

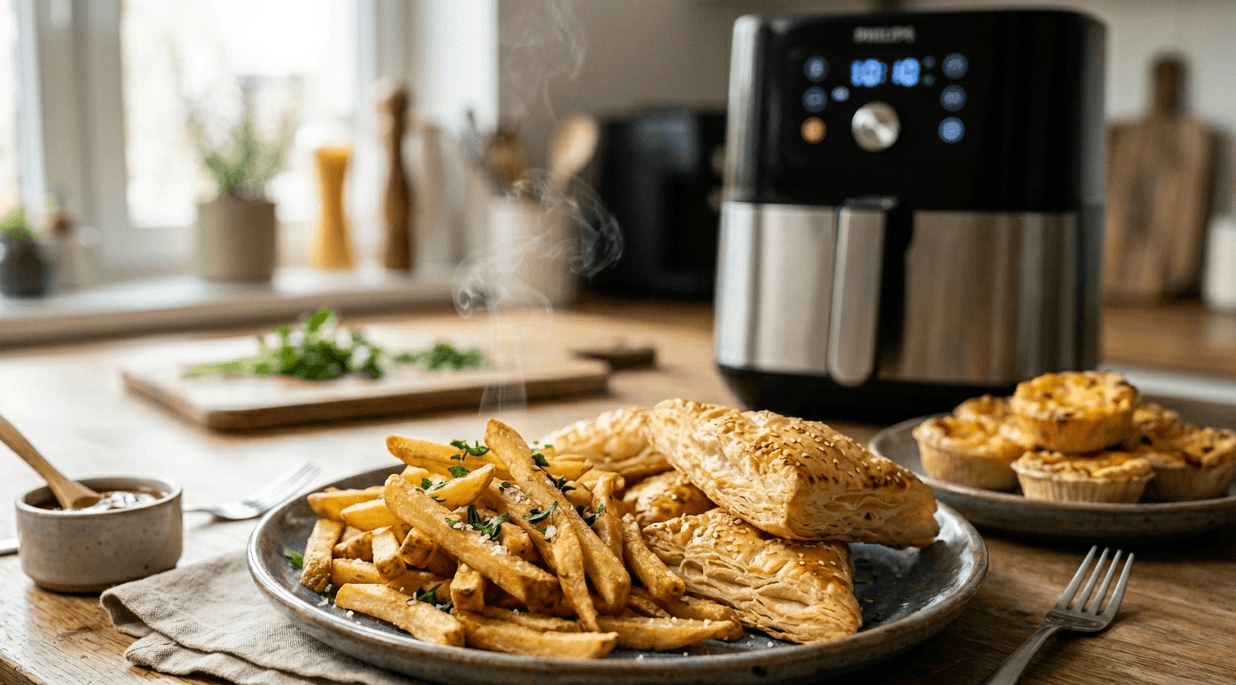
I spent a long time turning the temperature up. Pastry not crisp enough? Another 20 degrees. Pie base still pale? Another 20. What I got was a tart with a burnt rim, a scorched top, and a base that was still soft in the middle, which taught me nothing except that I was solving the wrong problem. The heat was never the issue. The water was.
Here is the thing that reframed it for me, and it is a piece of physics rather than a cooking tip. Browning starts at around 285°F. Water boils at 212°F. As long as there is liquid water sitting on the surface of your bake, that surface is pinned near 212°F, because all the incoming energy goes into turning water into steam rather than raising the temperature. It cannot reach browning temperature until the water is gone. You cannot brown a wet surface. You can only dry it, and then brown it.
Quick answer: Crispness is the absence of surface water, so the job is always dry first, brown second. Bake at your normal temperature until the inside is done, then finish 2 to 4 minutes at 25 to 40°F hotter to drive off the last of the surface moisture and brown it. Use a thin coat of fat, because dry heat alone gives you leathery, not crisp. Cook on the bare basket or a rack, never on a solid liner. And cool on a wire rack, because trapped steam undoes a good crust in about five minutes.
The 212 degree rule
Two numbers explain nearly every crisping failure:
- The Maillard reaction, which is what browns and flavors a crust, needs roughly 285°F and really gets going above 300°F.
- Water boils at 212°F, and evaporating water holds whatever it is sitting on near that temperature.
Those two facts do not overlap. While the surface is wet, it is stuck about 70 degrees below the temperature it needs to brown. This is exactly why boiled food never browns and why a steamed bun is pale no matter how long you steam it. It is also why turning your air fryer up to 400°F does not rescue a wet-surfaced bake: the extra heat just boils the water off faster, and until that is finished, the surface still cannot get above 212°F.
So the sequence is fixed, and it cannot be shortcut:
- Drive the surface water off.
- Only then does the surface temperature climb past 212°F.
- At around 285°F it starts browning, which is what crisp actually is.
Every technique on this page is doing one of those three things. Once you see it that way, you stop guessing at the dial.
Crisp is not the same as dry, and this is where people go wrong. A crisp crust is a thin, dehydrated, browned shell over a moist interior. A dry bake is one where the moisture left the whole thing, inside included. Turning the heat up and baking longer gets you the second one while you were hoping for the first. Crisping is a surface treatment, and it should happen fast and late, not slowly throughout. If your bakes come out dry rather than crisp, the companion to this guide, how to avoid dry air fryer bakes, covers the same physics pointed the other way.
Why an air fryer is genuinely better at this than an oven
Around any hot, moist food there is a thin envelope of humid air, sometimes called the boundary layer. It forms because moisture leaving the food has nowhere to go, so it hangs there against the surface.
That layer is the enemy of crisp. It is saturated, so it slows further evaporation, and it insulates the surface from the heat trying to reach it. In a conventional oven the air barely moves, so the boundary layer sits there for the whole bake and your crust fights it the entire time. That is the reason oven fries never match fried ones.
An air fryer's fan strips that layer away continuously and replaces it with dry air. That is the whole mechanism. It is not magic and it is not really frying. It is just aggressive removal of the humid envelope, which lets evaporation run fast and lets the surface get past 212°F sooner. On the crisping jobs, a decent air fryer will beat a domestic oven almost every time.
The flip side of the same fact is that the machine keeps stripping moisture long after the crust has formed, which is how you end up with something crisp on the outside and dry all the way through. Crisping and drying are the same process. The skill is stopping at the right moment.
The two-stage method
Because drying must finish before browning can start, trying to do both at one temperature means compromising on both. Split them.
- Stage one: bake it through at your normal temperature. Whatever the recipe calls for in the air fryer, usually 320 to 350°F for most bakes. The goal here is a cooked interior, not color. Ignore how pale it looks.
- Check the inside is actually done before you crisp. This matters, because stage two adds very little cooking to the center. For breads, 190 to 210°F internal. For pastry and pies, the filling should be hot and bubbling. Crisping a raw middle just gives you a browned raw middle.
- Stage two: raise the temperature 25 to 40°F and give it 2 to 4 minutes. This is the crisping blast. The interior is already cooked, so all this heat does is finish off the surface water and push into browning range. Watch it, because this stage moves fast.
- Pull it the moment the color is right. Crisp goes to burnt in under a minute at these temperatures, particularly on anything sugary. Stand there for the last two minutes rather than trusting a timer.
You may recognize this pattern from elsewhere on the site. It is the same logic behind cooking frozen Brussels sprouts dry before adding any oil, and behind the way frozen pizza needs its ice glaze gone before the base can crisp. Dry first, brown second, every time.
Adapting an oven recipe? Do the conversion before you think about crisping, because getting the base bake wrong makes the finishing stage pointless. Run the oven temperature and time through our air fryer calculator, use what it gives you for stage one, then add the finishing blast on top of that result. The calculator handles the base conversion, which is where most people go wrong, and it means the only thing you are judging by eye is the last three minutes.
Finishing temperatures by bake type
Stage one temperatures assume a 5 to 6 quart basket. Stage two is the crisping blast, and every one of these needs watching.
| Bake | Stage 1 | Stage 2 | Notes |
|---|---|---|---|
| Bread loaf | 320°F | 375°F, 3 to 5 min | Pull at 200 to 210°F internal first |
| Dinner rolls | 330°F | 375°F, 2 to 3 min | Egg wash before stage two |
| Pie & tart crust | 340°F | 375°F, 3 to 4 min | Blind bake for a crisp base |
| Puff pastry | 360°F | 390°F, 2 to 3 min | Needs high heat to laminate properly |
| Hand pies & empanadas | 350°F | 380°F, 2 to 3 min | Vent the top or steam softens it |
| Pizza base | 380°F | 400°F, 1 to 2 min | Bare basket, never a liner |
| Croutons & crostini | 350°F | Single stage | Thin enough to dry and brown at once |
| Crisp cookies | 300°F, longer | No blast | Low and slow dries them. Heat makes them soft-centered |
| Streusel & crumble tops | 330°F | 370°F, 2 to 3 min | Butter needs to render before it crisps |
| Pretzels | 340°F | 380°F, 2 min | Alkaline dip does most of the browning |
The cookie row is not a typo. Crisp cookies are the one case where high heat works against you. Crispness in a cookie comes from baking out its water over a longer, gentler bake, which is why shortbread is baked low. A hot blast sets the outside and traps moisture in the middle, giving you a soft-centered cookie with dark edges. If you want snap, go 300°F and longer.
Fat: how much, and which kind
Dry heat alone does not make things crisp. It makes them papery and leathery, which is a different and worse texture. Fat is what turns a dried surface into a crisp one, because it conducts heat into the surface far better than air does and it essentially shallow-fries the outer layer in place.
- Use less than you think, applied thinly. A teaspoon brushed or misted over a whole tray is usually enough. Pooled oil does not crisp; it steams underneath and drips through the basket.
- Brush or mist, do not pour. A pump mister gives you an even film. Aerosol cooking sprays contain propellants and additives that pit air fryer nonstick coatings over time, so use a refillable mister instead.
- Match the smoke point to the temperature. This is the one people miss. Extra virgin olive oil smokes somewhere around 325 to 375°F, which is right in the middle of the crisping range, and it will taste bitter and set off your smoke alarm. For a 375 to 400°F finishing blast, use refined avocado, refined canola, light olive, or plain vegetable oil.
- Butter browns beautifully but burns early. Its milk solids give unbeatable color and flavor, and they scorch above about 350°F. Use butter in stage one, or clarified butter if you want it in stage two.
- Fat is what a lot of bakes already have. Puff pastry, croissants and shortcrust are laminated with plenty of butter, so they need no extra fat at all. Adding more just makes them greasy.
Surface treatments that crisp
What you paint on before baking changes the crust more than most people expect:
| Treatment | What it gives you | Use it on |
|---|---|---|
| Whole egg wash | Deep gold, glossy, crisp | Rolls, pies, pastry, pretzels |
| Egg yolk plus a splash of cream | The darkest color available | When you want a bakery finish |
| Egg white only | High shine, crisp, very little color | Where you want crunch not browning |
| Milk or cream wash | Soft matte browning | Scones, biscuits |
| Cornstarch dusting | Noticeably crisper shell | Pastry, hand pies, coatings |
| Semolina or cornmeal underneath | Crunchy base, stops sticking | Pizza, bread, flatbread |
| Coarse sugar sprinkle | Crackly caramelized top | Muffins, scones, pastry |
| Plain water spritz | Steam early, crust later | Crusty bread only, see below |
On cornstarch: this is the one worth trying first if you have never used it. A very light dusting over pastry before baking gives a distinctly crisper, sandier surface, because starch granules dry and set harder than flour alone. It is the same principle behind crisp fried coatings.
Never overcook again
Get our one-page times & temps cheat sheet, plus a new tested recipe each week.
No spam · unsubscribe anytime
Soggy bottoms, and why they are always an airflow problem
A crisp top over a damp base is the most common complaint in air fryer baking, and the cause is almost always the same: the underside has no moving air, so the steam coming off it has nowhere to go and it re-condenses right there.
- Solid liners are the main culprit. Parchment rounds without holes, silicone mats, and foil laid flat all seal off the basket floor, which is where your airflow comes from. If crisp matters, cook on the bare basket. Our guide to foil and parchment in the air fryer covers when a liner is worth the trade and when it is not.
- Silicone molds insulate the base by design. They give great sides and pale, soft bottoms, which is fine for muffins and hopeless for anything you want crisp underneath. The full explanation is in our guide to using silicone molds in an air fryer.
- Raise it on a rack. A cheap metal trivet under a pan lets air move beneath it and makes a visible difference to the base.
- Blind bake pastry. For pies and tarts, bake the empty crust before the filling goes in. Wet filling on raw pastry produces a soggy base in any appliance.
- Flip small items. Croutons, crostini, and hand pies all benefit from a turn partway through so both faces get direct airflow.
- Do not crowd the basket. Food packed together traps humid air between the pieces. Fewer items with gaps beat a full basket, every time.
Crusty bread: the one time you add moisture on purpose
Everything above says get rid of water. Bread is the exception, and understanding why makes the rule clearer rather than muddier.
A crusty loaf needs steam in the first third of its bake, for two reasons. It keeps the surface flexible so the loaf can expand fully before the crust sets, and it gelatinizes the starch on the surface into a thin skin that later dries into that glassy, crackling crust. Skip the steam and the crust sets too early, the loaf stays small, and you get a dull, thick shell instead of a shattering one.
Then you take the moisture away completely, and the dry heat turns that gelatinized skin crisp. Steam first, bone dry second.
- Preheat properly. Bread wants a hot chamber from the start, so give it a full 5 minutes.
- Add steam for the first 5 to 8 minutes. Two or three ice cubes in the drawer beneath the basket, or a firm spritz of water over the loaf as it goes in. Never spray onto the heating element.
- Then run it completely dry for the rest of the bake so the crust can set and color.
- Finish hot. The last 3 to 5 minutes at 375°F is what gives you the crackle. Pull at 200 to 210°F internal.
- Cool on a rack and listen. A good crust ticks and crackles audibly as it cools. That sound is the crust contracting, and it means you got it right.
Our air fryer bread recipe puts this into practice, and soft pretzels use a related trick, where an alkaline dip rather than steam does the surface chemistry.
The cooling mistake that undoes all of it
You can do everything right and lose the crust in the five minutes after it comes out. A hot bake keeps releasing steam. Put it on a plate and that steam is trapped underneath, hits the cool ceramic, condenses, and soaks straight back into the base you just spent twenty minutes crisping.
- Cool on a wire rack, always. Not a plate, not a board, not the basket. Air has to reach the underside.
- Never cover a bake while it is warm if you want it crisp. A cover is a steam trap.
- Do not seal it in a container until it is completely cold, and even then expect crispness to fade over a few hours.
- Serve crisp things quickly. This is not a texture that keeps. Even in ideal conditions, moisture migrates from the wet interior out to the dry crust and softens it. That is the same reason takeout fries are never as good as fries at the restaurant.
Notice that this is the exact opposite of the advice for moist bakes. To keep a cake tender you wrap it while warm and trap the steam so it redistributes back into the crumb. To keep a crust crisp you do everything possible to let that steam escape. Same appliance, same physics, opposite goals, and you have to decide which one you are chasing before the bake comes out. You cannot have a maximally crisp crust and a maximally moist crumb on the same bake, and anyone who tells you otherwise is selling something.
How to re-crisp almost anything
This is the air fryer's best trick and it works on nearly any baked good that has gone soft:
- General rule: 350 to 375°F for 2 to 4 minutes, straight on the bare basket, no oil, no liner.
- Bread and rolls: 350°F for 3 minutes. A spritz of water on the crust first, counterintuitively, gives an even better result on day-old bread, because it rehydrates the crust just enough to re-crisp rather than simply hardening.
- Pastry, pies, hand pies: 350°F for 3 to 4 minutes. Better than an oven and vastly better than a microwave.
- Pizza slices: 350°F for 3 minutes revives the base completely.
- Croutons, crostini, chips: 350°F for 2 minutes, then cool fully before storing, since they crisp as they cool.
- Never microwave anything you want crisp. A microwave heats water, which is precisely the thing you are trying to drive off, so it does the exact opposite of crisping.
Our croutons and air fryer toast both rely on this, and toast is the simplest possible demonstration of dry heat plus a little fat producing crisp.
Bakes that will never get properly crisp
Worth knowing so you stop trying:
- Anything with a wet filling against the crust. Custard tarts, quiche, cheesecake. The filling keeps feeding water to the pastry from the inside. Blind bake, and accept the base will be firm rather than crisp.
- Frosted or glazed anything. Sugar syrups hold water and stay soft. Glaze after crisping, not before.
- Very wet batters. A thin, high-liquid batter has too much water to lose in a short bake.
- Bakes in silicone. Great sides, soft bottom, by design.
- Anything reheated under a cover. Foil over the top while reheating traps steam. Reheat uncovered if crisp matters.
Fixing the five problems people actually hit
Pale and soft all over
The surface never got dry, so it never got above 212°F. Three causes in order: the basket was overcrowded so humid air had nowhere to go, the temperature was too low for the whole bake, or the surface was genuinely wet going in. Space things out, and add the finishing blast.
Crisp on top, soggy underneath
Airflow to the base, covered above. Bare basket instead of a liner, a rack under the pan, blind bake pastry, and flip small items halfway.
Burnt outside, still soft inside
You tried to do both stages at once at too high a temperature. Split them: moderate heat until cooked through, then a short blast. Our guide on preventing burning in the air fryer covers the same gap from the other direction.
Crisp out of the basket, soft ten minutes later
Cooled on a plate rather than a rack, or covered while warm. This is the most frustrating one because the bake was genuinely good when it came out.
Dry all the way through, and still not crisp
The worst outcome, and it means you baked long and hot with no fat on the surface. Crisp needs fat; without it, extended heat just dehydrates the whole thing. Add a thin film of oil and shorten the bake. If this keeps happening, read how to avoid dry air fryer bakes alongside this one, because you are overshooting on both counts.
Frequently asked questions
QHow do I make baked goods crispy in an air fryer?
Bake it through at your normal temperature first, then finish with 2 to 4 minutes at 25 to 40°F hotter. Crispness is the absence of surface water, so you have to dry the surface before it can brown, and a wet surface cannot exceed 212°F while browning needs about 285°F. Add a thin film of oil, cook on the bare basket rather than a liner, and cool on a wire rack.
QWhy is my air fryer not making food crispy?
Almost always one of these four:
- The basket is overcrowded, so humid air is trapped between pieces.
- You are using a solid liner, which blocks the airflow that crisps the base.
- There is no fat on the surface, so it dries out rather than crisping.
- The temperature never got high enough to brown, which needs roughly 285°F at the surface.
QWhat temperature makes food crispy in an air fryer?
The surface has to reach about 285°F for browning to begin, and it climbs faster above 300°F. For most bakes that means a finishing stage at 375 to 400°F for a few minutes. Setting the machine high from the start does not help, because while the surface is still wet it is capped near 212°F regardless of what the dial says.
QWhy can't you brown a wet surface?
Because evaporating water holds the surface near its boiling point of 212°F, and the Maillard browning reaction does not get going until around 285°F. All the incoming energy goes into converting water to steam rather than raising the temperature, so the surface stays stuck about 70 degrees below where it needs to be. This is why boiled and steamed food never browns, no matter how long you cook it.
QDo I need oil to get crispy results in an air fryer?
For most bakes, yes, a thin film. Dry heat alone dehydrates the surface into something leathery and papery rather than crisp. Fat conducts heat into the surface far better than air and effectively shallow-fries the outer layer. A teaspoon brushed or misted over a whole batch is enough. Laminated pastries like puff and croissants already contain plenty of butter and need none.
QWhich oil is best for crisping in an air fryer?
One with a smoke point above your finishing temperature: refined avocado, refined canola, light olive, or plain vegetable oil all handle 400°F. Extra virgin olive oil smokes around 325 to 375°F, right in the crisping range, and turns bitter. Butter gives the best color and flavor but its milk solids burn above roughly 350°F, so use it in the first stage or use clarified butter.
QWhy is the bottom of my bake soggy in the air fryer?
No airflow underneath, so steam coming off the base re-condenses instead of escaping. Solid parchment, silicone mats and flat foil all seal off the basket floor. Cook on the bare basket, raise pans on a metal trivet so air moves beneath them, blind bake pastry before adding wet filling, and flip small items halfway through.
QShould I preheat the air fryer for crispy results?
Yes, when crisp is the goal. A hot basket starts evaporating surface moisture the moment food touches it, rather than spending the first few minutes warming up while the surface sits damp. Three minutes is enough for most bakes, five for bread. The exception is cooking from solidly frozen, where a cold start helps the center catch up.
QHow do I keep bakes crispy after they come out?
Cool on a wire rack so air reaches the underside, never on a plate where escaping steam condenses and soaks back in. Do not cover it while warm, and do not seal it in a container until fully cold. Accept that crispness is temporary: moisture migrates from the interior outward as it sits, so serve crisp things soon after baking and re-crisp leftovers rather than trying to store them crisp.
QHow do I re-crisp bread or pastry in an air fryer?
350 to 375°F for 2 to 4 minutes, straight on the bare basket with no oil and no liner. For day-old bread, spritz the crust lightly with water first; it rehydrates the crust just enough to re-crisp rather than simply hardening. Never use a microwave, which heats water and does the exact opposite of what crisping requires.
QWhy are my cookies soft in the middle instead of crisp?
Cookies are the exception to the high-heat rule. Crispness in a cookie comes from baking its water out over a longer, gentler bake, which is why shortbread bakes low. A hot blast sets the outside fast and traps moisture in the center, giving you dark edges and a soft middle. For snap, bake at around 300°F for longer, roll the dough thinner, and let them cool completely, since they crisp as they cool.
QCan I get a crisp crust and a moist crumb at the same time?
To a point, but they pull against each other. A crisp crust needs surface moisture driven off and steam allowed to escape; a moist crumb needs moisture retained and steam trapped. The workable compromise is to bake gently until the inside is just done, then crisp the outside fast and late, so the surface dries while the interior has not had time to. What you cannot do is maximize both.
If you take one idea from this page, make it the sequence: dry, then brown. Not hotter. Turning the dial up on a wet surface only boils the water faster, and until that water is gone your crust is stuck at 212°F no matter what the display says. Bake it through, then blast it for three minutes, then cool it on a rack. For the other half of this problem, read how to avoid dry air fryer bakes, which is the same physics aimed at the opposite outcome. Start with how to bake in an air fryer if you are new, keep the times and temps chart handy, and use the air fryer calculator to convert any oven recipe before you add a finishing stage. If things are going wrong in other ways, troubleshooting air fryer baking is the catch-all.
You can also follow me on Instagram and Pinterest for more easy air fryer recipes.
Was this guide useful?