
Here is something odd you can check for yourself. Open the first ten results for air fryer brownies and write down the cook times. You will get 14 minutes, 15 minutes, 17 minutes, 25 minutes, and 40 to 45 minutes. All at roughly the same temperature. All claiming to be tested.
None of them are lying. They are baking different amounts of batter at different depths, and almost none of them tell you which pan they used or what that changes. For most bakes the pan is a detail. For brownies it is the single most important variable in the recipe, and it is the thing this page is built around.
Quick answer: Pour the batter into a 6-inch round pan, tent foil loosely over the top, and air fry at 320°F (160°C) for 15 minutes covered, then 5 to 9 minutes uncovered. Pull them when the center reads 165 to 170°F on a thermometer. Cool at least 30 minutes before cutting or they will not hold a slice. Makes 9 squares.
Why the times vary from 14 minutes to 45
Heat has to travel from the outside of the batter to the middle, and batter is a poor conductor. Brownie batter is especially poor, because it is dense, wet and packed with fat and sugar rather than the air that makes a cake bake quickly.
The important part is that this does not scale in a straight line. Conduction time goes up with roughly the square of the thickness. Make the batter twice as deep and the center takes about four times as long to come up to temperature. That single fact explains the entire 14-to-45-minute spread you find online.
This recipe makes about 2½ cups of batter. Here is where that same batter ends up depending on what you pour it into:
| Pan | Batter depth | 320°F takes | Fits a basket? |
|---|---|---|---|
| 6-inch round (this recipe) | About 1¼ in | 20 to 24 min | Yes, 5 quart and up |
| 6-inch square | About 1 in | 17 to 21 min | Yes, 5 quart and up |
| 7-inch round | About 1 in | 17 to 21 min | Yes, 6 quart and up |
| 7-inch square | About ¾ in | 14 to 17 min | Tight, 8 quart |
| 8-inch square | About ½ in | 12 to 15 min | No, oven-style only |
So the site publishing 14 minutes and the site publishing 45 minutes can both be right. They are not making the same brownie. A half-inch-deep brownie in an 8-inch pan is a thin, chewy, mostly-edge brownie. A deep one in a 6-inch round is the thick fudgy kind, and it needs real time in the middle.
Our older version of this recipe said 15 to 18 minutes without naming a pan, which suits a shallower 7-inch tin. If that is the timing you have used before and it worked, your pan was on the wide side. Nothing was wrong with it, but a deeper pan needs the longer number.
The pan is the recipe
Before anything else, measure the inside of your basket. This trips people up more than any other part of air fryer baking, because the standard American brownie pan is 8x8 inches and an 8x8 pan does not fit in a standard air fryer basket. Most 5 to 6 quart baskets take a 6-inch pan comfortably and a 7-inch pan with very little room to spare.
What that means in practice: if you have a family brownie recipe written for a 9x13 or an 8x8, you cannot simply move it across. You are going to be baking it deeper in a smaller pan, and deeper means longer at a lower temperature, not the same time.
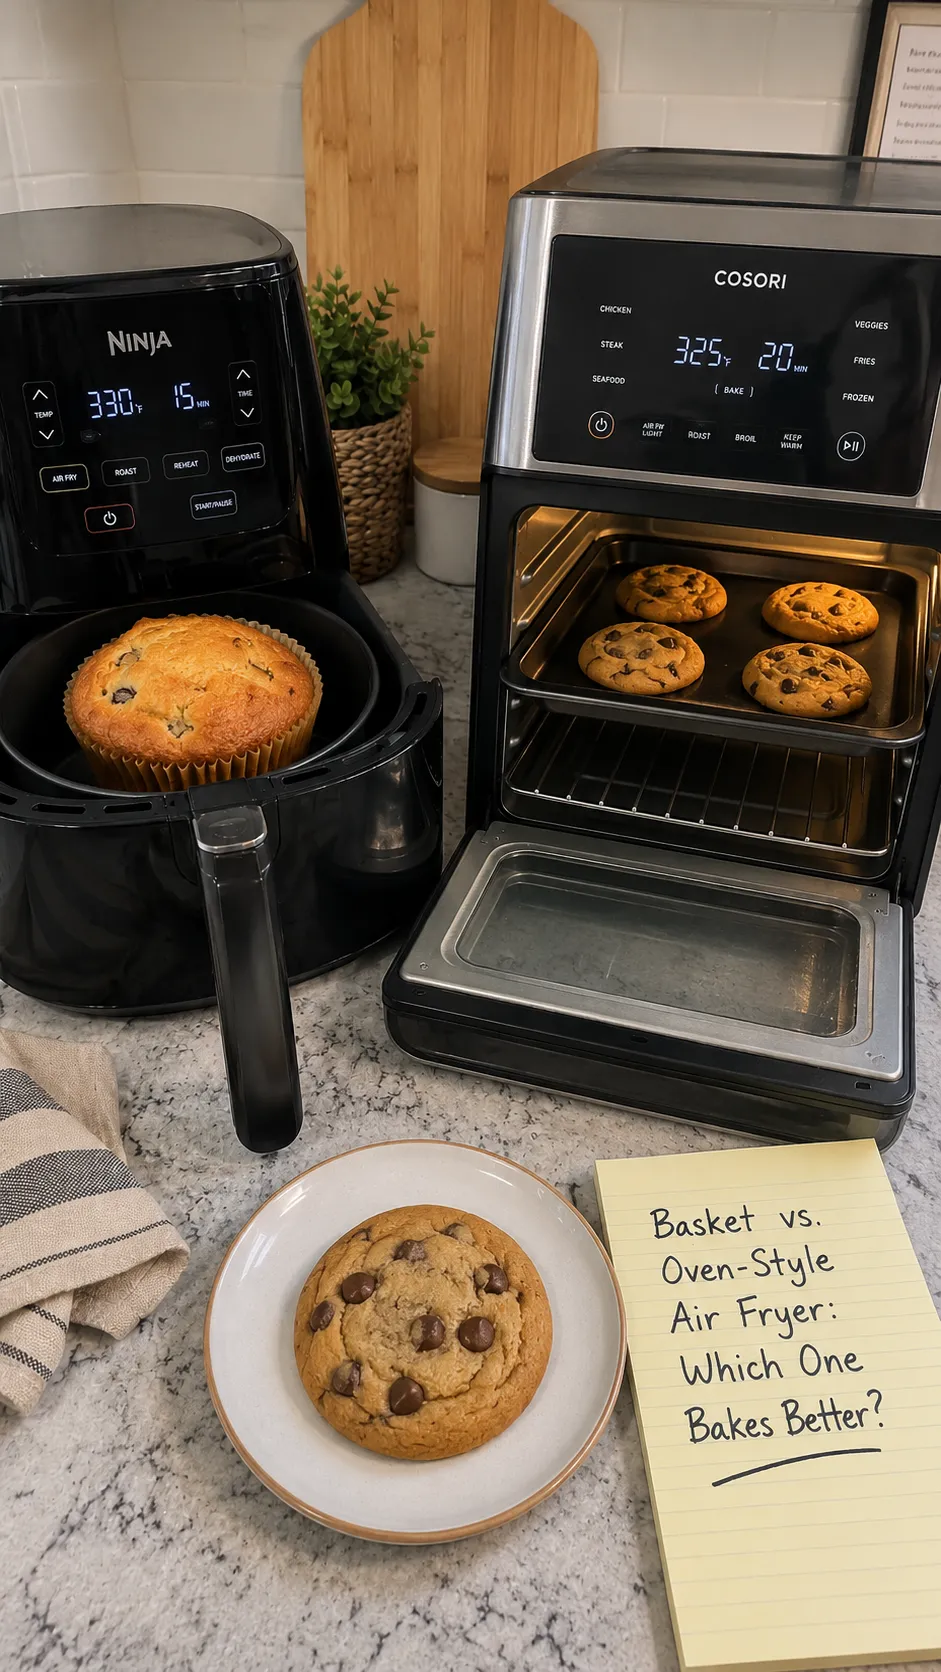
This is the bake where the shape of your machine limits you most, and it is worth knowing before you buy accessories. An oven-style unit takes a proper 8x8 pan and will make the thin chewy brownie a basket simply cannot. A basket makes a thicker, fudgier brownie and does it well, but the choice is made for you. Our comparison of basket vs oven-style air fryers for baking goes through this properly, including where the oven-style loses out.
Converting a favorite oven brownie recipe? Run its temperature and time through our air fryer calculator to get the conversion, then apply the depth adjustment from the table above on top of it. Those are two separate corrections and people usually only make one. The calculator handles the difference between an oven and a fan; it has no way of knowing you also went from an 8x8 pan down to a 6-inch round, which on its own can add eight or ten minutes. Do both, then confirm with a thermometer.
Pan material matters too, and it points the opposite way from what you might guess. A dark metal pan absorbs radiant heat and will crisp the sides hard. Silicone insulates, which slows the edges down and lets the center catch up, so it is genuinely the friendlier choice for a fudgy brownie. Expect to drop about 10°F and add a few minutes if you go silicone, as covered in our guide to using silicone molds in an air fryer.
Stop using the toothpick, start using a thermometer
Every brownie recipe I checked tells you to bake until a toothpick comes out with moist crumbs but not wet batter. Read that again and think about whether you could reliably act on it. Moist crumbs and wet batter are separated by maybe ninety seconds of baking, and the difference on the toothpick is a judgment call people simply cannot make consistently.
It gets worse with this recipe, because it has chocolate chips in it. Push a toothpick through a melted chip and it comes out coated in liquid chocolate that looks exactly like raw batter. I have thrown perfectly good brownies back in the machine over this.
An instant-read thermometer removes the guessing entirely, and brownies have unusually clear numbers:
| Center reads | You get |
|---|---|
| 165°F | Very fudgy, dense, almost truffle-like in the middle |
| 170°F | Classic fudgy brownie. This is my target. |
| 175°F | Set through, leaning cakey |
| 180°F and over | Cakey and drying out |
Probe the middle, going in at an angle so you are reading the center of the depth rather than the bottom of the pan, and aim between the chocolate chips rather than through one. Two seconds of work and you never guess again.
The numbers for brownies are lower than for anything else you bake. A cake or a quick bread is done at 200 to 205°F, and a loaf of bread wants 190 to 210°F. A brownie is finished at 165 to 170°F, because a brownie is meant to be underbaked. That is the whole point of the thing. If you have been applying cake logic to brownies, that alone is why yours come out dry.
Ingredients
For the brownies
- 1 cup granulated sugar
- ½ cup unsalted butter, melted
- 2 large eggs, room temperature
- 1 teaspoon vanilla extract
- ⅓ cup unsweetened cocoa powder
- ½ cup all-purpose flour
- ¼ teaspoon baking powder
- ¼ teaspoon salt
- ½ cup chocolate chips (optional)
Two notes on this list that are worth more than they look.
The eggs need to be at room temperature. Cold eggs hitting melted butter cause the fat to seize into little solid specks, and those specks never fully re-emulsify. You end up with a slightly greasy, grainy brownie and no idea why. If you forgot, sit them in warm water for five minutes.
Only a quarter teaspoon of baking powder, and no more. A brownie is not supposed to rise much. Extra leavening turns it into a thin chocolate cake, which is a fine thing to eat but not what you came here for. If you want the fudgiest possible version, leave the baking powder out altogether.
How to make air fryer brownies
- Line a 6-inch round pan with parchment, leaving two flaps hanging over the sides. Those flaps are how you lift the whole slab out later without breaking it.
- Whisk the melted butter and sugar together hard for a full minute. You are trying to dissolve the sugar into the warm butter. This is the step that decides whether you get a shiny top, and it is the one everybody rushes.
- Beat in the eggs one at a time, then the vanilla, and keep beating for another minute or two until the mixture lightens and falls off the whisk in a ribbon.
- Sift in the cocoa, flour, baking powder and salt. Sifting matters here because cocoa clumps and a clump of dry cocoa in a finished brownie is bitter and chalky.
- Fold until just combined, then fold in the chocolate chips. Stop as soon as the flour disappears. Overmixing develops gluten and makes brownies tough and rubbery.
- Scrape into the pan and level the top. Tap the pan on the counter a few times to knock out large air pockets.
- Preheat the air fryer to 320°F for 3 minutes. A wet batter sitting in a cold basket separates while it waits.
- Tent a piece of foil loosely over the pan and tuck it under the rim so the fan cannot lift it. Air fry at 320°F for 15 minutes covered.
- Remove the foil and air fry another 5 to 9 minutes uncovered, until the center reads 165 to 170°F. Start checking at 5.
- Cool in the pan for 30 minutes minimum, then lift out by the parchment flaps and cut. An hour is better.
The foil tent, and why it fixes the main problem
An air fryer is a small convection oven with a fan sitting directly above the food. That top-down blast is what makes it good at chips and bad at anything wet and deep.
With brownies the specific failure looks like this. The surface dries and firms within the first six or seven minutes, well before the center has warmed up at all. Now you have a lid on your batter. You keep baking to bring the middle up, and everything between the surface and the middle spends that whole time cooking past done. What comes out is a brownie with a tough dry top, a hard outer ring, and one decent bite in the very center.
Loosely tenting foil over the pan for the first two-thirds of the bake stops the surface from setting early. The heat still gets in around the sides and underneath, the center comes up while the top stays soft, and then you pull the foil off for the last stretch so the top can finish and dry properly. Same total time, dramatically better distribution.
Tuck the foil under the pan rim. An air fryer fan moves enough air to lift a loose sheet of foil into the heating element, which is a real hazard rather than a theoretical one. Never put foil in an empty basket during preheating either. Our guide on using foil and parchment paper in an air fryer covers what is safe and what is not.
The dry border, and why it is a separate problem
The foil helps the top. It does not do much for the sides, and the sides are their own issue.
In a basket, hot air circulates around all four vertical faces of your pan as well as over the top. The metal walls conduct that heat straight into the batter touching them, so the outer three quarters of an inch is effectively being cooked from two directions while the center is being cooked from none. That is where the hard cakey border comes from.
Three things actually help, in order of how much difference they make:
- Bake lower and longer. 320°F rather than 330 or 350. Every degree you drop gives the center more time to catch up before the edges pass the point of no return. This is why I have kept this recipe at 320°F while much of the internet has drifted to 330°F.
- Use a light-colored or silicone pan. Dark metal absorbs radiant heat and runs hotter at the wall. Silicone insulates and is the gentlest option on the edges.
- Accept a slightly underdone center. Pull at 165°F rather than 175°F. Carryover heat in a dense hot slab keeps cooking the middle for several minutes after it leaves the machine, and the edges stop getting worse the moment you take it out.
Dry edges are the most common complaint about air fryer baking in general, not just brownies, and the underlying mechanism is the same everywhere. Our guide on avoiding dry air fryer bakes works through it for cakes and quick breads too.
Never overbake again
Get our one-page times & temps cheat sheet, plus a new tested recipe each week.
No spam · unsubscribe anytime
The shiny crackly top, and how to actually get one
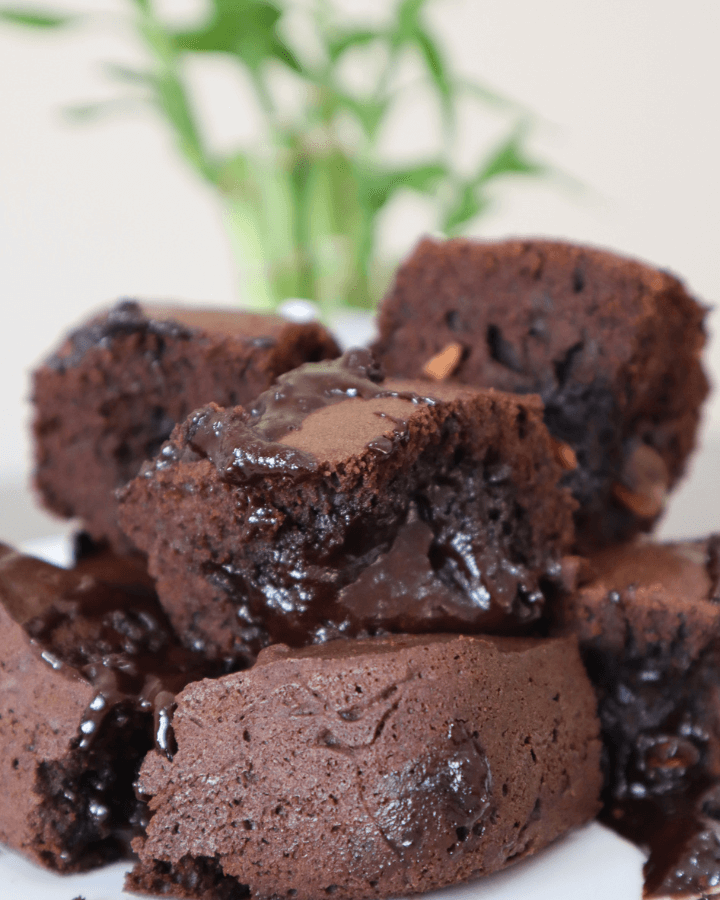
Let me be straight about this, because the photographs on this page do not have one. These brownies have a matte, slightly cocoa-dusted top. They are excellent brownies and that is genuinely what this recipe produces when you make it the quick way.
The shiny paper-thin crackle you see on bakery brownies is not decoration and it is not luck. It is a real thing with a real cause: sugar dissolved into the egg, which rises to the surface during baking and sets into a thin meringue-like layer. If the sugar is still sitting as undissolved crystals in the batter, that layer cannot form.
So getting it is entirely about how you handle the first two steps, not about ingredients:
- Melt the butter properly hot, not just softened, and whisk the sugar into it while it is still warm. Warm fat dissolves sugar; cool fat suspends it.
- Beat the eggs in hard, for two full minutes, until the batter visibly lightens in color and ribbons off the whisk. This is doing double duty: dissolving the rest of the sugar and whipping in the air that carries it to the surface.
- Then be gentle. Once the flour goes in, fold. Beating at that stage knocks the air back out.
Here is the part specific to this machine, and it is a rare piece of good news. The direct dry top heat that causes so many problems with the center is exactly what a crackle layer wants. Once you have done the batter work, an air fryer sets that top beautifully, better than a conventional oven does. The fan is not your enemy here, it is just badly aimed for everything else.
Cooling and cutting
Thirty minutes minimum, and an hour if you can manage it. This is not a nicety.
A hot brownie's center is liquid sugar syrup and melted fat that have not set into anything yet. The structure that makes a brownie sliceable forms as it cools, not as it bakes. Cut into it at ten minutes and you get a pan of delicious rubble.
Two things that make cutting cleaner:
- Lift the whole slab out by the parchment flaps first and cut it on a board. Cutting inside a small round pan means scraping a knife against a hot wall at a bad angle.
- If you baked in a round pan, trim the four curved edges off to make a square first, then cut that into nine. The offcuts are the cook's share.
For a properly clean edge, chill the cooled slab for twenty minutes before slicing and wipe the knife between cuts. The same principle applies across the site's baking, and our air fryer peanut butter cookies make the case for treating cooling as part of the bake rather than an afterthought.
Fixing what goes wrong
The middle was raw but the edges were hard
The classic air fryer brownie failure. Batter too deep for the temperature, or no foil tent. Drop to 320°F, tent the top for the first two-thirds, and go by the thermometer rather than the clock. If it is already out and the center is genuinely liquid, put it back at 300°F for 5 minutes rather than at full heat.
They came out dry and cakey all the way through
Overbaked, and almost certainly because the toothpick told you to keep going. Pull at 165 to 170°F. Too much baking powder does the same thing, so check you used a quarter teaspoon and not a full one.
Greasy, with visible fat separating out
Cold eggs met melted butter and the emulsion broke. Room temperature eggs, added one at a time with the whisk moving. This can also happen if the butter was so hot it started to scramble the eggs, so let it cool for a minute before you start.
Tough and rubbery rather than fudgy
Overmixed after the flour went in. Fold only until the last streak of flour disappears. A slightly lumpy batter bakes into a better brownie than a perfectly smooth one.
The top is pale and matte, not shiny
Undissolved sugar. See the section above. Whisk the sugar into hot melted butter and beat the eggs in for a full two minutes.
They stuck to the pan
Parchment with overhanging flaps, every time. Greasing alone is not enough for a sugar-heavy batter that caramelizes at the wall. If something is already stuck, ten minutes in the freezer usually releases it.
The top burned before the middle set
Too hot, or the pan is sitting too close to the element in a shallow basket. 320°F and the foil tent solve it. Our guide on preventing burning in an air fryer covers the other common causes.
Variations and serving
- Walnut or pecan: fold in ½ cup toasted chopped nuts with the chips. Toast them first or they taste raw against all that chocolate.
- Salted: a pinch of flaky salt across the top just before the foil comes off. It stays on the surface where you can taste it.
- Espresso: 1 teaspoon of instant espresso powder into the dry ingredients. It does not taste of coffee, it makes the chocolate taste more like chocolate.
- Extra fudgy: leave out the baking powder entirely and pull at 165°F.
- Cakey: increase the baking powder to ½ teaspoon and bake to 178°F. If a molten middle is what you are really chasing, our air fryer lava cake is built for it.
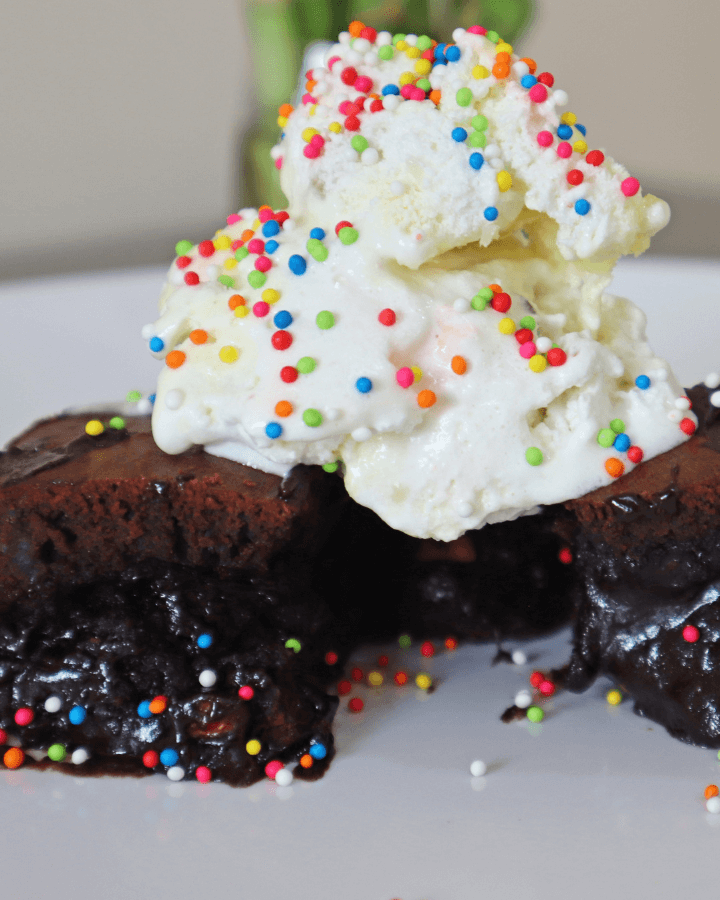
That order matters more than it sounds. Cutting cold and reheating gives you clean squares and a warm gooey middle. Cutting warm gives you neither.
Storage
- Room temperature: 3 to 4 days in an airtight container. Brownies keep better than most bakes because the sugar and fat hold onto water.
- Refrigerated: up to a week, and some people prefer them cold and dense straight from the fridge. Let them come back to room temperature if you want the fudgy texture back.
- Frozen: 3 months, wrapped individually so you can take one out at a time. Thaw at room temperature for an hour.
- Reheating: 90 seconds at 300°F in the air fryer. Do not go hotter, since a small square heats fast and dries out faster.
If you want more of this kind of baking from the machine, our air fryer chocolate chip cookies are the obvious companion, and the full air fryer baking chart collects times, temperatures and internal targets for everything on the site in one place.
Frequently asked questions
QWhat temperature do you cook brownies in an air fryer?
320°F (160°C). In a 6-inch round pan that takes 20 to 24 minutes, using a foil tent for the first 15 minutes and then baking uncovered. Lower and slower is deliberately better for brownies than the 330°F to 350°F you will see elsewhere, because a brownie is deep and dense and the center needs time to come up before the edges overcook.
QHow long do brownies take in an air fryer?
It depends almost entirely on how deep the batter is, which is why published times range from 14 to 45 minutes. At 320°F, roughly 20 to 24 minutes in a 6-inch round, 17 to 21 minutes in a 6-inch square or 7-inch round, and 12 to 15 minutes in an 8-inch square if your machine takes one. Heat conduction time rises with about the square of the thickness, so doubling the depth roughly quadruples how long the center needs.
QWhat internal temperature should brownies be?
165 to 170°F in the center for a fudgy brownie, and 175°F if you like them set through and leaning cakey. Anything past 180°F is drying out. These numbers are much lower than for other bakes because a brownie is meant to be underbaked. A cake or quick bread is done at 200 to 205°F, so applying cake logic to brownies is a common reason they come out dry.
QWhat size pan fits in an air fryer for brownies?
A 6-inch round or square pan fits most 5 to 6 quart baskets comfortably, and a 7-inch pan fits a 6 quart or larger with very little room to spare. A standard 8x8 brownie pan does not fit a basket air fryer at all, and needs an oven-style model. Measure the inside of your basket before buying a pan, and remember that a smaller pan means deeper batter and a longer bake.
QWhy are my air fryer brownies raw in the middle but hard at the edges?
The fan sets the top surface within the first several minutes, long before the center has warmed up, and everything between the surface and the middle then overcooks while you wait for the center. Tent foil loosely over the pan for the first two-thirds of the bake, drop the temperature to 320°F, and check the center with a thermometer rather than the clock. Tuck the foil under the pan rim so the fan cannot lift it.
QCan you put foil in an air fryer for brownies?
Yes, as long as it is weighed down or tucked under the rim of the pan so the fan cannot blow it into the heating element. A loose sheet of foil in an air fryer is a genuine hazard, not a theoretical one. Never preheat with foil in an empty basket. Tenting foil over a brownie pan for the first two-thirds of the bake is the single most useful thing you can do for the texture.
QHow do I know when air fryer brownies are done without a thermometer?
The edges should be visibly set and pulling very slightly away from the pan, and the center should still wobble a little when you nudge the pan. A toothpick should come out with moist crumbs clinging to it, but this test is unreliable for brownies because a melted chocolate chip coats the toothpick in liquid chocolate that looks identical to raw batter. If you are testing this way, probe between the chips, and accept that a thermometer is genuinely better here.
QWhy don't my brownies have a shiny crackly top?
The sugar was not fully dissolved before baking. That shiny layer is dissolved sugar carried to the surface by the egg, where it sets into a thin meringue-like crust, and undissolved sugar crystals cannot form it. Whisk the sugar into the butter while the butter is still hot, then beat the eggs in hard for two full minutes until the batter lightens and ribbons off the whisk. After the flour goes in, fold gently so you do not knock the air back out.
QDo I need to preheat the air fryer for brownies?
Yes, three minutes at 320°F. A wet batter sitting in a basket that is slowly warming up gives the butter time to separate out before any structure sets, and you get a greasy layer at the bottom. Frozen food does better from a cold start, but a fresh batter does not.
QHow long should brownies cool before cutting?
Thirty minutes minimum and an hour if you can wait. A hot brownie's center is liquid sugar syrup and melted fat that have not set yet, so the structure that lets you slice it forms while it cools rather than while it bakes. Lift the whole slab out by the parchment flaps and cut it on a board. For very clean edges, chill the cooled slab for twenty minutes first and wipe the knife between cuts.
QCan I use boxed brownie mix in an air fryer?
Yes. Mix it as the box says, then ignore the box's pan and time completely, because the box assumes a 9x13 oven pan. Use a 6-inch pan, 320°F, the foil tent, and the same 165 to 170°F internal target. A boxed mix poured into a small deep pan is the single most common reason people end up with a raw middle.
QCan I make brownies in silicone in the air fryer?
Yes, and for brownies specifically it is a good choice. Silicone insulates, which slows the edges down and gives the center a chance to catch up, so you get less of the hard dry border that metal pans produce in a basket. Drop the temperature about 10°F and add a few minutes. Individual silicone cups work too and bake much faster, around 12 to 14 minutes, since the batter is far shallower.
Made these? Rate the recipe