

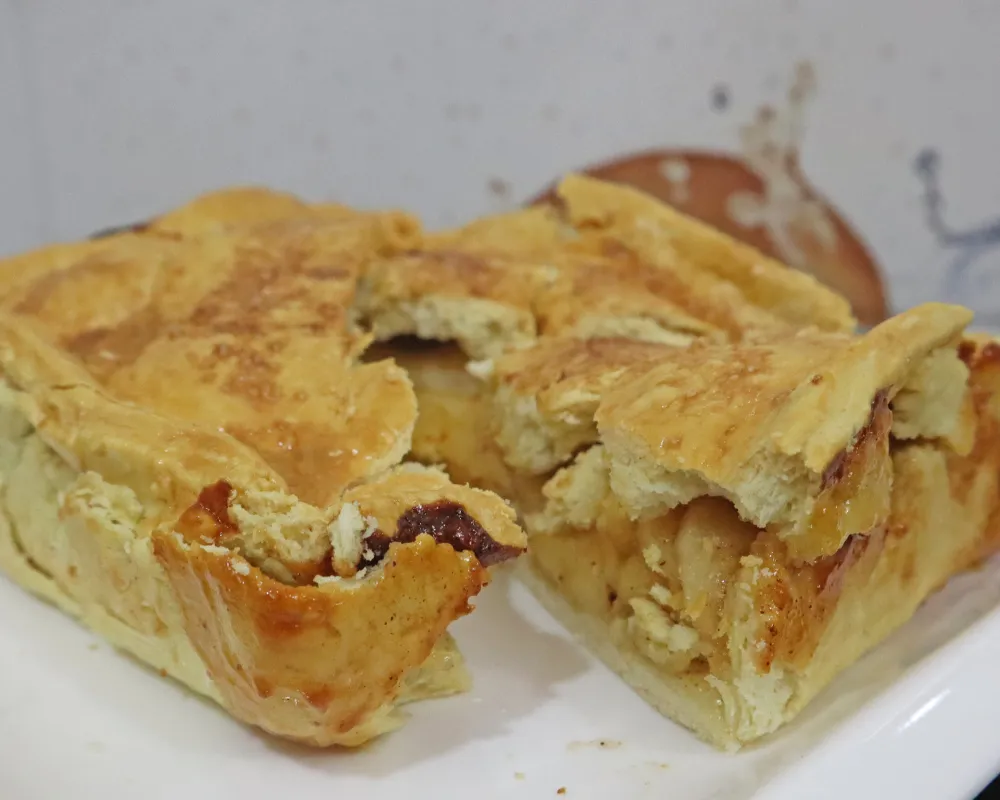
My first air fryer apple pie looked genuinely good coming out. Deep golden lid, proper crimped edge, steam coming through the vents.
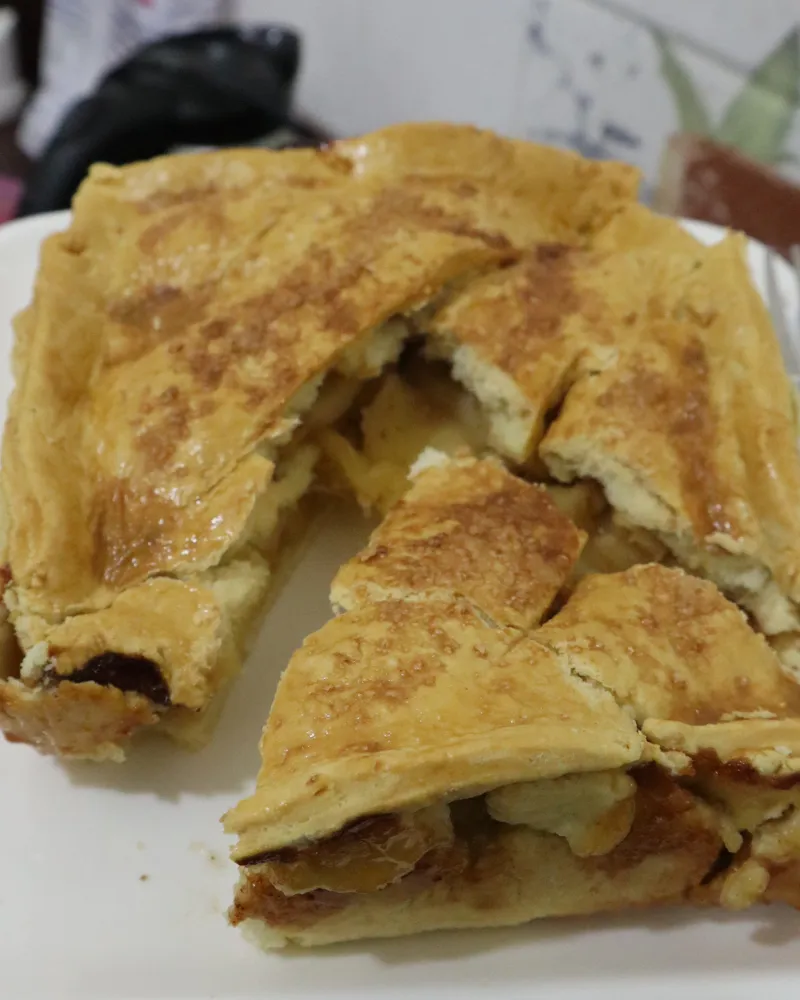
Then I cut it. The bottom crust was pale and damp enough to fold, the apples were still crunchy, there was a puddle of thin juice at the base, and above the filling sat an inch of empty air with the browned lid arched over it like a tent.
Every problem in that pie has the same cause, and once you see it the recipe more or less rewrites itself.
Quick answer: Cook the apple filling in a pan before it ever goes near the crust. Blind bake the bottom for 6 minutes so the base can set, assemble, then bake at 320°F for 20 to 24 minutes, tenting with foil from minute 8 so the lid stops browning while the rest catches up. It is done when the filling bubbles up through the vents, not when the top looks right. Then leave it alone for 3 hours before you cut it.
An air fryer inverts the pie problem
A conventional oven and an air fryer basket are not the same appliance running at different speeds. For a pie specifically they are close to opposites.
| Conventional oven | Air fryer basket | |
|---|---|---|
| Element above the lid | Roughly 8 inches away | Two to four inches away |
| Air over the lid | Still, or gently circulating | Fast and constant |
| Air under the dish | Circulates around a wire rack | None. The dish sits flat on the plate |
| Typical bake | 50 to 60 minutes | 20 to 25 minutes |
| So the lid is done | Around the same time as the filling | Long before the filling has started |
The last row is the whole thing. An oven recipe works because browning the lid and cooking the apples happen to take about the same length of time. In a basket those two clocks come apart completely, and no adjustment to temperature closes the gap, because the lid is close to the element no matter what number you set.
That single split produces three separate symptoms that people usually treat as three separate problems.
Dark lid
Eight minutes of fast air a few inches under an element is plenty to brown pastry. After that you are just taking it further, and by twenty minutes it is past golden.
Pale, wet base
No air reaches the underside of the dish, so the bottom crust cooks only by conduction through a dish that starts cold, while wet filling sits on it.
A gap under the lid
Raw apples lose about a quarter of their volume as they cook. The lid sets rigid in the first few minutes, then the filling shrinks away and leaves a cavern.
Recipes for this treat the last one as bad luck. It is not. It is arithmetic, and it happens every time you put raw apples under a lid that sets faster than they collapse.
Cook the filling first
Here is the part I find genuinely odd about the published recipes for this.
Look at the air fryer hand pie recipes and nearly all of them use canned apple pie filling. Look at the air fryer whole pie recipes made with fresh apples and nearly all of them tip the apples in raw. One of those groups has consistently good results and the other one does not, and the reason is sitting in plain sight: canned filling is already cooked.
Nobody connects the two. One recipe I read states outright that no pre-cooking is required. It is not required in an oven. In a basket it is the difference between a pie and a disappointment.
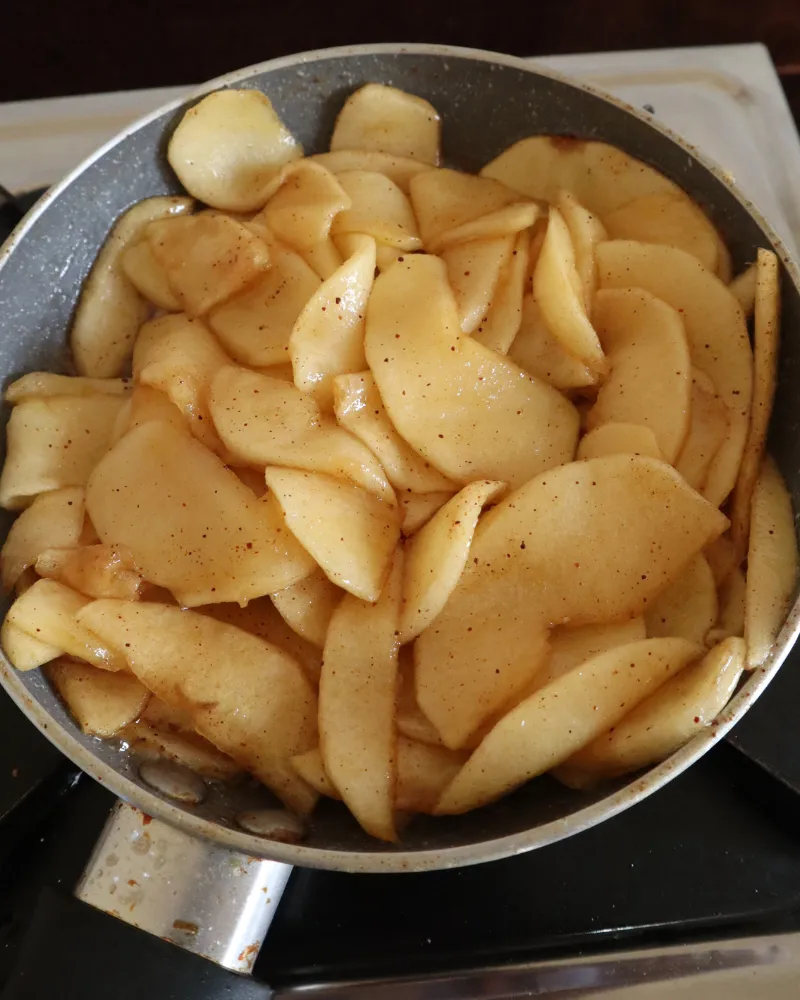
Ten minutes in a pan before the pie is assembled does four things at once.
- It drives off water. Apples are around 85 percent water. In an oven, an hour of baking and an open vent gets rid of enough of it. Twenty minutes does not, so in an air fryer that water stays in the pie and ends up in the bottom crust.
- It collapses the apples before assembly. All the shrinking happens in the pan. What goes under the lid is already the size it will be at the end, so the pie comes out full instead of hollow.
- It lets the starch actually work. Cornstarch needs to get to around 203°F to thicken properly. In the pan you can guarantee that. Buried in the middle of a pie in a twenty minute bake, you cannot.
- It puts warm filling into the pie. The bake then only has to finish the pastry rather than heat a cold mass of fruit from the middle out.
The bake stops being the cooking step. Once the filling is cooked, the twenty minutes in the basket is a pastry job and nothing else. That reframing is what makes the rest of this recipe make sense, including why it is fine to tent the lid halfway through and why the times are so much shorter than an oven pie.
You are not skipping a step, you are moving it somewhere you can control it. The same thinking sits behind pre-cooking the apples in our air fryer apple cake, where two apples carry about a cup of water into a batter that only wanted a few tablespoons.
The bottom crust, and why glass is wrong
Almost every recipe for this tells you to use a pie plate. Most of the photos show glass. Glass is the worst of the realistic options and it is worth understanding why, because it is not obvious.
In an oven, a pie sits on a wire rack with hot air moving all around it, so the dish is heated from every direction and the material barely matters. In a basket the dish sits flat on the crisper plate. Nothing gets underneath it. The only route to the bottom crust is conduction down through the sides and base of the dish, so how well that dish conducts stops being a detail and becomes the whole story.
| Dish | Conducts | Bottom crust | Verdict |
|---|---|---|---|
| Metal, thin (aluminum, tinned steel) | Very well | Crisp and browned | Best. Use this. |
| Disposable foil pan | Well, but flimsy | Good | Fine. Support it underneath when you lift it |
| Ceramic or stoneware | Slowly | Pale, usually acceptable | Workable. Blind bake longer |
| Glass or Pyrex | Poorly, and holds heat | Pale and damp | Avoid. It is the standard advice and it is wrong here |
Glass is a genuinely good pie dish in an oven, where it heats gently from all sides and lets you see the base browning. In a basket, poor conduction plus no airflow underneath is the exact combination that produces a soggy bottom. Metal is not a marginal improvement here, it is the difference between crisp and folded.
And blind bake the base
Six minutes, before the filling goes anywhere near it. This is a short blind bake and it does two jobs: it sets and dries the surface of the pastry so wet filling cannot soak straight into it, and it means the assembled pie goes into a pan that is already hot rather than one starting from room temperature.
Dock the base first, which means pricking it all over with a fork so trapped steam has somewhere to go and the pastry does not lift into a dome. Then line it with a square of parchment and fill with dry rice or beans.
The parchment has to be weighted, properly. This is the one real hazard on this page. An air fryer fan moves air fast enough to lift a bare sheet of parchment straight up into the heating element, where it scorches and can catch. Weighed down with rice or beans it is completely fine. Never put an empty or barely loaded sheet of parchment into a basket. The same applies to the foil tent later on, which is why it gets pressed down over the rim rather than draped. Foil and parchment in an air fryer goes through this properly.
What size pie actually fits
A standard pie is 9 inches. Almost no basket takes a 9 inch dish, and the recipes that call for one are quietly assuming you own an oven-style air fryer with a full shelf.
This recipe is written for a 6 inch pan, which is what fits a typical 5 to 6 quart basket with room for air to move around it. Six inches sounds small and then produces six proper slices, because a pie that size is deeper relative to its width than a 9 inch one.
| Pan | Fits | Filling needed | Bake at 320°F |
|---|---|---|---|
| 6 inch | Most 5 qt baskets and up | About 2 cups cooked | 20 to 24 min |
| 7 inch | 6 qt baskets and up | About 3 cups cooked | 24 to 28 min |
| 8 inch | Oven-style units, or very large baskets | About 4 cups cooked | 28 to 32 min |
| 9 inch | Oven-style only | About 5 cups cooked | Use the oven. Honestly. |
Measure before you buy anything, because the gap between a pan that fits and one that does not is usually about half an inch. The pan size calculator will tell you what your basket takes, and the recipe scaler will convert the filling quantities if you go up a size. If you are working from somebody else's oven recipe, put its numbers through the air fryer calculator first, then ignore the time and go by the bubbling vents.
You also need clearance above the lid. Aim for at least an inch and a half between the top of the crimped edge and the element. If your pie is crowding the element, the lid will be dark at six minutes rather than eight and the tent goes on earlier.
Which apples, and why it changes here
The usual advice is to pick an apple that holds its shape, which normally means Granny Smith, because a soft apple turns to sauce over an hour in an oven.
Pre-cooking changes that calculation, and this is one of the nicer side effects of the method. You are no longer hoping an apple survives an unsupervised hour. You are watching it in a pan and stopping when it looks right, which means you can use apples that taste better and would normally be too soft to risk.
| Apple | In the pan | Tastes |
|---|---|---|
| Granny Smith | Holds shape well. 8 to 9 minutes | Sharp and tart. One note, but the right note |
| Honeycrisp | Dense, holds up. 7 to 8 minutes | Sweet and genuinely appley |
| Braeburn | Softens faster. 6 to 7 minutes | Spiced and complex. Very good in pie |
| Golden Delicious | Goes soft quickly. 5 to 6 minutes | Mild and sweet. Best mixed with something tart |
| Red Delicious | Turns mealy whatever you do | Skip it |
What I actually make is two Granny Smith and one Honeycrisp. The Granny Smiths hold the structure and bring the acidity, and the Honeycrisp fills in the flavor the Granny Smith does not have. This is the same split we use in air fryer baked apples, for the same reason.
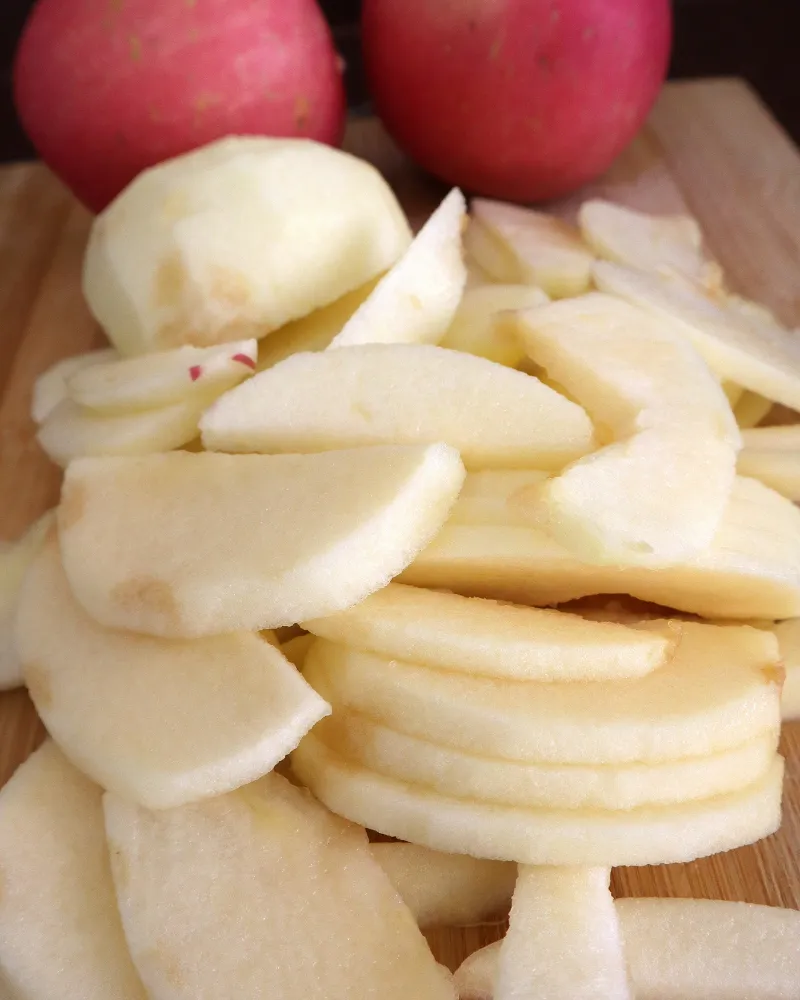
Cut them into half inch pieces rather than thin slices. Thin slices are an oven habit, where they have time to soften. Half inch chunks survive the pan, pack more densely under the lid, and give you something to actually bite. Our air fryer apple chips page has the opposite argument for the opposite reason, which is worth a read if you want the sugar side of what apples do in heat.
Ingredients
Makes one 6 inch double crust pie, six slices.
- 1 package refrigerated pie crust (2 rolls), or a double batch of homemade
- 3 medium apples (about 1 lb / 450g), 2 Granny Smith and 1 Honeycrisp
- 1/3 cup (67g) light brown sugar, packed
- 1 tablespoon (14g) unsalted butter
- 1 tablespoon (8g) cornstarch
- 2 tablespoons (30ml) water or apple cider
- 1 teaspoon ground cinnamon
- 1/8 teaspoon ground nutmeg
- 1 teaspoon lemon juice
- 1/4 teaspoon salt
- 1 egg, beaten, for the wash
- Optional: 1 tablespoon coarse sugar for the top
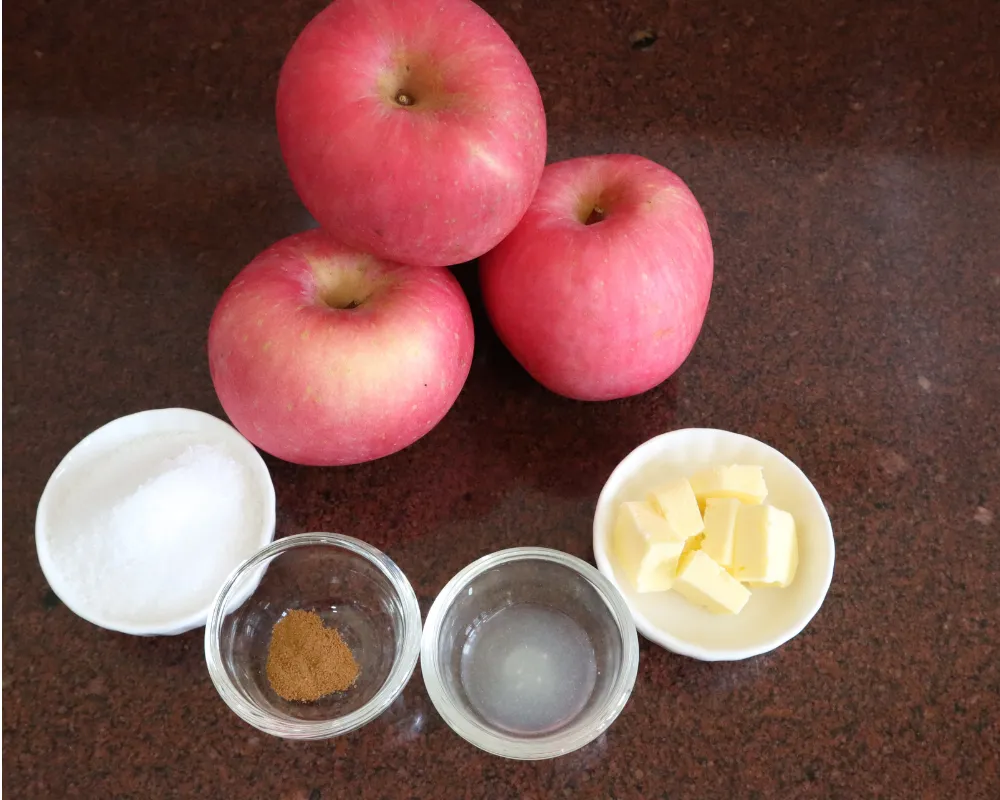
A package of refrigerated crust makes a 9 inch pie, so a 6 inch uses roughly two thirds of it and you will have trim left. Re-roll the offcuts into a lattice, or cut leaves for the top, or bake them flat with cinnamon sugar as a cook's treat. Do not try to squeeze a third crust out of it.
How to make it
- Peel, core and chop the apples into half inch pieces. Toss with the lemon juice so they do not brown while you work.
- Cook the filling. Melt the butter in a saucepan over medium heat, add the apples, brown sugar, cinnamon, nutmeg and salt. Cook 6 to 9 minutes depending on the apple, stirring now and then, until they have released their liquid and a knife goes into a piece with slight resistance. Not mushy.
- Thicken it. Stir the cornstarch into the cold water until smooth, pour it in, and cook another 1 to 2 minutes until the liquid turns glossy and coats the apples. It should look like pie filling, because it is.
- Cool the filling completely. Spread it on a plate and give it 20 minutes, or refrigerate it. Warm filling melts the butter in raw pastry before it ever gets to the basket, and that is a greasy, tough crust.
- Line the pan. Fit one crust into a 6 inch metal pie pan, press it into the corner where the base meets the wall, and trim to about half an inch of overhang. Prick the base all over with a fork.
- Blind bake 6 minutes at 320°F. Line with parchment, fill with dry rice or beans so the fan cannot lift it, and bake. Lift the parchment and weights out and let it sit while you finish the top.
- Fill it generously. Pack the cooled filling in and mound it very slightly. Unlike raw apples this will not shrink any further, so what you see is what you get.
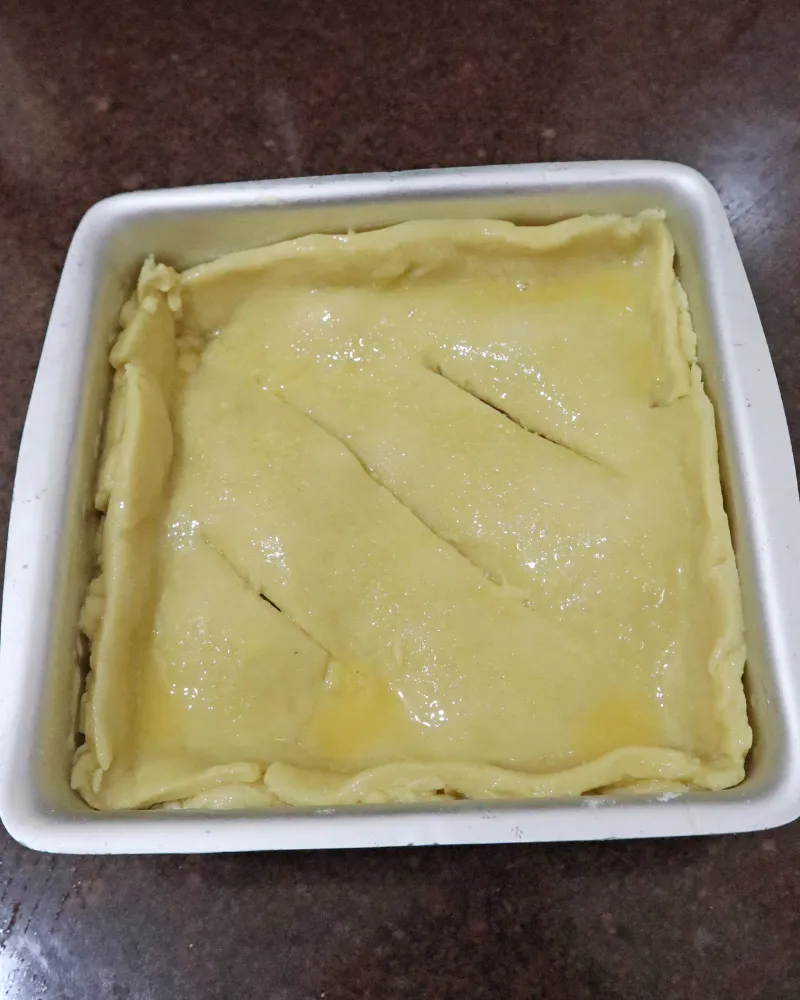
- Lid and seal. Lay the second crust over, trim, fold the overhang under and crimp firmly all the way round. Cut four or five vents in the middle.
- Egg wash and sugar. Brush the lid with beaten egg and scatter the coarse sugar over if you are using it.
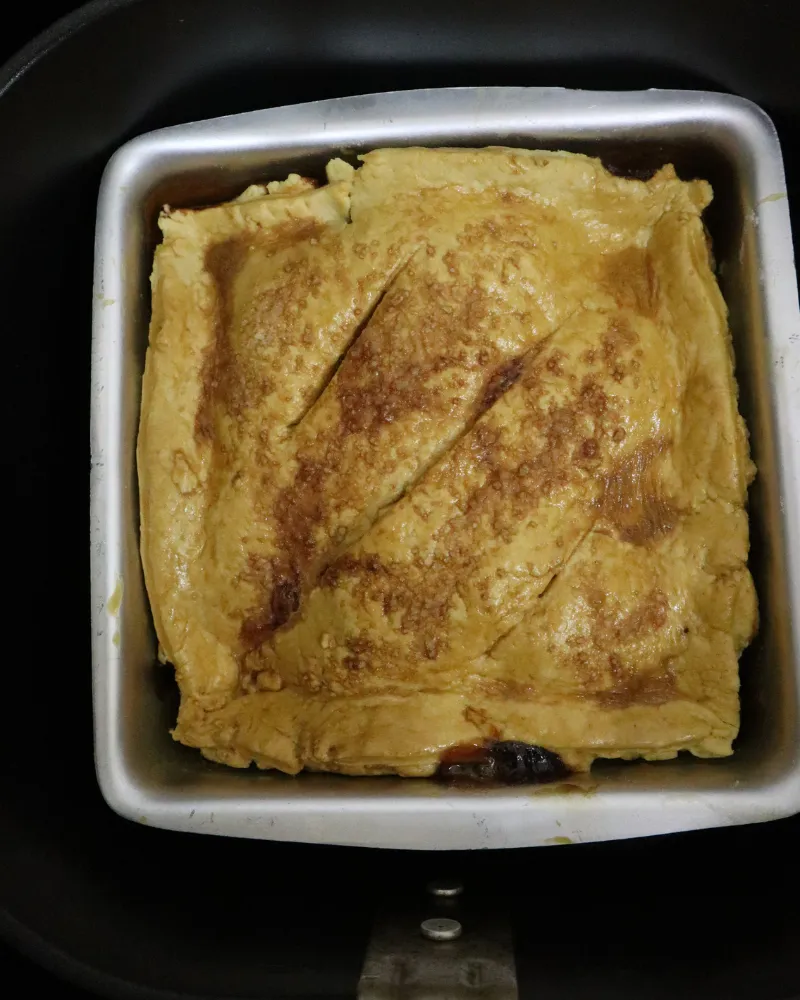
- Bake 20 to 24 minutes at 320°F, with the pan sitting directly on the crisper plate.
- Tent at 8 minutes. The lid will already be golden. Lay a square of foil over the top and press it down firmly over the rim of the pan so the fan cannot get under an edge. Then carry on baking.
- Look for the filling bubbling up through the vents, not for a color you like. That is the actual finish line and it is explained below.
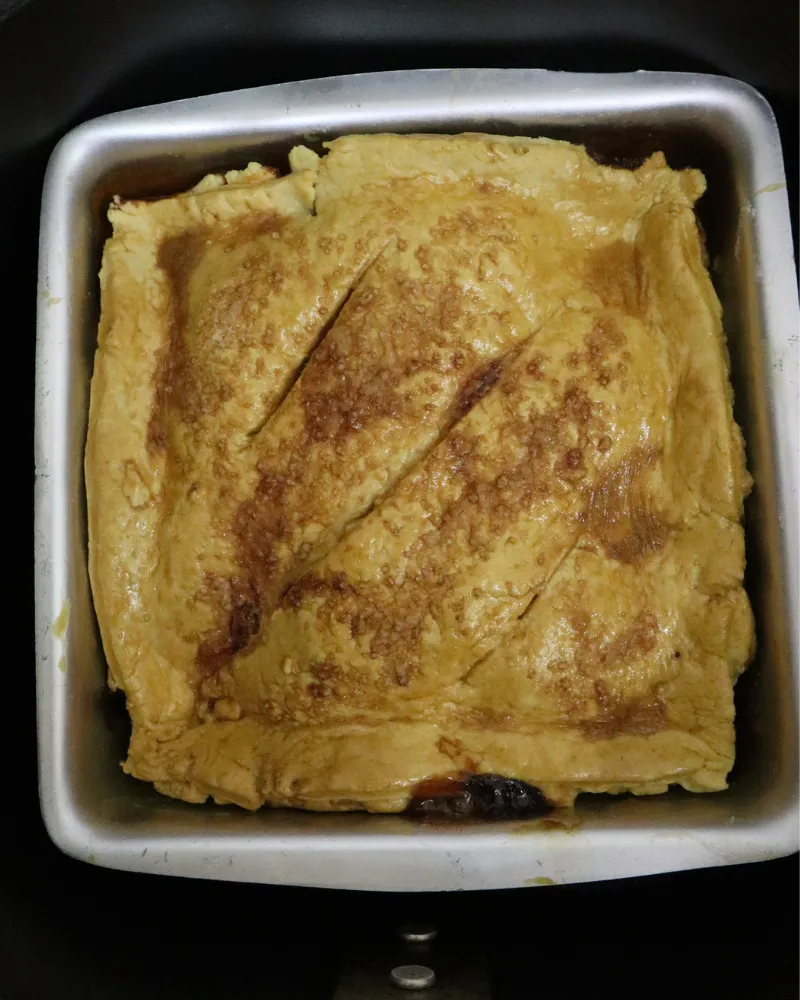
- Out onto a rack, and leave it three hours. This is not optional. Cutting it warm gives you apple soup.
Why 320°F and not 350 or 375. Oven apple pie recipes run at 400°F and higher, and the instinct is to translate that up rather than down. Do not. The element is inches from the lid, so a high temperature only makes the top finish even further ahead of everything else, and past about 320°F you are also into the range where the sugar on the crust starts to caramelize hard and go bitter. Lower and longer is the correct direction for anything with a lid in a basket. The full temperature reference is in the air fryer baking chart.
Bubbling vents, and the three hour wait
Every recipe I read finishes on a color. Golden brown on top. That is a useless instruction for this pie, because the top was golden brown at eight minutes and will be golden brown at any point you choose to stop after that.
The real cue is filling bubbling up through the vents, and it is not an aesthetic judgment, it is a temperature reading in disguise. Filling only bubbles once the center of the pie has reached boiling, which is a bit over 200°F, and a bit over 200°F is also where cornstarch finishes thickening. So when you see it bubble in the middle rather than just at the edges, two things you care about have both happened.
If you would rather have a number, an instant-read thermometer pushed in through a vent should read 200°F or a touch over. Since the filling was cooked in the pan, this normally arrives well before anything is at risk of overbaking.
| What you see | What it means |
|---|---|
| Lid golden, nothing moving in the vents | Pastry is ahead of the filling. Tent it and keep going |
| A little bubbling at the outside edge only | Nearly there. Give it another 4 to 5 minutes |
| Bubbling in the middle vents, slow and thick | Done. Take it out |
| Bubbling that is thin and watery | The starch has not set. Usually too little cornstarch, or it never boiled in the pan |
Three hours, and why
Cornstarch does not finish its job in the heat. It thickens when it is hot, but the gel only sets properly as it cools, and until it does the filling behaves like syrup with apples in it. Cut a pie at thirty minutes and the first slice takes the second one with it.
Three hours at room temperature is the minimum I would give a 6 inch pie and four is comfortable. It will still be pleasantly warm in the middle at three hours, because a pie holds heat far longer than it looks like it should. If you want it hot, reheat a slice rather than cutting it early, and there is a way to do that further down.
This is the same deal we make with the air fryer cheesecake, where the texture does not exist until the thing is cold. It is a rare bake where the recipe genuinely is not finished when the timer goes.
Fixing what goes wrong
| What you got | Why | Fix |
|---|---|---|
| Dark lid, undercooked apples | Raw filling, and no tent. The lid finished at 8 minutes. | Cook the filling first. Tent from minute 8. |
| Hollow gap under the lid | Raw apples shrank about a quarter after the lid had already set. | Cook the filling first, then pack it in and mound it slightly. |
| Pale, damp bottom crust | Glass or thick ceramic dish, no blind bake, and no air under the pan. | Thin metal pan, and 6 minutes blind with weights. |
| Runny filling that ran out | Cut too early. The starch gel had not set. | Three hours. There is no way around this one. |
| Thin, watery juice even after cooling | The cornstarch never boiled, so it never fully thickened. | Let it bubble a full minute in the pan after the slurry goes in. |
| Filling erupted out of the vents | Overfilled, or the crimp gave way under pressure. | Leave a quarter inch below the rim and crimp firmly. |
| Bitter, almost burnt top | Too hot. Sugar on the crust caramelized hard. | 320°F, not 375. Tent earlier if your basket runs hot. |
| Greasy, tough pastry | Warm filling went into raw crust and melted the butter in it. | Cool the filling completely. Twenty minutes on a plate. |
| The base puffed up into a dome | Not docked, or the weights were too light. | Prick it all over, and use enough rice to actually hold it down. |
| Soggy top crust | No vents, so steam had nowhere to go but into the pastry. | Four or five real cuts, not decorative nicks. |
| Parchment flew up and scorched | It was not weighted. This is a genuine fire risk. | Never put loose parchment or foil in a basket. Weigh it down. |
If crust problems are a pattern across your baking rather than just here, how to get bakes crispy in an air fryer covers the general case, and the troubleshooting guide has the rest.
Variations and hand pies
- Hand pies. The same cooked filling, a tablespoon on each 5 inch pastry round, folded, sealed hard with a fork and vented. 350°F for 9 to 11 minutes, no tent needed because there is no deep filling waiting on the lid. This is the format the air fryer is genuinely best at, and it is why so many of the good air fryer pie recipes are hand pies.
- Crumble top instead of a lid. Half a cup of flour, a quarter cup of brown sugar and 3 tablespoons of cold butter rubbed together. It browns even faster than pastry, so tent at 6 minutes rather than 8.
- Lattice. Looks excellent and vents itself, but it also lets more water evaporate, so cut the cornstarch to 2 teaspoons or the filling goes stiff.
- Salted caramel. Two tablespoons of caramel stirred into the filling once it is off the heat. Not before, or the sugar catches on the pan.
- Apple and blackberry. Swap a third of the apple for blackberries, added in the last minute in the pan, and add a teaspoon of cornstarch because they bring more water.
- Cinnamon roll crust. If you want the flavor without pastry, our air fryer cinnamon rolls page covers dough in a basket, and the same filling works spooned into the middle of them.
- Canned filling, honestly. It is already cooked, which is the whole point of this page, so a 21 oz can works and you skip straight to assembly. It is sweeter and softer than what you get from three apples and a pan, and you lose the half inch chunks, but nobody is going to be upset.
For other things worth putting in a basket when you want dessert without heating an oven, air fryer brownies and air fryer apple cake are the two I make most, and what you can and cannot bake in an air fryer is the honest list of what is worth attempting.
Storage and reheating
- Room temperature: 2 days, loosely covered. An airtight container traps steam and softens the crust, so a plate over the top is better than a lid.
- Refrigerated: 4 days. Cold pastry is disappointing, so bring slices back to room temperature or reheat them.
- Reheating, and this is where an air fryer earns its place: a slice at 330°F for 3 to 4 minutes comes back genuinely crisp, which a microwave cannot do at all. Sit it on a small piece of foil so the filling does not drip through the plate.
- Frozen, baked: 3 months. Freeze slices on a tray until firm, then wrap. Reheat from frozen at 320°F for 8 to 10 minutes.
- Frozen, unbaked: works well. Assemble, freeze solid in the pan, then bake from frozen at 320°F for about 32 to 36 minutes, tenting at 10. Do not thaw it first, because a thawed raw pie leaks.
Twenty five minutes of air fryer time against an hour of a full oven is a real saving on a single small pie, and if you want the actual figure for your electricity rate the running cost calculator will work it out. All four air fryer tools are in one place, the accessories guide covers which small pans are worth owning, and the full recipe index has everything else on the site.
Frequently asked questions
QCan you cook an apple pie in an air fryer?
Yes, but not by following an oven recipe with the numbers adjusted. In an oven the lid browns at roughly the same rate as the apples cook, so one bake handles both. In a basket the element sits two to four inches above the lid, so the pastry is finished in about eight minutes while the filling has barely warmed through. The fix is to cook the apple filling in a pan first, blind bake the base for six minutes, then bake the assembled pie at 320F for 20 to 24 minutes with a foil tent going on at minute eight. Done that way it works properly. Done the oven way you get a dark top, a wet base and a hollow gap under the lid.
QHow long does apple pie take in an air fryer?
About 28 minutes of machine time for a 6 inch pie: 6 minutes to blind bake the base, then 20 to 24 minutes for the assembled pie at 320F. A 7 inch takes 24 to 28 minutes for the second stage and an 8 inch takes 28 to 32. Published times for this range from 18 to 30 minutes and the spread is mostly down to pan size and whether the filling went in raw, which almost none of them mention. Do not go by the clock alone: the pie is finished when the filling bubbles up through the vents in the middle, not when the top looks golden, because the top was golden twenty minutes earlier.
QWhy is the bottom of my air fryer apple pie soggy?
Three causes stacking up. First, no air reaches the underside of the dish, because it sits flat on the crisper plate, so the bottom crust cooks only by conduction through the pan. Second, most people use a glass pie dish, and glass conducts heat poorly, which is fine in an oven where hot air surrounds it and bad in a basket where conduction is the only route. Third, raw apples release a lot of water and a twenty minute bake cannot drive it off. Fix all three: use a thin metal pan, blind bake the base for six minutes with weights, and cook the filling in a pan before it goes in.
QDo I need to cook the apple filling before putting it in the pie?
In an air fryer, yes. In an oven you can get away without it because an hour of baking cooks the apples and drives off their water. A twenty minute bake does neither. Cooking the filling first does four things: it drives off water that would otherwise end up in the bottom crust, it collapses the apples before assembly so there is no hollow gap under the lid, it lets the cornstarch reach the roughly 203F it needs to thicken properly, and it means the bake only has to finish the pastry. Worth noticing: nearly every air fryer hand pie recipe uses canned filling, which is already cooked, and those recipes work reliably. The whole pie recipes that tip fresh apples in raw are the ones that do not.
QWhy is there a gap between the crust and the filling?
Raw apples lose roughly a quarter of their volume as they cook, and in an air fryer the top crust sets rigid within the first few minutes because it is so close to the element. So the lid locks into position while the filling is still full size, then the apples shrink away underneath it and leave a cavern. It is not bad luck and it is not your crimping. Cooking the filling first solves it completely, because all the shrinking happens in the pan and what goes under the lid is already the size it will be when you cut it. Pack it in generously and mound it very slightly, since it will not settle any further.
QWhat temperature should I use for apple pie in an air fryer?
320F, which is lower than most people expect and much lower than the 400F an oven apple pie recipe will tell you. The instinct is to translate an oven temperature upward for a shorter bake, and here that is exactly backwards. The heating element is only two to four inches above the lid, so raising the temperature just makes the top finish even further ahead of the filling. Past about 320F you also move into the range where the sugar on the crust caramelizes hard and turns bitter. For anything with a lid in a basket, lower and longer is the right direction.
QWhat size pie pan fits in an air fryer?
A 6 inch pan fits most 5 quart baskets and up, and that is what this recipe is written for. A 7 inch needs 6 quarts or more. An 8 inch realistically needs an oven-style unit with a shelf, and a standard 9 inch pie does not fit a basket at all, which is worth knowing before you follow a recipe that assumes one. You also want at least an inch and a half of clearance between the crimped edge and the element, because a pie crowding the element browns on top in about six minutes instead of eight. Measure your basket before buying a pan, since the difference between one that fits and one that does not is usually about half an inch.
QCan I use a glass pie dish in an air fryer?
You can, but it is the worst realistic choice and it is the one most recipes photograph. Glass conducts heat poorly. In an oven that does not matter, because hot air surrounds the dish on every side and the material is almost irrelevant. In a basket the dish sits flat on the crisper plate with no airflow underneath, so conduction through the dish is the only way heat reaches the bottom crust. Poor conductor plus no airflow is exactly how you get a pale, damp base. Thin metal is the best option, a disposable foil pan is a good second, and ceramic works if you blind bake a little longer.
QHow do I stop the top of the pie from burning?
Tent it with foil at eight minutes, which is around when the lid hits golden. The important part is how you put the foil on: press it down firmly over the rim of the pan rather than draping it loosely, because an air fryer fan moves air fast enough to lift a loose sheet of foil into the heating element, where it scorches and can catch fire. That is a real hazard rather than a theoretical one, and it is the same reason you never leave an empty paper liner or an unweighted sheet of parchment in a basket. If your machine runs hot, or your pie sits close to the element, tent at six minutes instead.
QHow do I know when the pie is done?
When the filling bubbles up through the vents in the middle of the pie, not when the top looks golden. The top was golden at eight minutes and will still look golden whenever you decide to stop, so color tells you nothing here. Bubbling is a temperature reading in disguise: filling only bubbles once the center has reached boiling, a little over 200F, and that is also where cornstarch finishes thickening. If you would rather have a number, push an instant-read thermometer in through a vent and look for 200F or just above. Edge bubbling alone is not enough, it needs to be moving in the middle.
QHow long should apple pie cool before cutting?
Three hours minimum for a 6 inch pie, and four is better. Cornstarch thickens while it is hot but the gel only sets as it cools, so until then the filling is essentially syrup with apple in it and the first slice takes the second one with it. A pie holds heat much longer than it looks like it should, so at three hours it will still be pleasantly warm in the middle rather than cold. If you want it properly hot, cut it after the full rest and reheat individual slices at 330F for 3 to 4 minutes, which brings the pastry back crisp in a way a microwave never will.
QCan I use canned apple pie filling?
Yes, and it works better in an air fryer than you might expect, for the exact reason this whole page is about: canned filling is already cooked. The apples have already given up their water and shrunk to their final size, and the starch is already thickened, so you skip straight to assembly and none of the usual problems apply. A 21 oz can is enough for a 6 inch pie with some left over. It is sweeter and softer than three apples cooked in a pan, and you lose the half inch chunks that give the filling some bite, but the pie will be structurally sound and nobody is going to complain.
Never overbake again
Get our one-page times & temps cheat sheet, plus a new tested recipe each week.
No spam · unsubscribe anytime