

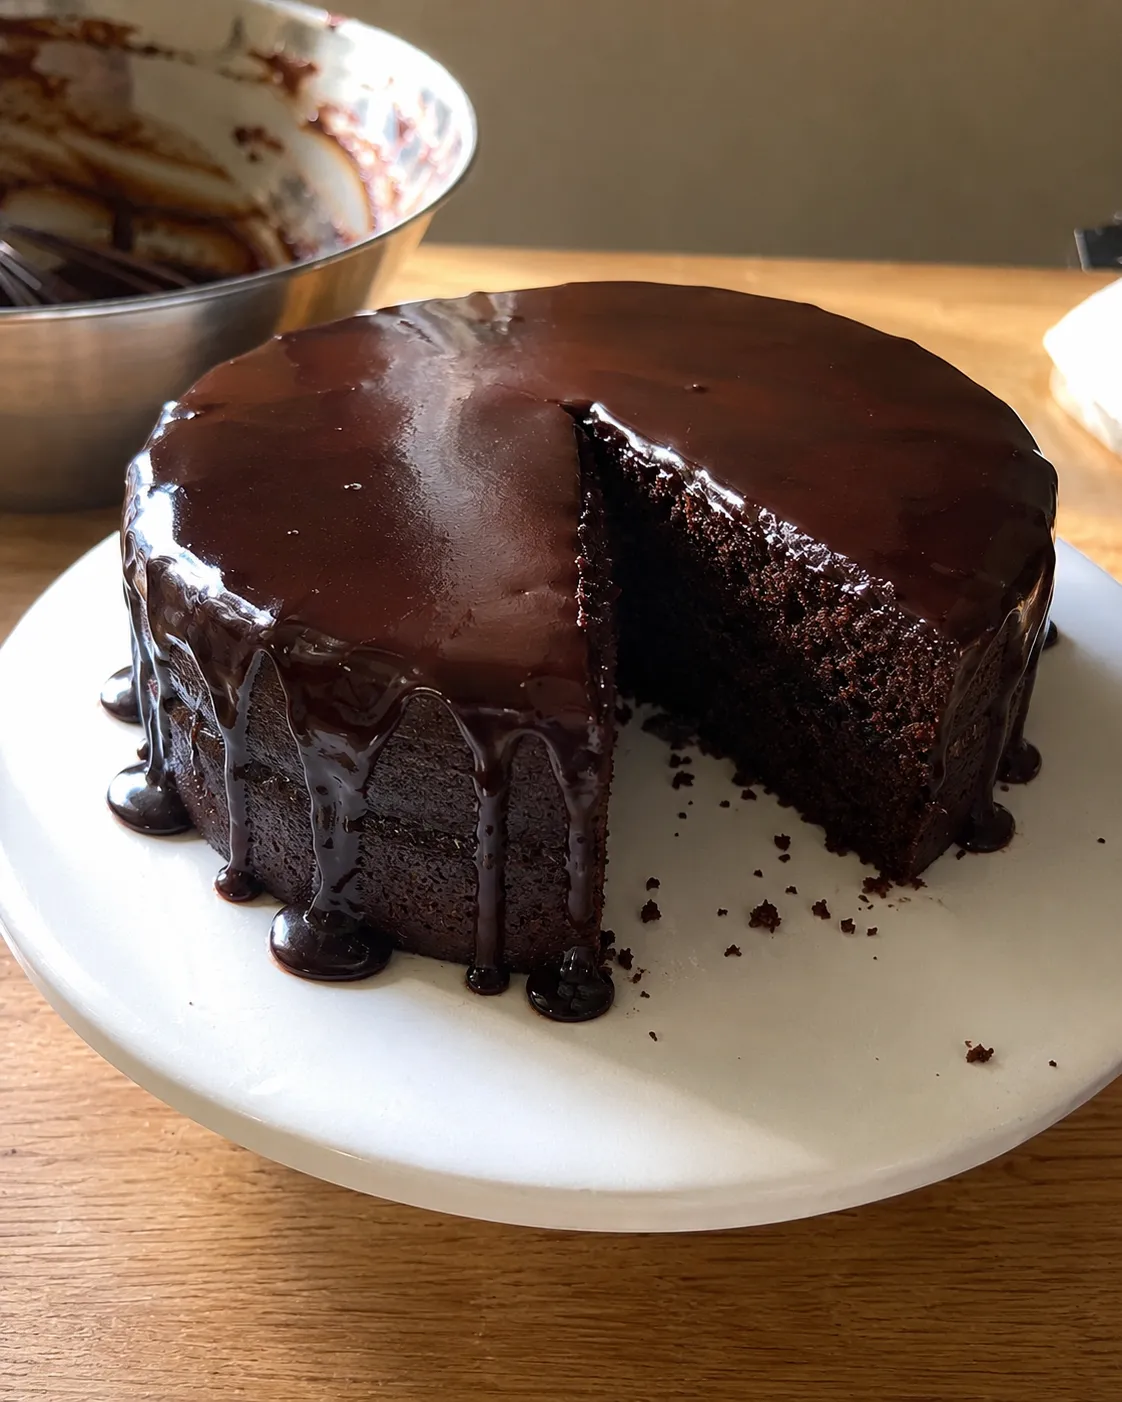
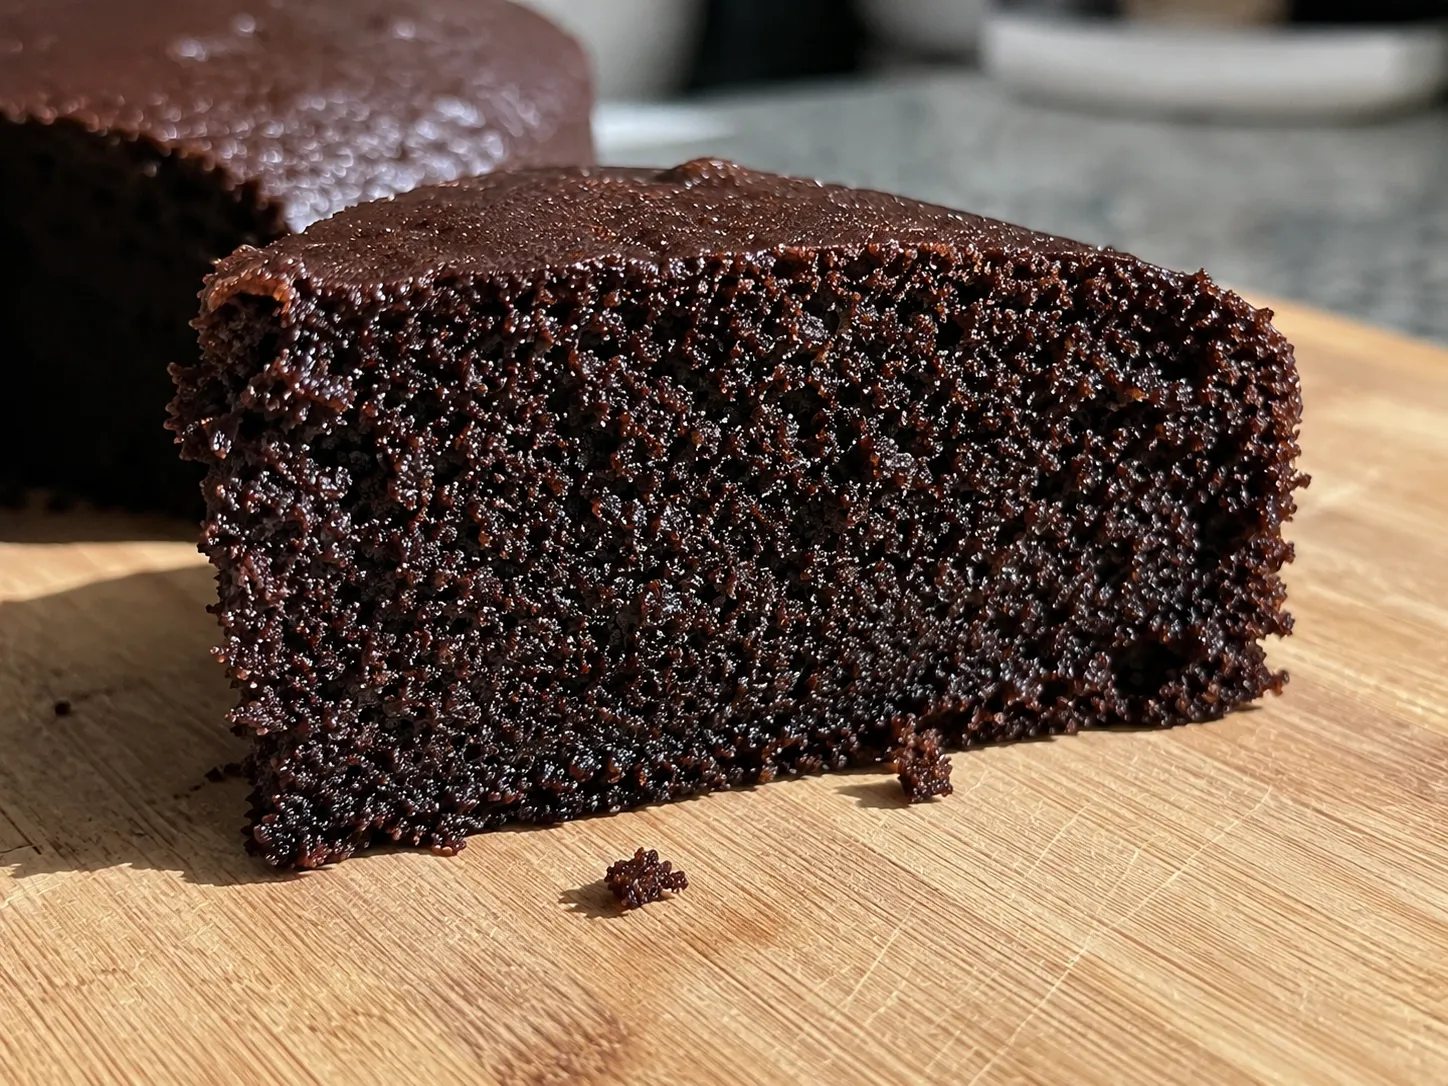
The first few 6-inch chocolate cakes I baked in a basket all came out the same way. Perfectly good in the middle. Then a ring around the outside, maybe half an inch wide, that was noticeably darker, firmer and drier, and if you cut a slice you could see exactly where one became the other.
I assumed the edge was just running a bit ahead of the middle and that the answer was more time at a lower temperature so they could even out. That made it worse.
The edge is not running ahead. It falls off a cliff, and the cliff happens at a specific moment that has nothing to do with how long you bake.
Quick answer: Bake at 310°F for 28 to 32 minutes in a 6-inch pan, wrapped in a properly soaked cake strip, and pull it at 200°F in the center. Use oil rather than butter, natural cocoa rather than Dutch because there is baking soda in this, and hot coffee as the liquid. Do not cover the top with foil for the whole bake, which is what one popular recipe does, and which is why it takes 45 minutes.
Dry edges are a cliff, not a gradient
Here is the thing that made it click for me, and it is one line: wet batter cannot get hotter than about 212°F.
As long as there is free water in a piece of cake, every bit of heat arriving goes into boiling that water off rather than raising the temperature. It is the same reason a pan of water on full heat stays at boiling instead of climbing. So while a cake is baking, almost all of it is sitting patiently at around 212°F, no matter whether the air around it is 310°F or 400°F.
Which means the air temperature does not directly cook your cake. It controls how fast the water leaves. And the part of the cake that runs out of water first is the part that stops being protected.
| Stage | The center | The outer half inch |
|---|---|---|
| Early | Warming through, batter still liquid | Warming faster, because heat arrives through the metal wall as well as from the air |
| Middle | Held near 212°F while its water boils off | Also held near 212°F, but losing water several times faster |
| The cliff | Still wet. Still capped. | Runs dry. Nothing caps it now, so it climbs toward the air temperature |
| End | Reaches 200 to 205°F and is done | Has been well past 212°F for several minutes. That is the dry ring |
This is why adding time at a lower temperature made mine worse rather than better. A longer bake gives the edge more minutes on the wrong side of the cliff. What you want is not a gentler bake, it is a later cliff. The glossary covers the two mechanisms involved, evaporative cooling and case hardening, in a couple of sentences each.
A basket makes this worse than an oven does for two reasons that stack. The air moves fast, which strips water off exposed surfaces much quicker than still oven air. And a 6-inch pan is small, so a much larger share of the cake is close to a wall in the first place. In a 9-inch cake the outer half inch is about a fifth of the cake. In a 6-inch it is nearly a third.
Push the cliff back
Slow down how fast the edge loses water. That is what a cake strip does, and it is the single biggest change on this page.
Lower the ceiling
310°F rather than 320 or 350. Once the edge is over the cliff, the air temperature is what it climbs toward, so a lower number costs it less.
Finish sooner
Pull at 200°F rather than baking to a clean toothpick. Every extra minute after the middle is done is a minute the edge spends unprotected.
The cake strip is a timer, not a shield
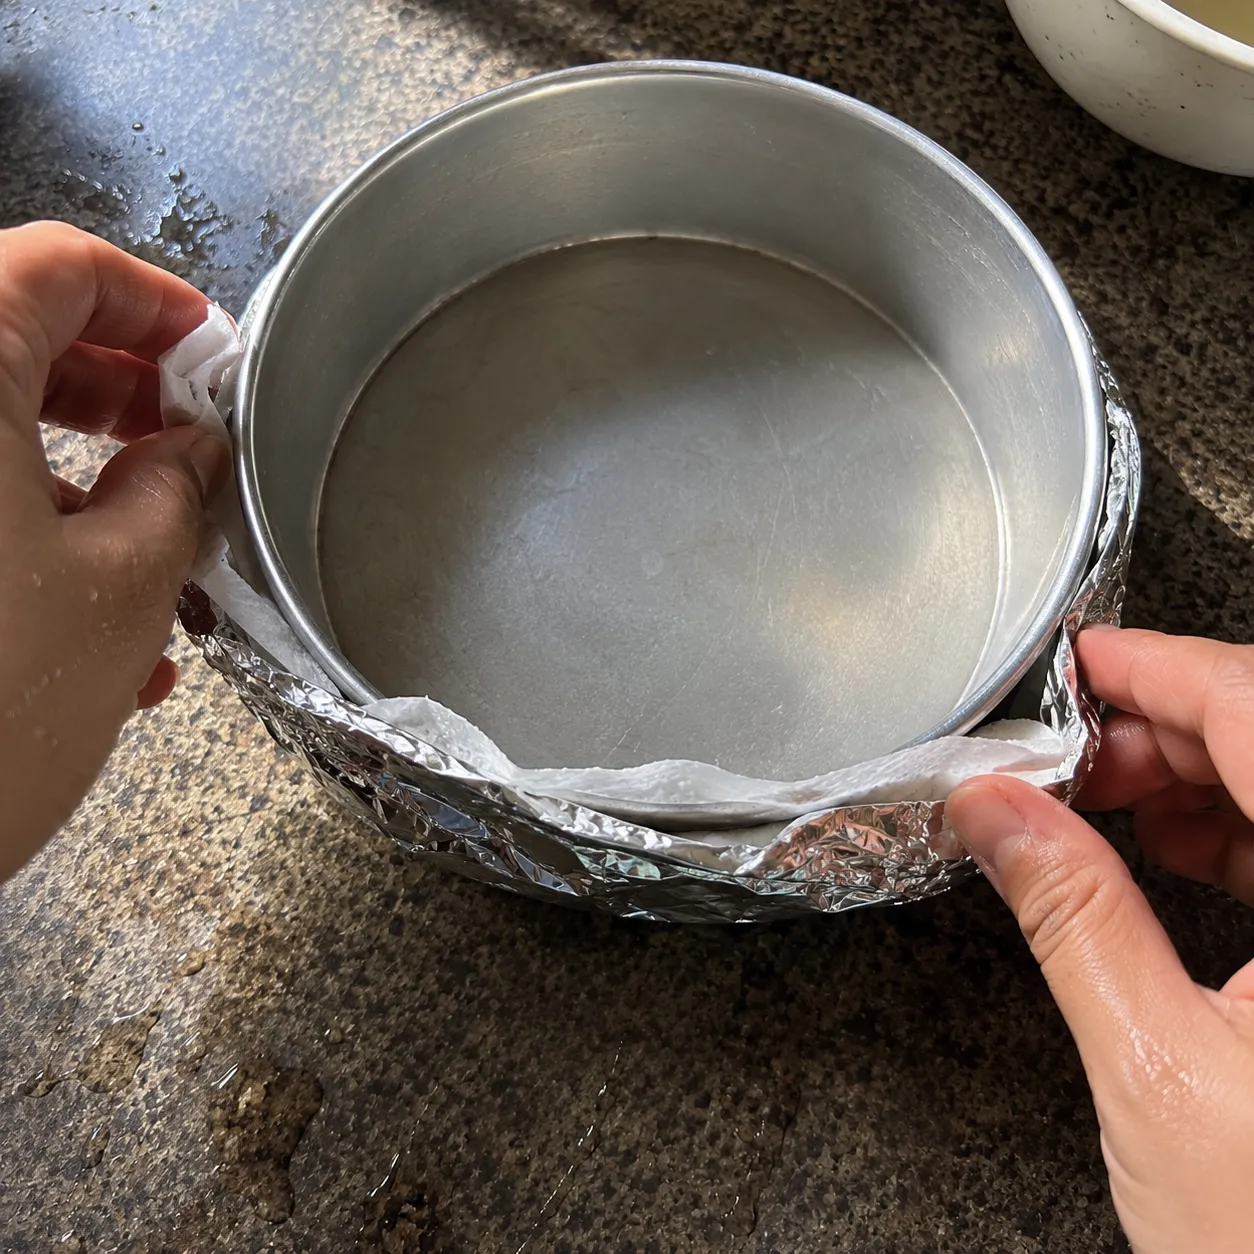
A cake strip is a band of fabric you soak in water and wrap around the outside of the pan. One of the better recipes for air fryer chocolate cake does mention them, which is more than most, but it describes them as insulation. They are not insulation, and the difference matters because it tells you when they stop working.
A soaked strip is a lump of water pressed against the pan wall. Water absorbs an enormous amount of heat while it evaporates, far more than it does simply warming up. So while that strip is wet, it holds the outside of the pan near 212°F and refuses to let it go higher. The batter behind the wall stays capped along with it.
And then the strip dries out. That is the part nobody tells you. A strip holds maybe two tablespoons of water, and in a basket with fast moving air it is usually gone somewhere around the 25 to 30 minute mark. After that it is a dry rag doing very little. So a cake strip does not protect your edges for the whole bake, it protects them for about half an hour, and your job is to have the cake finished before that runs out.
Two practical consequences follow, and they are the whole reason the recipe is written the way it is.
- Soak it properly. Genuinely wet, not damp. Hold it under the tap, squeeze it once so it is not dripping into the drawer, and put it straight on. Half wet gives you half the protection and it expires twice as fast.
- Keep the bake inside 30 minutes. This is why 310°F and 28 to 32 minutes rather than a slower, gentler 45. A 45 minute bake spends its last fifteen minutes with no strip left, which is exactly the window in which the damage happens.
Making one, and doing it safely
You do not need to buy anything. Cut a strip of aluminum foil about four inches wide and long enough to go all the way round the pan with a little overlap. Lay a folded strip of wet paper towel down the middle, fold the foil over it into a band roughly the height of the pan, and wrap it around the outside. Tuck the ends together so it grips.
Wrap it tight, with no loose ends. An air fryer fan moves air fast enough to lift a loose flap of foil into the heating element, where it scorches and can catch. Wrapped snugly around a pan and held there by its own tension it is completely safe, because there is nothing for the air to get under. This is the same rule that applies to parchment and to empty paper liners in a basket. Foil and parchment in an air fryer goes through it properly.
Do not cover the top with foil for the whole bake. One widely shared recipe wraps the sides and covers the top and then bakes for 45 minutes, and while it does solve the dry edge problem, it solves it by turning the air fryer into a steamer. The top never dries, never browns, and never sets, which is why the time balloons. You are giving up the one thing the machine does well.
If your particular basket runs hot and the top is getting dark early, tent it loosely for the last ten minutes only. That is a different move from covering it from the start.
Oil, not butter, and the hot coffee
Two ingredient choices that are doing more work than they look like they are.
Oil
Nearly every chocolate cake that gets called moist uses oil, and nearly every one that gets called rich uses butter. That is not a coincidence and it is not marketing.
Butter is roughly 80 percent fat and 16 percent water, and it is solid at room temperature. Oil is 100 percent fat and stays liquid at room temperature. So a butter cake, once it has cooled to the temperature you eat it at, has firm fat running through the crumb, and firm fat reads on the tongue as dry even when the cake has plenty of moisture in it. An oil cake has soft fat coating the same crumb and reads as moist.
Butter tastes better, which is why our air fryer vanilla cake creams butter and sugar rather than using oil. But a vanilla cake has nowhere to hide, and a chocolate cake has cocoa doing all the flavor work, so there is nothing to miss. This is the one place I would use oil without hesitating.
The butter water content matters too. Sixteen percent of the fat in a butter cake is water that has to be boiled off during the bake, which brings us straight back to the cliff.
Hot coffee
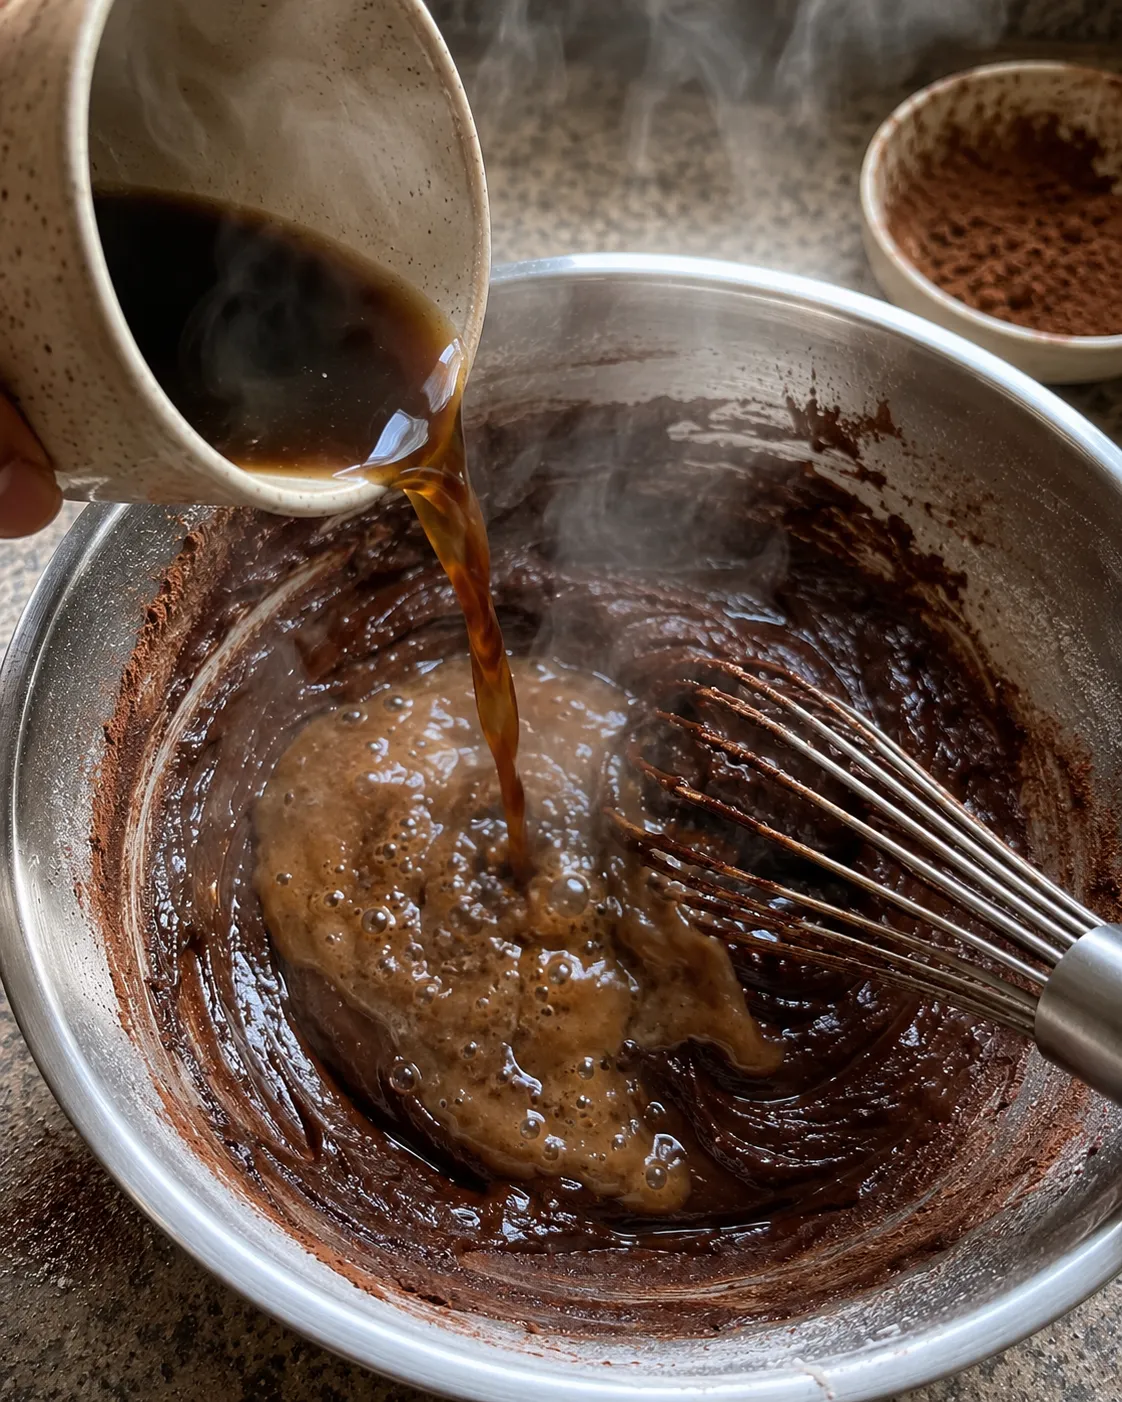
The liquid goes in hot, and it goes in last. This does two things at once.
- It blooms the cocoa. Cocoa powder is about a fifth fat and carries a lot of its flavor in compounds that only release into fat or hot liquid. Mixed in dry and hit with cold milk, most of it stays locked in the particles. Hot liquid opens it up, which is the difference between a cake that tastes brown and one that tastes chocolatey. Our mug cake uses the same trick with melted butter.
- Coffee sharpens chocolate. At this quantity nothing tastes remotely of coffee. It just makes the cocoa read darker and less flat. Boiling water works and the cake is still good, so use water if you would rather.
The batter will look alarmingly thin after the hot liquid goes in. That is correct and it is not a mistake. A thin batter conducts heat through itself more evenly than a stiff one, which on a cake with an edge problem is another small point in your favor.
Which cocoa, because here it matters
Cocoa comes in two kinds and most recipes just say unsweetened cocoa powder and leave it there. On some recipes that is fine. On this one it is not, and it is worth thirty seconds.
| Cocoa | Roughly | In this recipe | Tastes |
|---|---|---|---|
| Natural (most US supermarket cocoa) | Acidic | Correct. Use this | Sharper and fruitier, lighter in color |
| Dutch-process (alkalized) | Close to neutral | Works, but add another 1/4 teaspoon of baking powder | Mellower and deeper, much darker |
This recipe leans on baking soda, and baking soda needs an acid to react with. Natural cocoa and buttermilk both supply one. Dutch cocoa has been alkalized to close to neutral, so it contributes nothing, and soda that never reacts tastes faintly soapy and gives you no lift. The buttermilk alone will carry it, which is why Dutch is workable here rather than a disaster, but it needs the extra baking powder to make up the difference. Baking soda versus baking powder has the longer version.
Ingredients
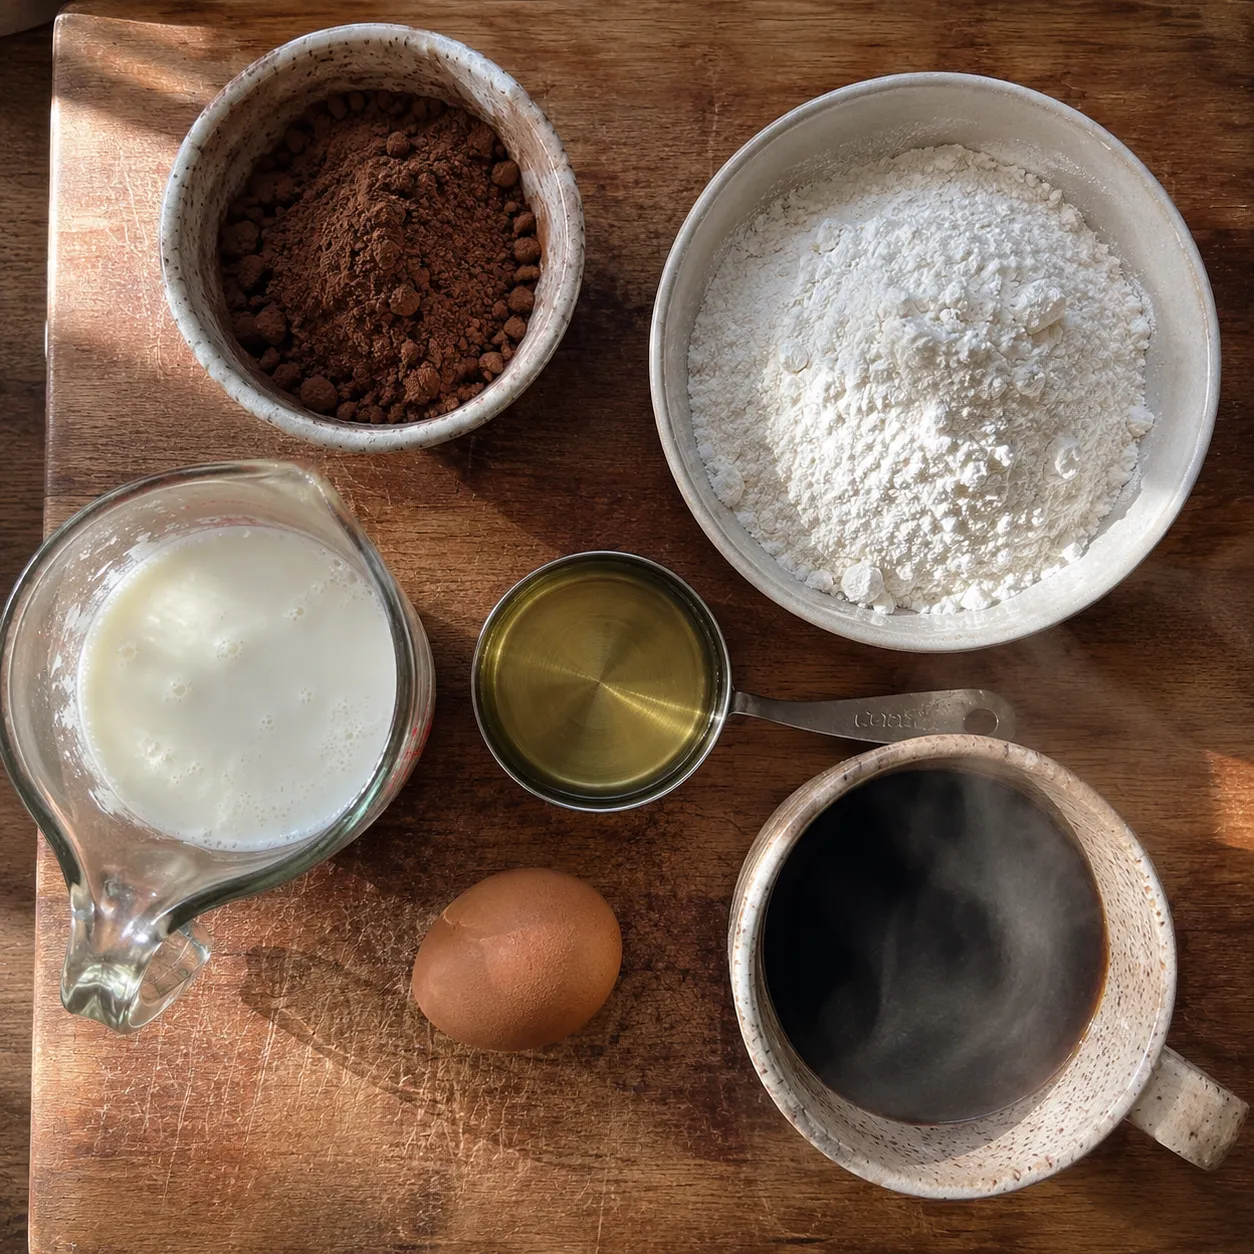
One 6-inch cake, eight slices. One bowl, no mixer needed, everything at room temperature except the coffee.
- 2/3 cup (85g) all-purpose flour
- 1/3 cup (28g) unsweetened natural cocoa powder
- 2/3 cup (133g) granulated sugar
- 1/2 teaspoon baking soda
- 1/4 teaspoon baking powder
- 1/4 teaspoon salt
- 1 large egg, room temperature
- 1/4 cup (60ml) neutral oil
- 1/3 cup (80ml) buttermilk, room temperature
- 1 teaspoon vanilla extract
- 1/3 cup (80ml) hot strong coffee, or boiling water
No buttermilk? Put a teaspoon of lemon juice or white vinegar in a measuring cup, top up to a third of a cup with milk, and leave it five minutes. It is not identical but it brings the acid, which is the part the baking soda cares about.
How to make it
- Preheat to 310°F (155°C) for 3 minutes. Start it before you mix. Whether you need to preheat covers why leavened batters care about this most: the baking soda starts working the moment it meets the buttermilk.
- Line and grease a 6-inch pan. Parchment circle in the base, greased sides. Metal rather than silicone here, for reasons in the pan section.
- Make the cake strip. Fold a wet paper towel inside a four inch band of foil, wrap it snugly around the outside of the pan, and tuck the ends so nothing flaps. Genuinely wet, not damp.
- Whisk the dry ingredients in a bowl: flour, cocoa, sugar, baking soda, baking powder and salt. Break up every cocoa lump now, because they will not disappear later.
- Add the egg, oil, buttermilk and vanilla and whisk until just combined. About 30 seconds. It will be thick.
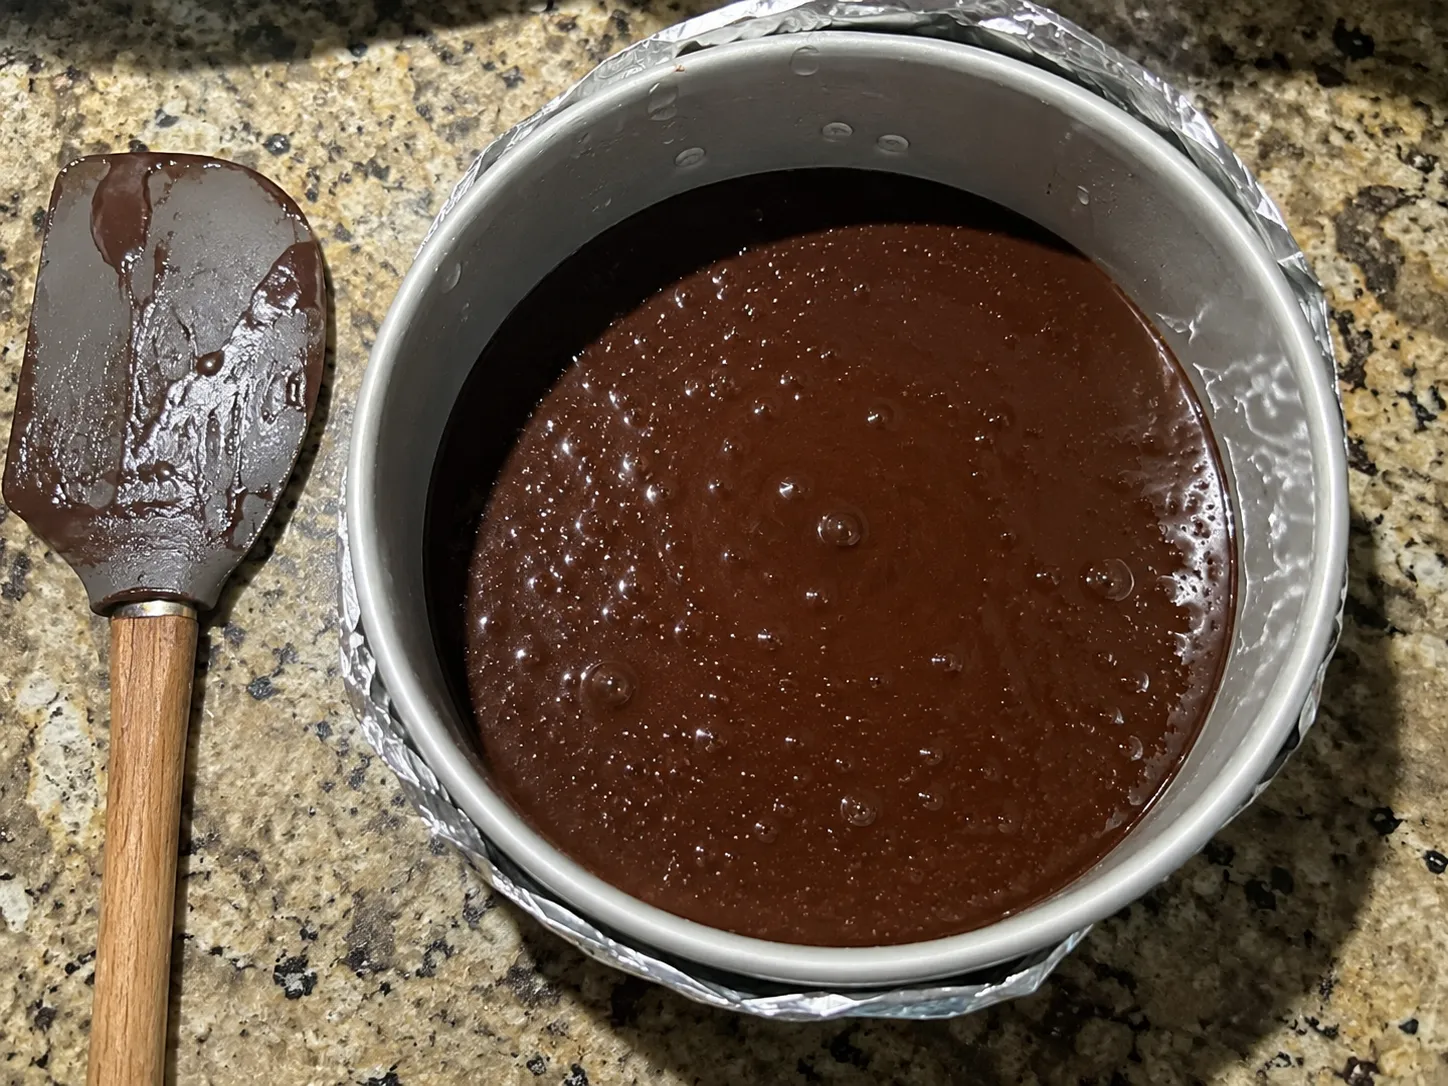
- Pour in the hot coffee last and whisk it through. The batter will go very thin and slightly glossy. This is correct.
- Stop mixing. Overmixing develops gluten, and gluten gives you a tight, chewy crumb rather than a tender one.
- Pour into the pan. It should come a little over halfway up. If your pan is only 2 inches deep, hold back a couple of tablespoons rather than filling it higher.
- Bake 28 to 32 minutes at 310°F. Do not open it for the first 20 minutes.
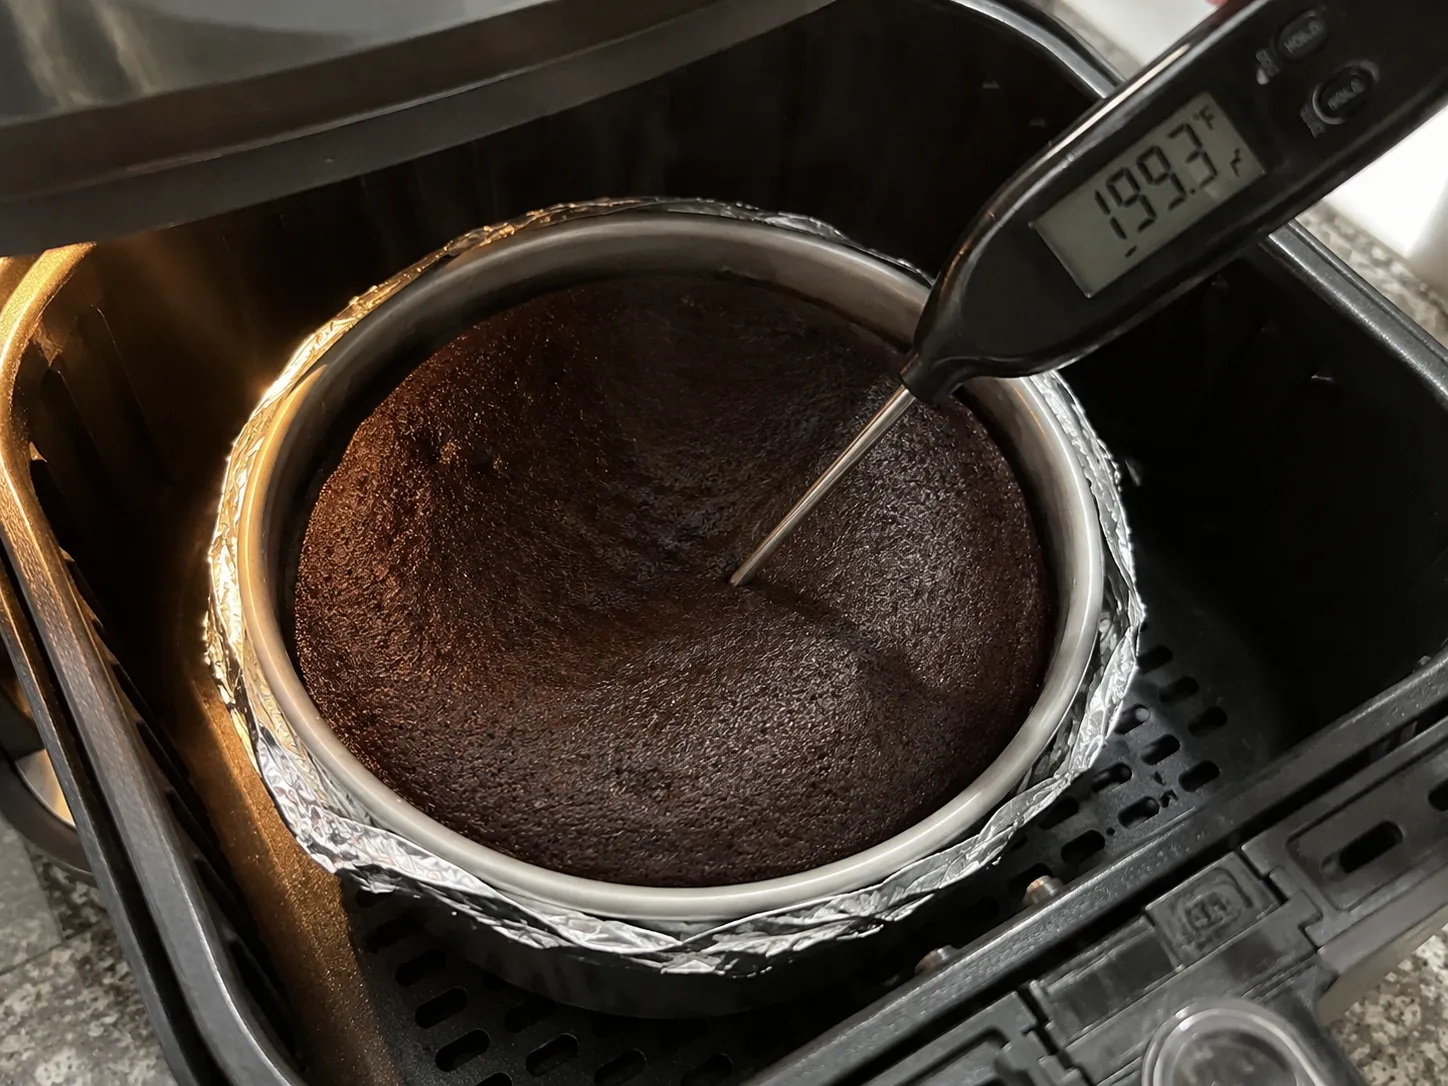
- Check at 28 minutes. Push an instant-read thermometer into the dead center, halfway down. You want 200°F. Under 195, give it 3 more minutes.
- Out of the pan at 10 minutes. Cool in the pan for ten, then turn it out onto a rack. Leaving a cake in a hot metal pan is a slow way to dry the edges you just worked to protect.
- Cool completely before frosting. At least an hour. Frosting a warm cake gives you a slide rather than a layer.
Why 310°F rather than the 320°F we use for vanilla. Ten degrees sounds like nothing, but the air temperature is what the edge climbs toward once it is past the cliff, so it directly sets how bad the damage is. Vanilla cake gets 320 because a paler batter needs a bit more heat to develop any color at all. A chocolate cake is already dark and has nothing to gain from it. Published recipes for this run from 320 to 350°F, and the hot end is where the cracked, domed, dry-ringed cakes come from. If you are converting somebody else's oven recipe, put its numbers through the air fryer calculator first, then take another 10°F off and go by the 200°F reading.
200°F, and why chocolate hides everything
A cake is done when the starch has gelatinized and the egg protein has set, and for a small cake that is 200°F in the middle. Not a color, not a springy top, and on a chocolate cake especially not a toothpick.
Every published recipe for this ends on a toothpick coming out clean. On a chocolate cake that instruction is worse than usual for two separate reasons.
- You cannot read the crumbs. On a vanilla cake, wet batter on a toothpick is pale and obvious against the wood. On a chocolate cake, wet batter and moist crumbs are both dark brown, and telling them apart by eye at arm's length over a hot basket is genuinely difficult.
- Clean means late. A toothpick only comes out properly clean once the batter touching it has fully set, which is around 205 to 210°F. So even when you read it correctly, it is telling you to stop several degrees after you should have. On a cake with a dry edge problem, those are the most expensive degrees in the bake.
| Center reads | What you have |
|---|---|
| 190°F | Underset. It will sink as it cools |
| 195°F | Just about there. Give it 2 more minutes |
| 200°F | Done. Soft, moist, holds its shape. Take it out |
| 205°F | Still fine, and where a clean toothpick would have put you |
| 210°F and up | Dry, and the edge is now well past saving |
There is a bit of carryover in a hot metal pan, which is the other reason to take it out at 200 and turn it onto a rack at ten minutes rather than leaving it to sit. Internal targets for everything else are in the air fryer baking chart.
Pan size and fill level
This is written for a 6-inch round metal pan, at least 2 inches deep, which is what fits most 5 to 6 quart baskets with air moving around it.
| Pan | Batter | At 310°F | Notes |
|---|---|---|---|
| 6-inch round | The recipe as written | 28 to 32 min | Just over half full. The default |
| 7-inch round | Same batter, shallower | 22 to 26 min | Bakes faster because it is thinner |
| Two 4-inch rounds | Split evenly | 16 to 20 min | Good for a small layer cake. Strip both |
| 6-inch silicone | The recipe as written | 32 to 36 min | Silicone insulates. A strip is unnecessary here |
The silicone row is worth reading twice. Silicone conducts heat badly, which is normally a nuisance and here is the exact thing you want, because the pan wall is the problem. A silicone pan is a permanent cake strip that never dries out. The trade is that it also slows the whole bake down and gives you almost no browning on the sides. Using silicone molds in an air fryer covers the adjustment, and the pan size calculator will tell you what your basket takes.
Just over half full is the ceiling. This batter climbs a fair amount in the first ten minutes and a pan filled higher will dome hard, crack across the top, and in a basket the top of that dome is heading straight for the element. Fill level is covered properly in the glossary, and if you want to scale the recipe for a different pan, the recipe scaler does the arithmetic.
Fixing what goes wrong
| What you got | Why | Fix |
|---|---|---|
| Dry ring around the outside | The edge ran out of water and climbed past 212°F while the middle was still baking. | Soaked cake strip, 310°F, and pull at 200. All three. |
| Strip did not seem to help | It was damp rather than wet, or the bake ran past 30 minutes and it dried out. | Soak it properly. Keep the bake inside half an hour. |
| Dry all the way through | Baked to a clean toothpick, which is about 205 to 210°F. | 200°F and a thermometer. |
| Domed and cracked on top | Too hot, or the pan was filled past half. | 310°F, just over half full. See doming. |
| Sank in the middle | Pulled before the center set, so nothing held the risen shape. | 200°F. More in why air fryer cakes sink. |
| Flat, and faintly soapy | Dutch cocoa in a recipe leaning on baking soda. | Natural cocoa, or add 1/4 teaspoon more baking powder. |
| Tight, chewy crumb | Overmixed after the flour went in. | Whisk until just combined. Thirty seconds. |
| Cocoa lumps through it | Cocoa clumps and will not break up once liquid is in. | Whisk the dry ingredients properly first. |
| Tastes brown rather than chocolatey | The cocoa never bloomed. | The liquid goes in hot, and it goes in last. |
| Burnt top, pale sides | Too close to the element, usually a deep pan filled high. | Tent loosely for the last 10 minutes only. |
| One side darker than the other | Basket hot spot. | Turn the pan 180 degrees at the halfway mark, as with cupcakes. |
| Stuck in the pan | No parchment circle, or left to cool in the pan too long. | Line the base. Out onto a rack at 10 minutes. |
If dryness runs across your baking rather than just here, how to avoid dry air fryer bakes is the general version of this whole page, and the troubleshooting guide has the rest.
Frosting and variations
- Chocolate buttercream. 6 tablespoons soft butter, 1 1/4 cups powdered sugar, 3 tablespoons cocoa, 2 tablespoons milk and a pinch of salt. Enough for the top and sides of a 6-inch.
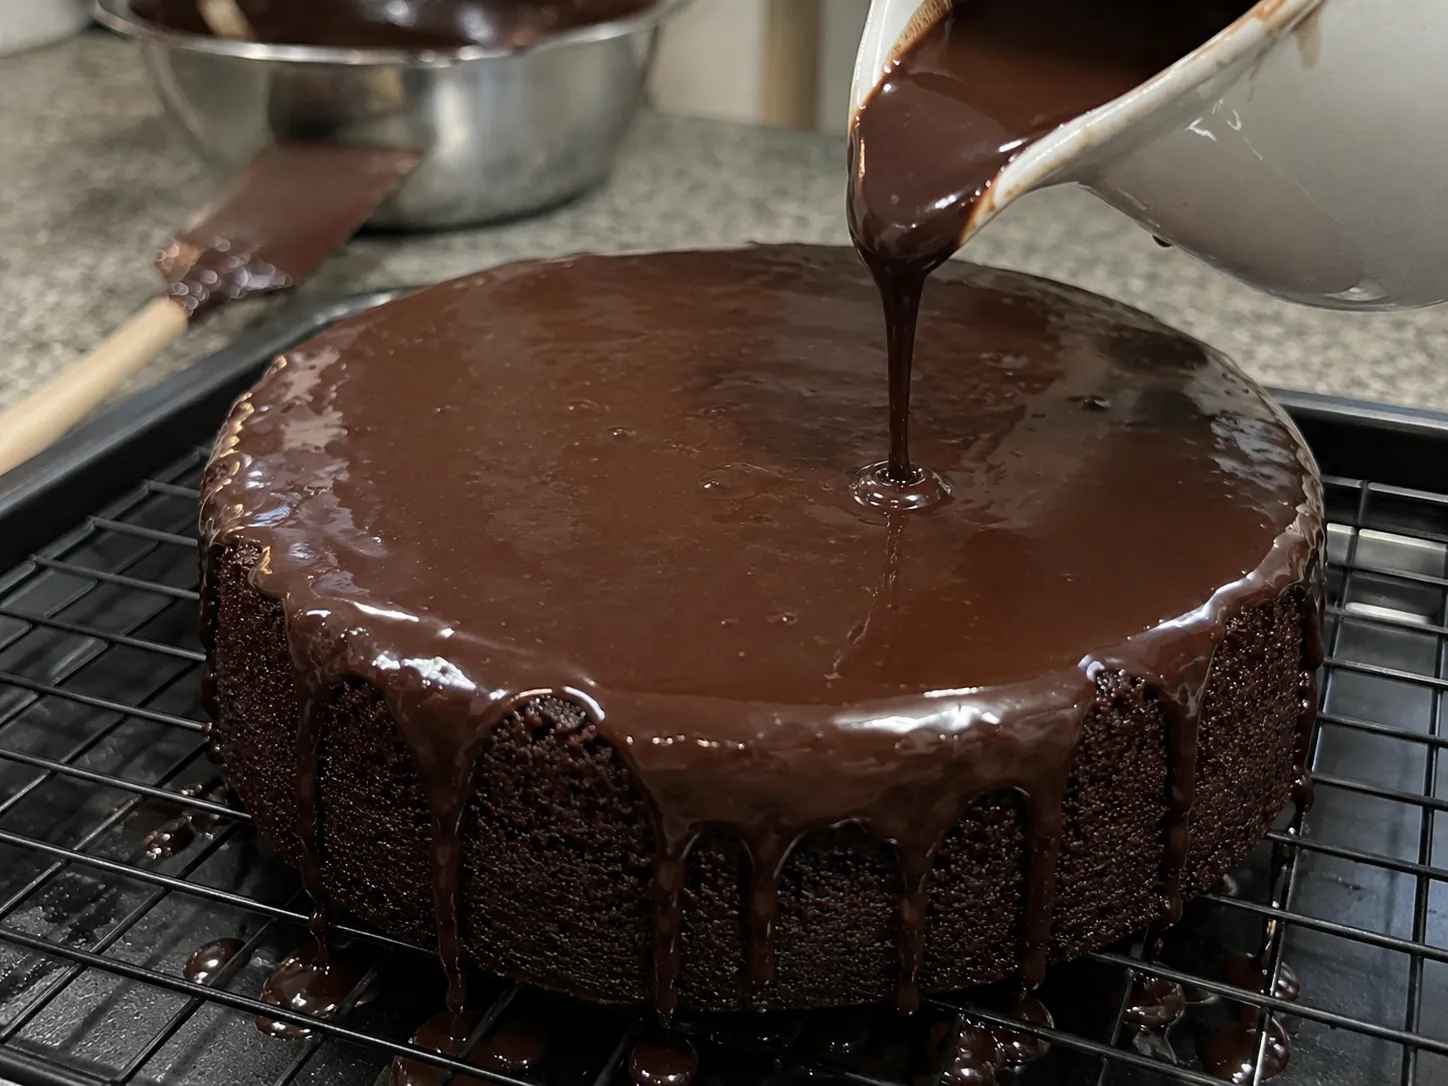
- Chocolate ganache. Equal weights of chopped dark chocolate and hot cream, stirred smooth and left to thicken 20 minutes. The easiest good-looking option and the one I make most.
- Cream cheese frosting. Works better on chocolate than people expect, and if you add a teaspoon of cinnamon to the batter it becomes a close cousin of our air fryer carrot cake.
- Two layers. Split the batter between two 4-inch pans and bake 16 to 20 minutes. Strip both, and treat them as two separate cakes rather than assuming they finish together.
- Molten middle. Push a few squares of chocolate into the batter before baking and pull at 195°F instead of 200. Halfway between this and our air fryer lava cake.
- Add espresso powder. Half a teaspoon into the dry ingredients, on top of the coffee. It does not taste of coffee, it just makes the chocolate read darker still.
- Cupcakes from this batter. It makes about 8. Drop to 320°F and check at 13 minutes, still to 200°F, and rotate at halfway. Our air fryer cupcakes page has the full argument about basket position.
For the same flavor in smaller formats, air fryer brownies and the single serving air fryer mug cake are the two I fall back on, and what you can and cannot bake in an air fryer is worth reading before you try scaling any of this up.
Storage and freezing
- Unfrosted, room temperature: 3 days in an airtight container, once completely cool. An oil cake keeps noticeably better than a butter one, for the same reason it tastes moister.
- Frosted: 2 days at room temperature with buttercream or ganache, 4 refrigerated with cream cheese frosting. Bring refrigerated slices back to room temperature before eating.
- Do not refrigerate it unfrosted. Cold air pulls moisture out of an uncovered crumb faster than anything else you could do to it.
- Frozen: 3 months, unfrosted and well wrapped. Wrap it while it is barely warm rather than stone cold, so the little steam left inside stays in there.
- Refreshing a day-old slice: 60 to 90 seconds at 300°F, unfrosted, brings it back better than you would think.
Thirty minutes of air fryer time against an hour of preheating and running a full oven for one small cake is a real saving, and if you want the actual number for your electricity rate the running cost calculator will work it out. All four air fryer tools are in one place, the accessories guide covers which small pans are worth owning, and the full recipe index has everything else.
Frequently asked questions
QWhy are the edges of my air fryer chocolate cake dry?
Because wet batter cannot get hotter than about 212F, and the edge runs out of water first. While any part of a cake still holds free water, every bit of heat arriving goes into boiling that water rather than raising the temperature, so almost the whole cake sits near 212F for most of the bake. The outer half inch is heated through the metal wall as well as from the air, so it dries out well before the middle does, and the moment it does there is nothing capping it any more and it climbs toward the air temperature. That is why it is a sharp ring rather than a gradual fade. Fix it with a soaked cake strip, a lower temperature of 310F, and pulling at 200F rather than baking to a clean toothpick.
QDo cake strips actually work in an air fryer?
Yes, and they are the single most effective thing on this page, but they are not insulation and they do not last the whole bake. A soaked strip is a band of water held against the pan wall, and evaporating water absorbs a huge amount of heat, so while it is wet it pins the outside of the pan near 212F. When the water is gone it is just a dry rag. In a basket with fast moving air that usually happens somewhere around 25 to 30 minutes, so soak it genuinely wet rather than damp, and keep the bake inside half an hour. That is exactly why this recipe runs 28 to 32 minutes rather than a slower 45.
QHow do you make a cake strip without buying one?
Cut a strip of aluminum foil about four inches wide and long enough to wrap the pan with a little overlap. Lay a folded strip of wet paper towel down the middle, fold the foil over it into a band roughly the height of the pan, and wrap it snugly around the outside, tucking the ends so it grips. Wrap it tight with no loose flapping ends, because an air fryer fan moves air fast enough to lift loose foil into the heating element, where it scorches and can catch. Held tight against a pan by its own tension there is nothing for the air to get under and it is completely safe.
QShould I cover the cake with foil in the air fryer?
Not for the whole bake, which is what one widely shared recipe does. Covering the top from the start does prevent dry edges, but it does it by trapping steam, so the top never dries, never browns and never sets. That is why that recipe takes 45 minutes when the oven version of the same cake takes under 35. You have turned the air fryer into a steamer and given up the one thing it does well. Wrap the sides with a wet cake strip, which targets the part that actually has the problem, and leave the top open. If your basket runs hot and the top is getting dark early, tent it loosely for the last ten minutes only.
QWhat temperature should chocolate cake be inside?
200F in the dead center, measured halfway down with an instant-read thermometer. That is where the starch has gelatinized and the egg protein has set. Under 195 it will sink as it cools. At 210 and up it is dry, and the edge has been past saving for several minutes. A toothpick only comes out properly clean at around 205 to 210F, so even when you read it correctly it is telling you to stop several degrees late, and on a cake with a dry edge problem those are the most expensive degrees in the bake.
QWhy is the toothpick test worse on a chocolate cake?
Two reasons stack up. First, you cannot read it: on a vanilla cake, raw batter shows up pale and obvious against the wood, while on a chocolate cake wet batter and moist crumbs are both dark brown and telling them apart at arm's length over a hot basket is genuinely hard. Second, even a correct reading is late, because a toothpick only comes out clean once the batter touching it has fully set, at roughly 205 to 210F, which is past where you wanted to stop. A thermometer costs about the same as two coffees and turns the whole thing into a number.
QOil or butter for air fryer chocolate cake?
Oil, and this is the one cake where I would not hesitate. Butter is about 80 percent fat and 16 percent water and it is solid at room temperature, so once a butter cake has cooled to eating temperature there is firm fat running through the crumb, and firm fat reads as dry on the tongue even when the cake holds plenty of moisture. Oil is 100 percent fat and stays liquid, so the same crumb reads as moist. Butter tastes better, which is why our vanilla cake creams butter and sugar, but a chocolate cake has cocoa doing all the flavor work so there is nothing to miss. The water in butter is also 16 percent more moisture that has to be boiled off during the bake, which works directly against the dry edge problem.
QWhy does the recipe use hot coffee?
Two jobs at once. It blooms the cocoa, which is the bigger one: cocoa powder is around a fifth fat and carries much of its flavor in compounds that only release into hot liquid or fat, so mixing it in dry and adding cold milk leaves most of it locked in the particles. Hot liquid opens it up, and it is the difference between a cake that tastes brown and one that tastes chocolatey. Second, coffee sharpens chocolate. At a third of a cup nothing tastes remotely of coffee, it just makes the cocoa read darker and less flat. Boiling water works and the cake is still good, so use water if you would rather. Add the liquid last and expect the batter to go very thin, which is correct.
QCan I use Dutch-process cocoa?
It works, but add another quarter teaspoon of baking powder. This recipe leans on baking soda, and baking soda needs an acid to react with. Natural cocoa is acidic and supplies one. Dutch-process cocoa has been alkalized to close to neutral, so it contributes nothing, and soda that never reacts tastes faintly soapy and gives no lift. The buttermilk is acidic too, which is why Dutch is workable here rather than a disaster, but it will not carry the whole job on its own. Natural cocoa is the straightforward answer and it is what most US supermarket cocoa is. Dutch does give you a darker, mellower cake if you prefer that.
QWhat size cake pan fits in an air fryer?
A 6-inch round at least 2 inches deep fits most 5 to 6 quart baskets with air moving around it, and that is what this recipe is written for. A 7-inch works in larger baskets and bakes faster because the same batter sits shallower, 22 to 26 minutes. Two 4-inch rounds take 16 to 20 minutes and make a small layer cake. Fill any of them just over halfway and no more, because this batter climbs in the first ten minutes and a pan filled higher will dome, crack, and push the top of that dome toward the element. Measure your basket before buying, since the gap between a pan that fits and one that does not is usually about half an inch.
QCan I use a silicone pan instead of a cake strip?
Yes, and it is a genuinely clever shortcut. Silicone conducts heat badly, which is normally a nuisance and here is exactly what you want, because the pan wall is the source of the problem. A silicone pan is effectively a permanent cake strip that never dries out, so no wrapping is needed. The trade is that it slows the whole bake down to 32 to 36 minutes and gives you almost no browning on the sides, so the cake comes out paler and softer around the outside. If you are frosting it, none of that matters. If you want a cake with some structure to its edge, metal plus a strip is better.
QHow long does chocolate cake take in an air fryer?
28 to 32 minutes at 310F for a 6-inch, plus 3 minutes to preheat, and start checking the temperature at 28. Published times for this run anywhere from 25 minutes to 45, and the spread is not machine variation. It is mostly pan size and whether the recipe covers the top with foil, which slows everything down by trapping steam. Time is the least reliable instruction here anyway: a 7-inch pan holds the same batter shallower and runs 22 to 26 minutes, silicone runs 32 to 36, and two 4-inch pans are done in 16 to 20. The internal target of 200F in the center is the same for all of them.
Never overbake again
Get our one-page times & temps cheat sheet, plus a new tested recipe each week.
No spam · unsubscribe anytime