
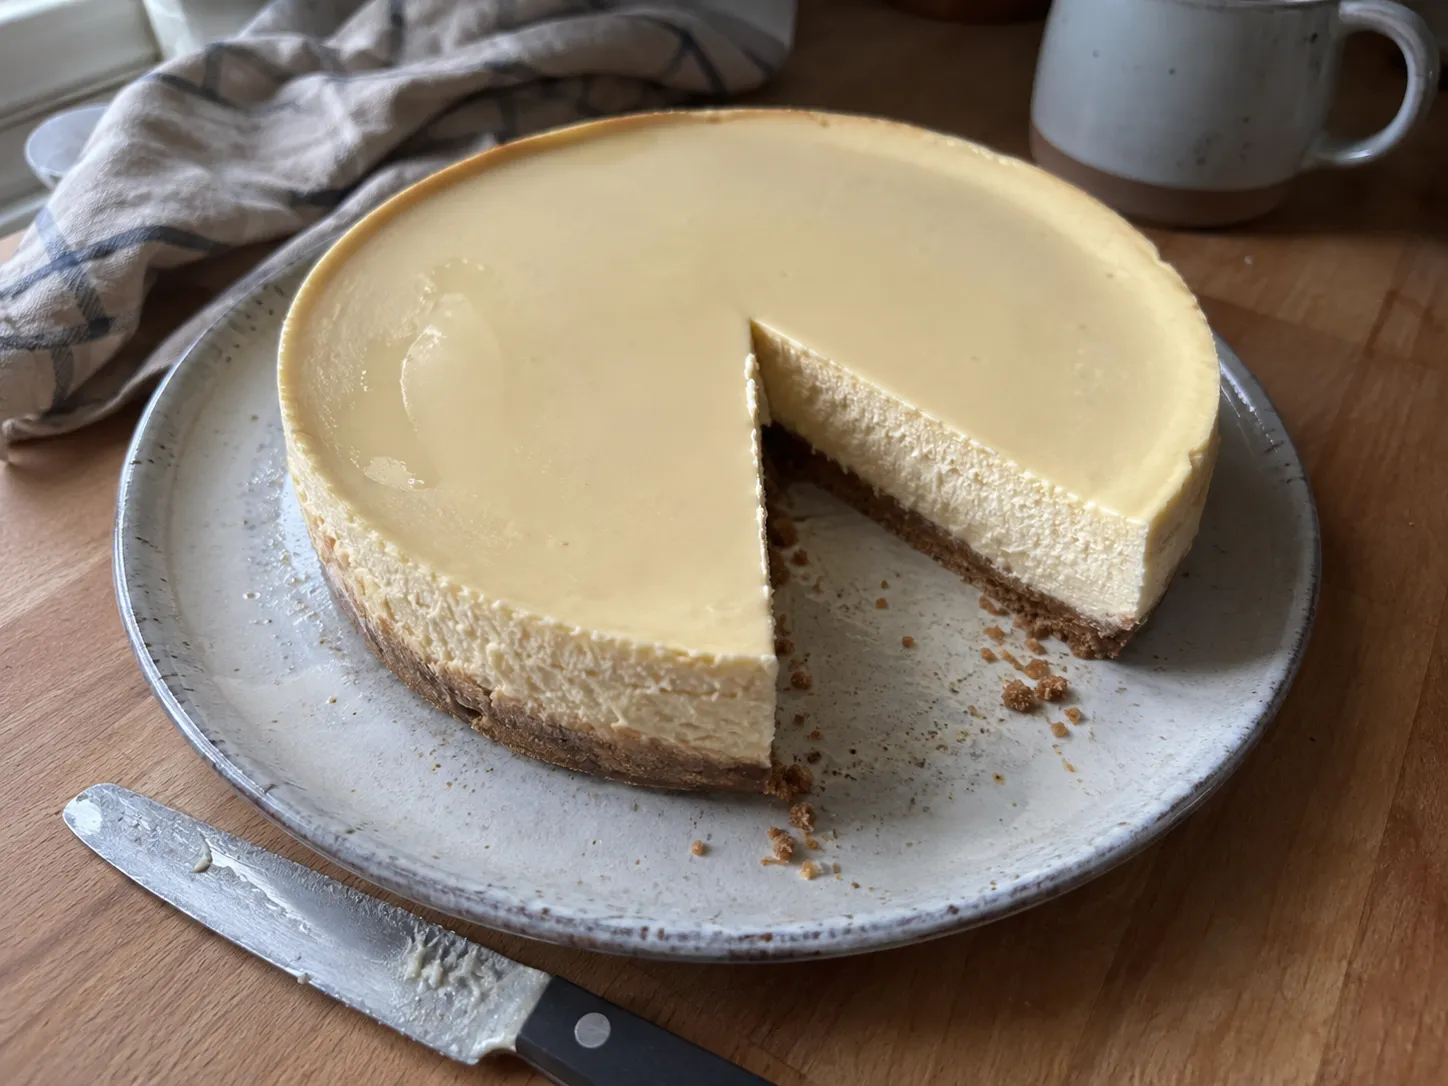
The first air fryer cheesecake I made came out with a crack across it wide enough to see the crust through. I had followed a recipe that promised no water bath and no cracks, and I had done everything it said. So I made it again, got a smaller crack, and made it a third time and got a perfect one, and I could not tell you what I had done differently.
That is an annoying way to cook. It took me a while to work out that the recipes are all giving the same reassurance for the same wrong reason, and once you drop that reason the actual fixes are specific and repeatable.
Quick answer: 6-inch springform, 300°F (150°C) for 28 to 34 minutes. Beat on low the whole way, never high. Pull it when the center reads 150°F on an instant-read thermometer, not when it looks right. Cool it in the switched-off basket for 30 minutes with the drawer pulled out an inch, run a thin knife around the edge at the 10 minute mark, then chill at least 6 hours. No water bath at any point.
The water bath myth
Read the popular air fryer cheesecake recipes and you will keep meeting the same sentence, usually phrased as the machine acting like a built-in water bath because the circulating air surrounds the pan evenly.
That is a nice thought and it is backwards. Here is what a water bath is actually doing in a conventional oven:
It caps the temperature
Water cannot go above 212°F at normal pressure. A pan sitting in water has its sides held near that, no matter what the oven is set to, so the edges cannot race ahead of the middle.
It adds humidity
Evaporating water fills the oven with steam, and a humid surface dries far more slowly. A cheesecake in a water bath keeps a soft, moist top for most of the bake.
It slows everything down
Both effects together stretch the bake out, which gives the middle time to reach setting temperature before the outside has gone past it.
Now compare that with an air fryer. It is a small, sealed box with a fan driving hot dry air at high speed across the surface of your food. It is the least humid and least gentle cooking environment in the kitchen. It does not resemble a water bath in any respect, and if anything it is the exact opposite on every count.
So why can you genuinely skip the water bath here? Two honest reasons, neither of which is the one you keep reading:
- The cheesecake is small. A 6-inch cheesecake is about half the volume of a 9-inch one. The distance from the edge to the center is short, so the middle reaches setting temperature before the edge has had time to overcook. Most of what a water bath buys you on a big cheesecake is simply not needed on a small one.
- The temperature is low. 300°F is gentle enough that the edge-to-center gap stays small. That is doing the same job a water bath does, by a different route.
Which matters because it tells you where the real risk is. The air fryer is not protecting your cheesecake from drying. It is actively drying it, faster than an oven would, and the method below is built to work around that rather than to pretend it is not happening.
What actually cracks a cheesecake
Three things crack a cheesecake, and a water bath only ever helped with one of them. That is the whole reason people who skip the water bath still get cracks, and the reason people who use one sometimes get cracks anyway.
1. It went past its setting temperature
This is the big one. A cheesecake is a baked custard, and the thing holding it together is coagulated egg protein. Egg white starts to thicken around 145°F and becomes a tender solid at about 150°F. That is the target.
Go past it and the proteins do not just set harder. They contract and squeeze out the water held between them, which is a process called syneresis. You get two symptoms at once: a slightly grainy, weepy texture, and a surface under tension that tears. A cheesecake pulled at 150°F and one pulled at 165°F are not the same dessert with slightly different timing. They are different textures.
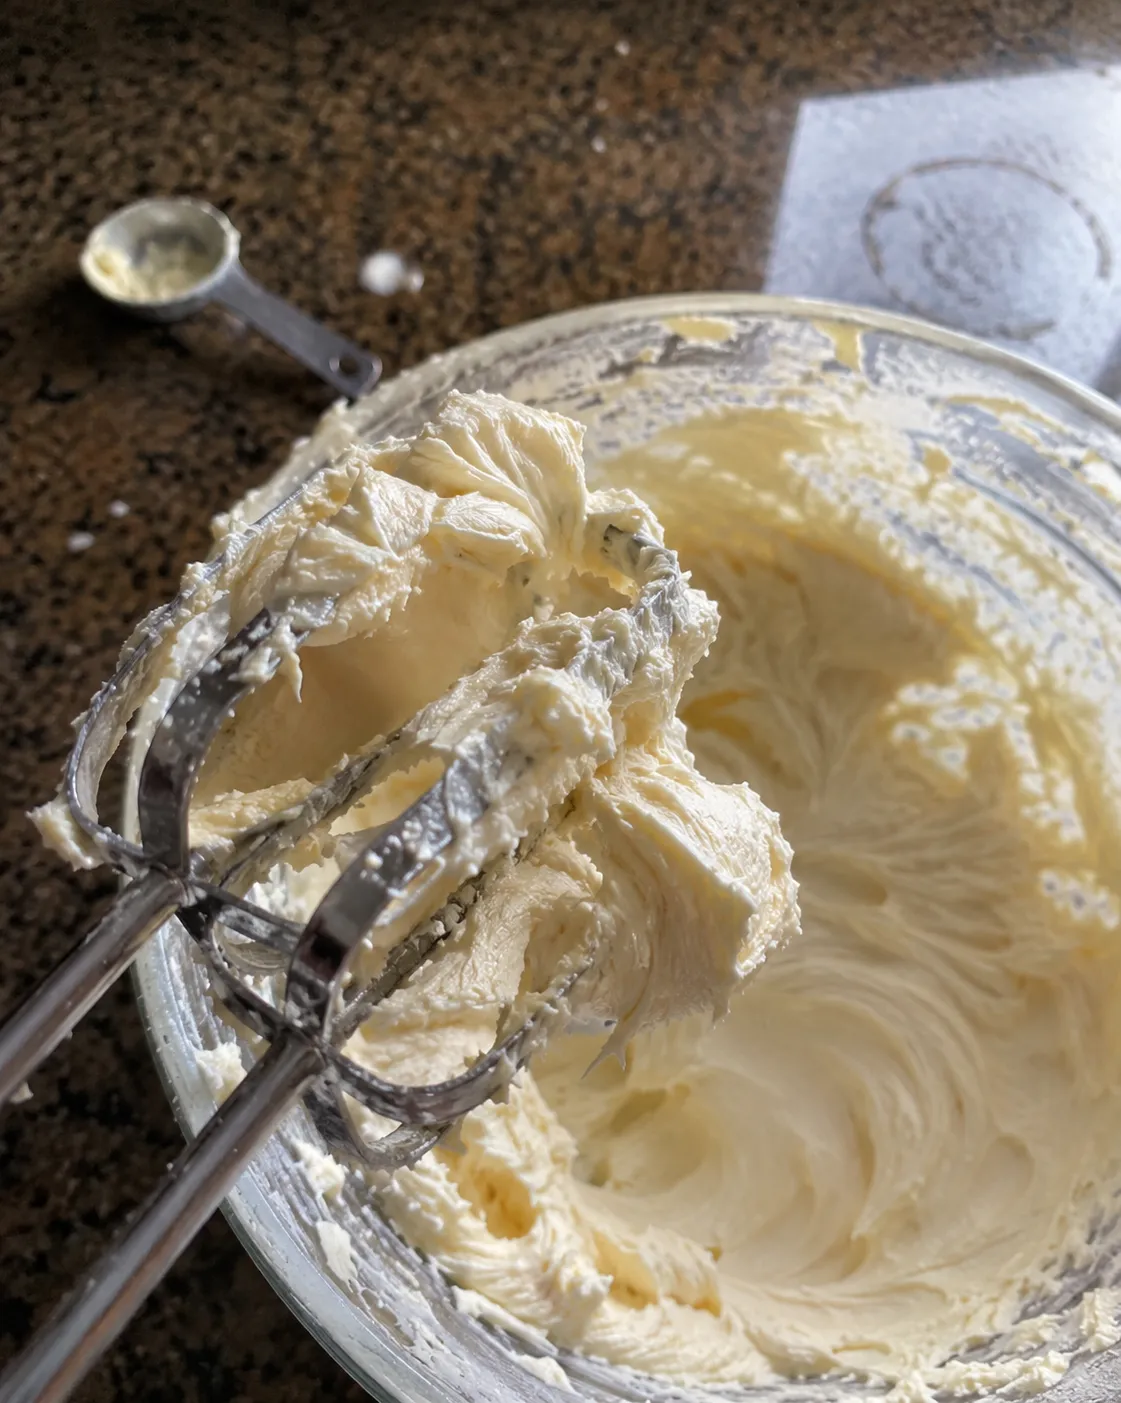
2. Air was beaten into the batter
Cream cheese whipped on high traps air. Those bubbles expand in the heat, push the surface up into a dome, and then collapse as the cheesecake cools and contracts. The surface has to go somewhere and it splits.
This is why every step in the method below says low speed. You are not aerating anything, you are just combining, the same principle as the coagulation entry in our glossary. A slower, lower mix gives you a denser and much more reliable cheesecake.
3. It was glued to the side of the pan
This is the one almost nobody mentions, and it is the most satisfying to fix because it takes ten seconds.
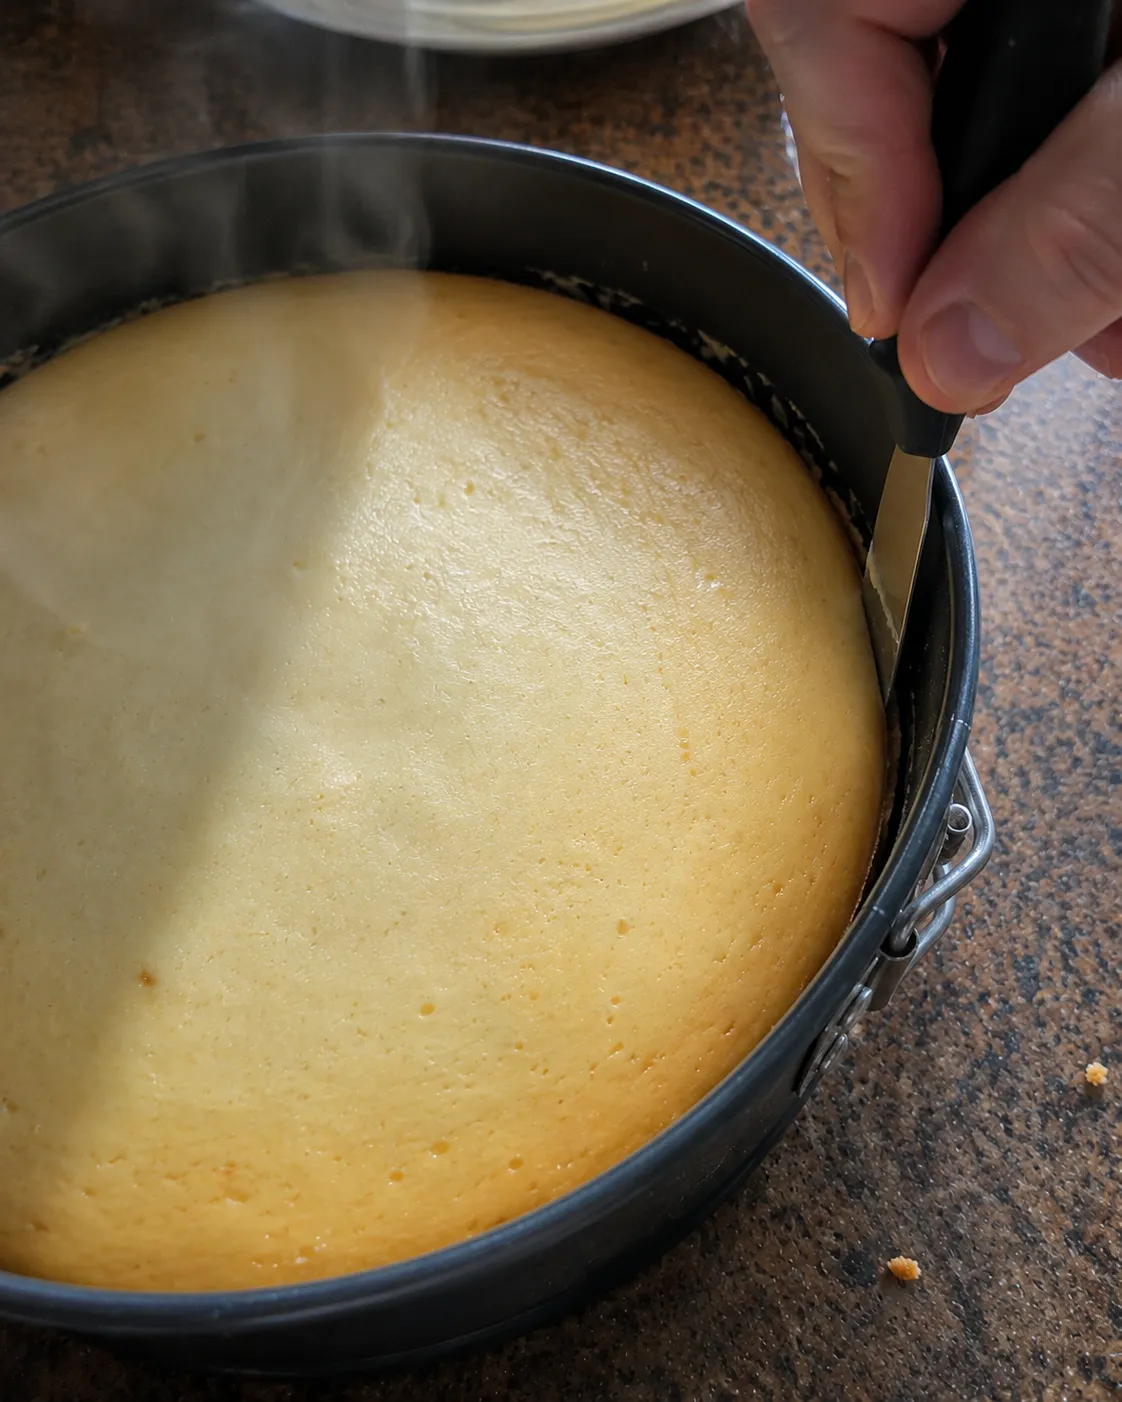
A cheesecake shrinks as it cools. If the top edge is still stuck to the wall of the springform, the middle contracts while the rim is held in place, and the cake tears itself apart to relieve the tension. That is a mechanical failure, not a baking one, which is why it can happen to a perfectly baked cheesecake.
The fix is to butter the sides of the pan properly, and then run a thin knife around the edge about ten minutes after it comes out, while it is still warm and flexible. Once it can shrink freely, it just shrinks.
Worth noticing what is not on that list: surface drying. A dry top is real, and an air fryer causes it faster than an oven does, but on its own it gives you a dull, slightly leathery surface rather than a crack. It only turns into a crack when it combines with number one. Low temperature and a thermometer handle both.
150°F, and why the wobble test is a guess
Every air fryer cheesecake recipe I read ends on some version of the same instruction: bake until the edges are set and the center still has a slight wobble, like Jell-O, but not wet.
I have made a lot of cheesecakes and I still could not reliably tell you the difference between a wobble that means 148°F and a wobble that means 162°F. Through a hot basket, on a dark surface, with the light behind you. It is not a test, it is a vibe.
The temperature version is unambiguous:
| Where you measure | Target | What it means |
|---|---|---|
| Dead center, halfway deep | 150°F | Pull it. Egg protein has just set. |
| 1 to 2 inches in from the edge | 165 to 170°F | Normal. The edge always runs ahead. |
| Center at 140°F | Too early | Middle will stay loose and soupy after chilling. |
| Center at 160°F and up | Too late | Proteins contracting, water squeezing out, crack likely. |
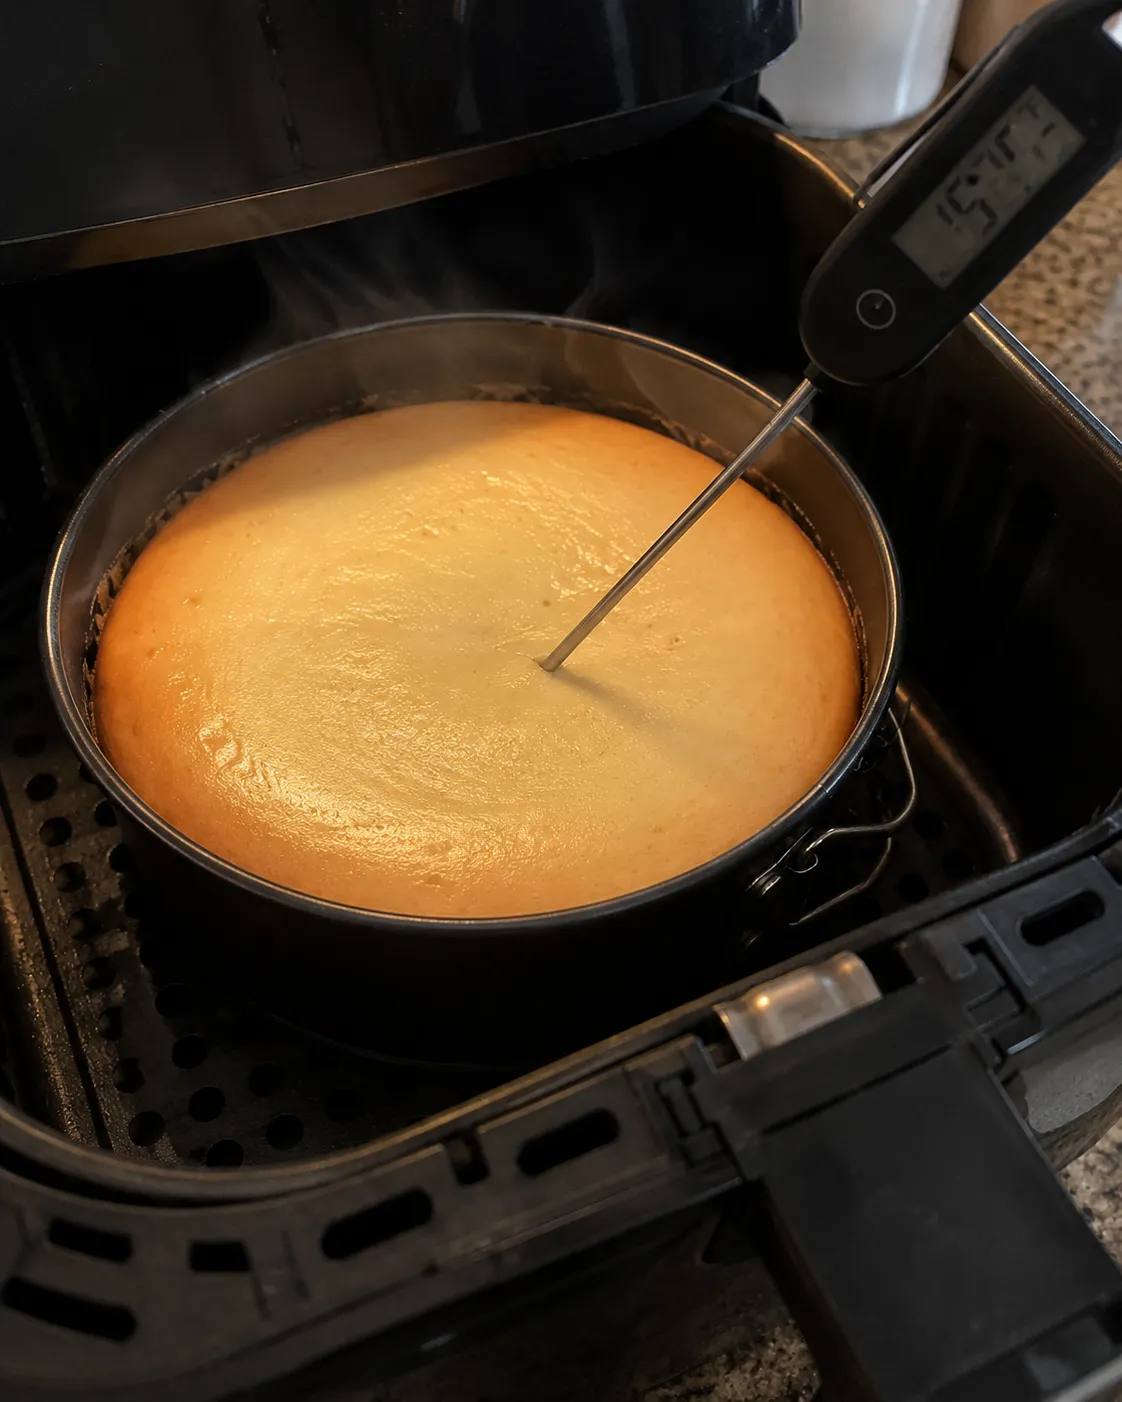
Push the probe in at an angle so the tip sits in the middle of the depth rather than resting on the crust. One reading, five seconds, then out. The small hole it leaves closes as the cake settles and disappears entirely under a topping.
There is a second reason the number matters here more than it would in an oven. Carryover cooking keeps happening after you pull it, and a small cheesecake in a hot metal pan carries over a good few degrees. Pulling at 150°F is not pulling it underdone. It is accounting for the fact that it is still cooking.
If you do not own an instant-read thermometer yet, this is the recipe that pays for one. Our air fryer baking chart has the internal targets for everything else on the site, and most of them are far more forgiving than this.
Ingredients
Makes one 6-inch cheesecake, eight slices. Everything wants to be at room temperature, which is not a formality here and is explained below.
For the crust
- 3/4 cup (90g) graham cracker crumbs, about 6 full sheets
- 3 tablespoons (42g) unsalted butter, melted
- 1 tablespoon granulated sugar
- Pinch of salt
For the filling
- 16 oz (450g) full-fat block cream cheese, room temperature
- 1/2 cup (100g) granulated sugar
- 1 tablespoon (8g) cornstarch
- 2 large eggs, room temperature
- 1/3 cup (80g) sour cream, room temperature
- 1 teaspoon vanilla extract
- 1 teaspoon lemon juice
- Pinch of salt
Four of these are doing real work
- Block cream cheese, not the tub kind. Spreadable cream cheese in a tub has extra water and gums in it to keep it soft at fridge temperature. Both work against you: more water to drive off, and a texture that never quite sets. Full-fat blocks, and check the label says cream cheese rather than cream cheese spread.
- Room temperature, genuinely. Cold cream cheese does not smooth out, so you beat it harder to get the lumps out, and beating it harder is exactly the thing that cracks it. Leave it on the counter for an hour. Cold eggs added to a smooth mixture will also seize it back into lumps, which is the same trap one step later.
- A tablespoon of cornstarch. Starch gets between the egg proteins and physically interferes with them tightening into a dense network. It widens the window between set and overset, it makes the cake more forgiving if you overshoot by a few degrees, and it costs nothing. Some classic recipes leave it out for purity. I would rather have the insurance.
- A teaspoon of lemon juice. Not enough to taste lemony. It sharpens the dairy flavor and the acid tightens the set very slightly, which helps a small cheesecake hold its shape when you cut it.
How to make it
- Prepare the pan properly. Butter the base and sides of a 6-inch springform, then line the base with a parchment circle. Butter the sides again over the top of the join. The sides are what matters, since that is where it will stick and tear.
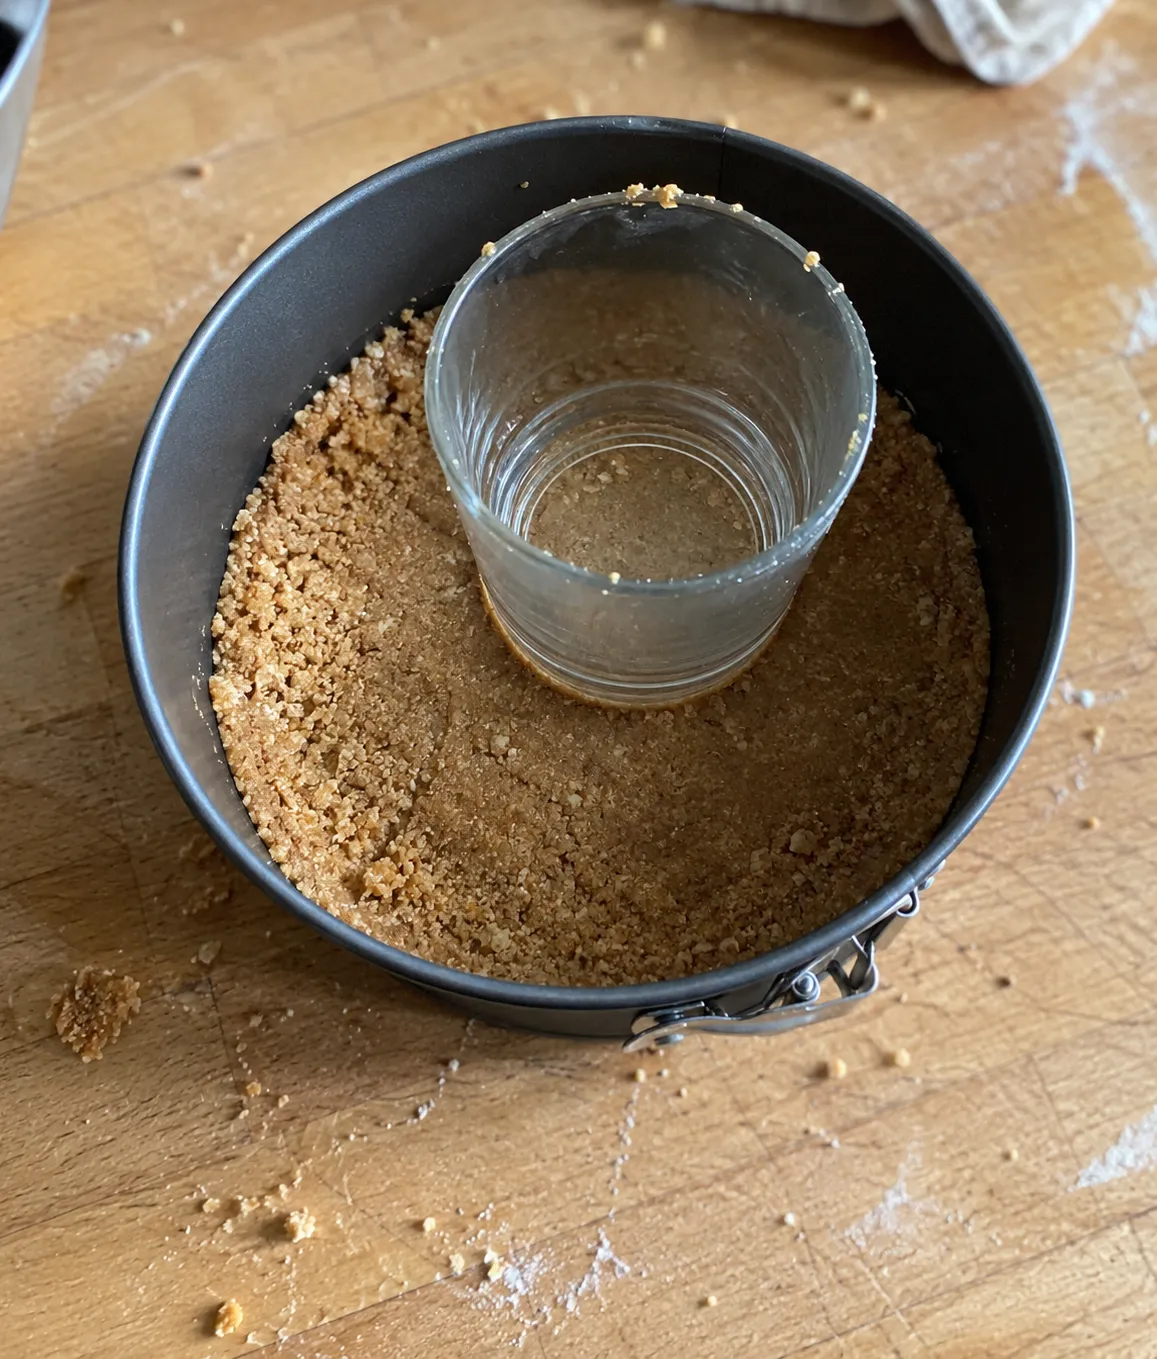
- Make the crust. Mix the crumbs, sugar, salt and melted butter until it looks like wet sand. Press firmly into the base, using the flat bottom of a glass. Press it well up into the corner where the base meets the wall, since a loose corner is where the filling leaks in and glues itself down.
- Pre-bake the crust 5 minutes at 300°F. This sets it so it does not go soggy under the filling. Let it cool while you mix.
- Beat the cream cheese alone, on low, until smooth. No sugar yet. Scrape the bowl twice. You are looking for no lumps at all, because any lump left now will still be there in the finished cake.
- Add the sugar and cornstarch, still on low. Mix just until combined, about 30 seconds.
- Add the eggs one at a time, on the lowest speed. Let the first disappear before the second goes in. This is the moment most air gets beaten in, so go slowly and stop the second it looks uniform.
- Fold in the sour cream, vanilla, lemon juice and salt by hand. A spatula, not the mixer. Twenty seconds.
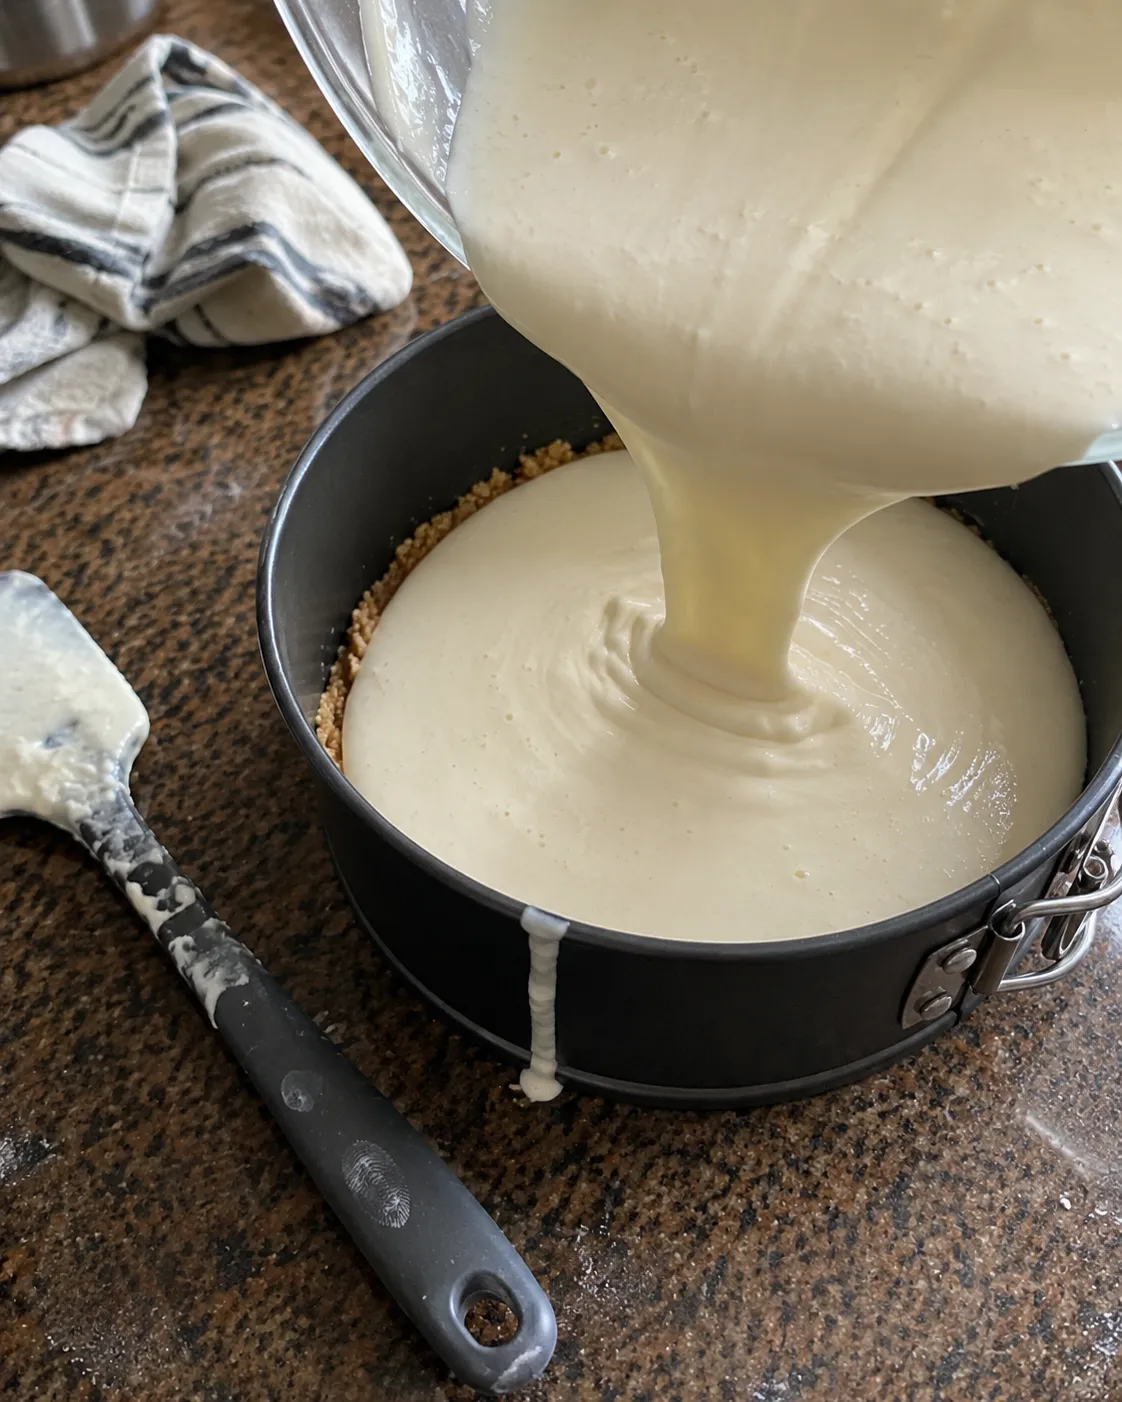
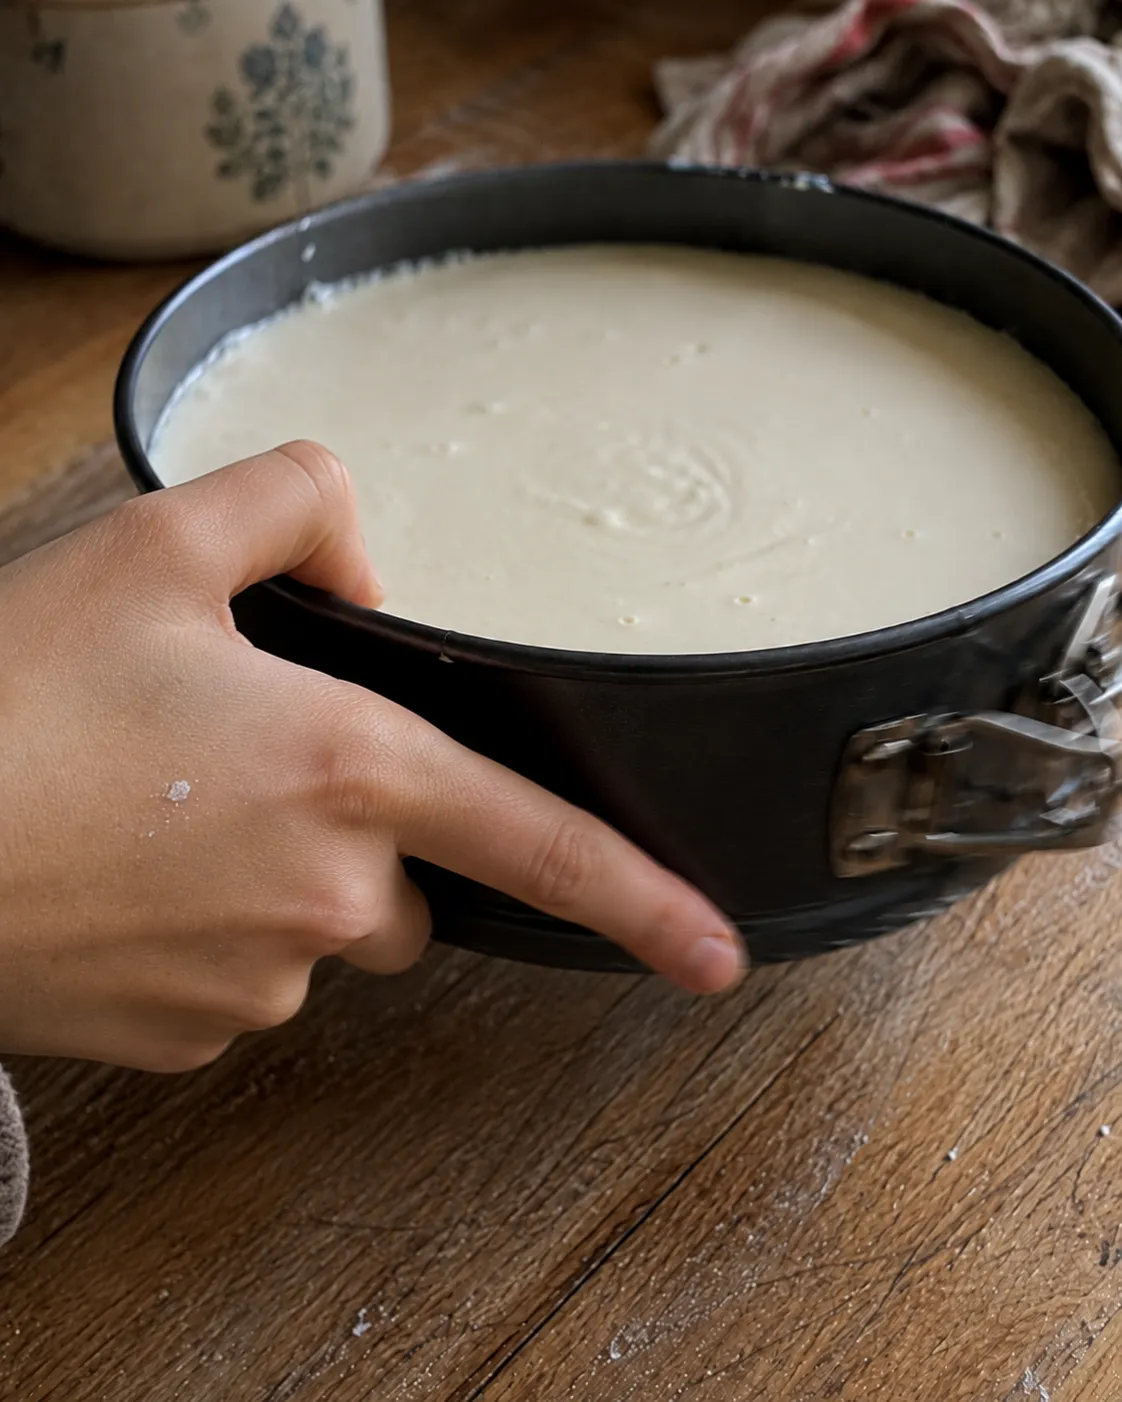
- Tap the pan to release air. Pour the filling over the cooled crust, then tap the pan firmly on the counter ten or twelve times. You will see bubbles rise and pop. Pop any that stay with a toothpick.
- Preheat the air fryer to 300°F for 3 minutes, then lower the pan in. If your basket is shallow, check the top of the pan clears the element by at least an inch and a half.
- Bake 28 to 34 minutes. Do not open it for the first 20. The edges will set and puff very slightly, the center will stay soft.
- Check the temperature at 28 minutes. Probe the dead center at an angle, halfway deep. You want 150°F. Under 145, give it 3 more minutes and check again.
- Turn the machine off and leave it in there. Pull the drawer out about an inch so the heat escapes slowly, and leave it 30 minutes. Do not lift it out into a cold kitchen.
- Run a knife around the edge at 10 minutes in. Ten minutes into that 30, slide a thin knife between the cheesecake and the pan wall all the way around. This is the step that stops the tear.
- Chill at least 6 hours, still in the pan. Overnight is better. Cover it loosely once it is at room temperature, not before, or condensation will drip onto the top.
- Release and serve. Unclip the springform, lift the ring straight up, and cut with a hot dry knife, wiping between slices.
Do not skip the slow cool. Taking a 150°F cheesecake out into a 70°F kitchen drops its surface temperature fast, and the surface contracts faster than the middle. That is a tearing force applied to a cake that has only just set. Thirty minutes in the switched-off basket with the drawer cracked open costs you nothing but patience and prevents more cracks than any other single step here.
The cooling stage is half the recipe
Everything above this point takes about 50 minutes. Everything below takes seven hours, and it is where most cheesecakes are lost.
A cheesecake is not finished when it comes out of the basket. It is barely set, still carrying over, and structurally at its weakest. What happens over the next few hours decides both whether it cracks and what the texture is like.
| Stage | How long | What is happening |
|---|---|---|
| In the off basket, drawer ajar | 30 min | Carryover finishes. Temperature falls slowly enough that the surface and the middle contract together. |
| Knife around the edge | At the 10 min mark | Frees the rim so contraction cannot tear it. |
| On the counter | 1 hour | Comes down to room temperature. Only cover it once it gets there. |
| Refrigerated, in the pan | 6 hours minimum | Fat sets firm and the texture changes completely. This is not optional and it cannot be rushed. |
Six hours is the minimum that works. Overnight is genuinely better, and a cheesecake eaten on day two is better than one eaten on day one. It is the rare bake that improves with a night in the fridge.
The reason the chill matters so much is that a warm cheesecake is held together by set egg protein alone, which is not much. Cold, the butterfat in the cream cheese is solid, and that is what gives you a clean slice and a dense creamy texture rather than something closer to a soft custard. Cutting into it after two hours is not tasting it early, it is tasting a different and worse dessert.
Pan size, springforms and leaks
A 6-inch springform is the right pan for this and fits a 4-quart basket comfortably. Check yours has at least an inch of clearance around the sides for airflow, and an inch and a half above the rim so the top is not sitting right under the element. Our pan size calculator will tell you what fits if you measure your basket, which is easier than finding out with batter already in the tin.
| Pan | Batter | Temp | Time | Pull at |
|---|---|---|---|---|
| 6-inch springform | 1 x recipe | 300°F | 28 to 34 min | 150°F center |
| 7-inch springform | 1 x recipe | 300°F | 22 to 27 min | 150°F center |
| Two 4-inch pans | 1 x recipe | 300°F | 16 to 20 min | 150°F center |
| 6 silicone cups | 2/3 x recipe | 295°F | 11 to 14 min | 150°F center |
A shallower cheesecake in a wider pan bakes faster, not slower, because heat has less depth to travel through. The internal target never changes. Scaling to a different pan is what the recipe scaler is for.
The springform leak question
Springform pans leak a little at the base seam. In a conventional oven with a water bath this is a genuine problem, because water gets in. With no water bath it is a much smaller problem: at worst a little melted butter from the crust escapes and sits in the drawer, where it can smoke.
Two things handle it. Press the crust firmly into the corner where base meets wall, which seals it from the inside. And sit the springform on a small square of foil with the edges turned up an inch, which catches anything that does escape. Do not wrap the whole pan in foil the way you would for a water bath, since that blocks airflow to the base and you will end up with a wet crust. Our guide to foil and parchment in an air fryer covers what is safe. If butter has already found the drawer and you are getting smoke, that guide explains the rest.
No springform at all? A 6-inch cake tin with a parchment sling works: two long strips crossed in the base, hanging over the sides, so you can lift the whole thing out once it is chilled and firm. It is fiddly but it is far better than trying to invert a cheesecake. Silicone also works and releases beautifully, and using silicone in an air fryer covers the small temperature adjustment it needs.
Fixing what goes wrong
| What you got | Why | Fix |
|---|---|---|
| One clean crack across the middle | Overbaked past the set point, or cooled too fast. | Pull at 150°F. Thirty minutes in the switched-off basket with the drawer ajar. |
| Cracks around the rim only | Stuck to the pan wall while it contracted. Mechanical, not a baking fault. | Butter the sides properly and run a knife around the edge 10 minutes after it comes out. |
| Domed then sank and split | Air beaten into the batter expanded, then collapsed. | Low speed throughout, especially when the eggs go in. Tap the pan before baking. |
| Grainy, slightly weeping texture | Proteins went past setting and squeezed out their water. | The same fix as the first row. This one is only visible after chilling. |
| Lumpy, not smooth | Cold cream cheese, or cold eggs seizing a smooth mixture. | An hour on the counter for everything. Beat the cream cheese smooth before anything else joins it. |
| Middle still loose after chilling | Underbaked. Chilling firms a cheesecake but it cannot set one that never set. | 150°F, measured. Under 145 needs more time. |
| Soggy crust | Crust not pre-baked, or the pan was wrapped in foil so the base got no airflow. | Five minutes at 300°F before the filling goes in. Foil under, not around. |
| Dark or blistered top | The pan sat too close to the element. | A shallower pan or a lower rack. Drop to 290°F and add time. |
| Smoking air fryer | Butter leaked from the springform seam onto the hot drawer. | Press the crust into the corner, sit the pan on a foil square with turned-up edges. |
If a crack does appear, it is worth saying that it is purely cosmetic. The cheesecake tastes the same. Sour cream topping, a fruit compote or a layer of salted caramel covers it completely and nobody will ever know. More general failures are collected in air fryer baking troubleshooting, and why air fryer cakes sink covers the closely related problem of a set surface over an unset middle.
Flavors and toppings
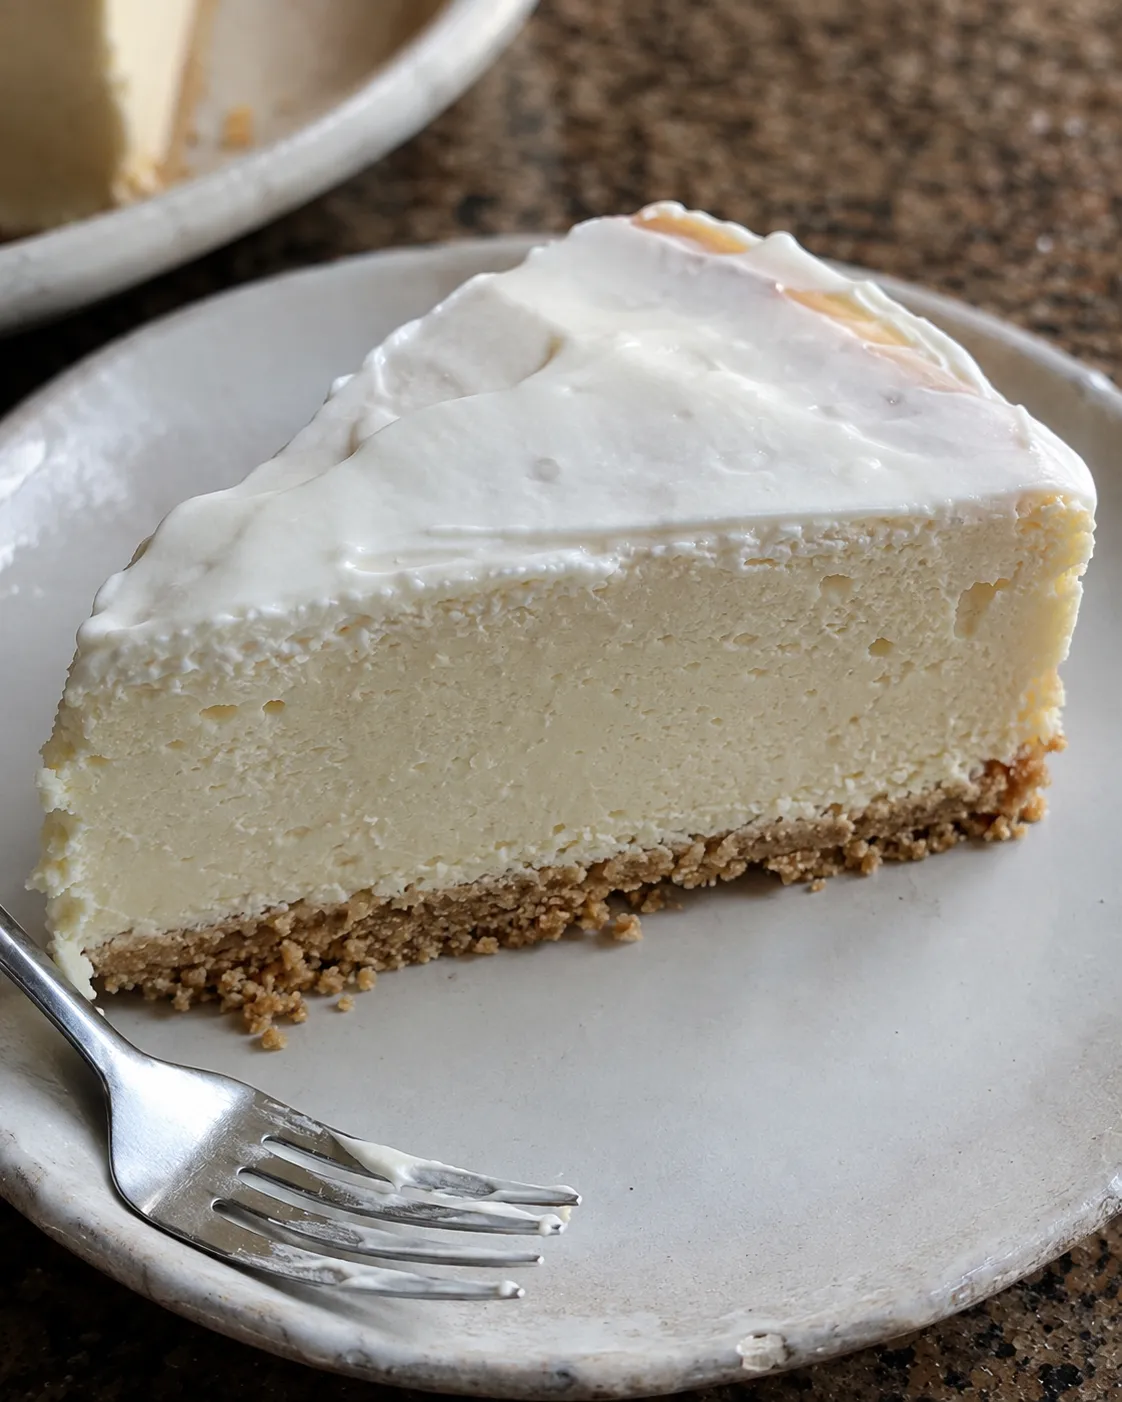
- Sour cream top. Mix 1/2 cup sour cream with 2 tablespoons sugar and 1/2 teaspoon vanilla, spread it over the cheesecake as soon as it comes out of the basket, and return it for 3 minutes at 300°F. It sets into a smooth white layer and hides any crack completely. This is the traditional New York finish and it is the best insurance on this page.
- Berry compote. A cup of frozen berries with 2 tablespoons sugar and a squeeze of lemon, simmered until it thickens. Cool it fully before it goes near the cheesecake.
- Salted caramel. Warm, poured over just before serving so it stays glossy rather than soaking in.
- Biscoff or chocolate crust. Swap the graham crumbs for Biscoff, or use chocolate cookie crumbs and cut the sugar in the crust, since both are sweeter than graham.
- Lemon. Add the zest of a whole lemon and take the juice up to a tablespoon. The extra acid firms the set slightly, so check the temperature a couple of minutes earlier.
- Pumpkin spice. 1/3 cup pumpkin puree and a teaspoon of pumpkin pie spice, and add 4 to 6 minutes since the puree brings water. Related in spirit to air fryer pumpkin bread.
- Crustless. Works fine. Butter the pan well, skip steps 2 and 3, and take 3 or 4 minutes off since there is no crust insulating the base.
If you want more small-format desserts from a basket, air fryer lava cake is the other one that lives or dies on pulling it at the right moment, air fryer brownies are far more forgiving, and air fryer carrot cake is what I make when I want something that does not need six hours of waiting.
Storage and freezing
- Refrigerated: 5 days, covered, and genuinely better on day two than day one. Keep it in the springform base until you have cut it, since that is the easiest way to move it.
- Cover it cold, not warm. Plastic wrap over a warm cheesecake collects condensation and drips it onto the surface, which leaves marks. Wait until it is at room temperature.
- Frozen, whole: 2 months. Chill completely first, then freeze uncovered for an hour until the surface is firm, then wrap in plastic and foil. Thaw overnight in the fridge.
- Frozen, in slices: better if you want one at a time. Freeze the slices on a tray until solid, then wrap individually. A slice thaws in the fridge in about 3 hours.
- Do not add toppings before freezing. Fruit compote goes watery and caramel goes grainy. Top after thawing.
- Cutting cleanly: a thin knife dipped in hot water and wiped dry between every slice. It makes more difference than any other serving trick.
Running an air fryer for half an hour versus heating a full oven for a single 6-inch cheesecake is not a close contest, but if you want the number for your own electricity rate, the running cost calculator works it out. If you are converting a conventional oven cheesecake recipe, put its numbers through the air fryer calculator first, then ignore its time estimate and go by the 150°F reading, which does not change between machines. All four of our air fryer baking tools are in one place.
Frequently asked questions
QDo you need a water bath for air fryer cheesecake?
No, but not for the reason most recipes give. They say the air fryer acts like a built-in water bath, which is backwards: a water bath caps the pan temperature near 212°F and floods the oven with humidity, while an air fryer is the driest, fastest-moving air in your kitchen. The real reasons you can skip it are that a 6-inch cheesecake is small, so the distance from edge to center is short, and that 300°F is gentle enough to keep the edge from racing ahead of the middle. A water bath in an air fryer basket would also be a genuinely bad idea, since water in the drawer kills the airflow the machine relies on.
QWhat temperature should air fryer cheesecake be inside?
150°F in the dead center, measured halfway down with an instant-read thermometer pushed in at an angle. Egg white starts to thicken around 145°F and becomes a tender solid at about 150°F, which is exactly the set you want. An inch or two in from the edge it will read 165 to 170°F, and that is normal. Pull it at 150 rather than waiting for a firmer look, because carryover cooking keeps raising the temperature after it leaves the basket, and a small cheesecake in a hot metal pan carries over a good few degrees.
QWhy did my air fryer cheesecake crack?
One of three things, and only one of them is about baking. Most often it went past its setting temperature: past about 150°F the egg proteins contract and squeeze out the water held between them, which puts the surface under tension until it tears. Second, air beaten into the batter expanded in the heat, domed the top and then collapsed. Third, and the one nobody mentions, the cheesecake was still glued to the wall of the springform while it cooled and contracted, so it tore itself apart. Fix all three: pull at 150°F, beat on low throughout, and run a thin knife around the edge ten minutes after it comes out.
QHow long do you cook cheesecake in an air fryer?
28 to 34 minutes at 300°F for a 6-inch springform, and start checking the temperature at 28. A 7-inch pan is shallower with the same batter so it runs faster, 22 to 27 minutes. Two 4-inch pans take 16 to 20. The time changes with the depth of the filling, but the internal target of 150°F in the center never does, which is why it is a more useful instruction than any number of minutes.
QCan I use a springform pan in an air fryer?
Yes, and it is the easiest pan for this because you never have to invert a cheesecake. Springforms leak a little at the base seam, which is a real problem in a conventional oven with a water bath but a minor one here: at worst a little melted butter escapes into the drawer, where it can smoke. Press the crust firmly into the corner where the base meets the wall to seal it from the inside, and sit the pan on a square of foil with the edges turned up an inch. Do not wrap the whole pan in foil the way you would for a water bath, because that blocks airflow to the base and gives you a wet crust.
QWhy does my cheesecake need to chill for 6 hours?
Because the texture you are after does not exist until it is cold. A warm cheesecake is held together only by set egg protein, which is not much. Chilled, the butterfat in the cream cheese is solid, and that is what gives you the dense creamy texture and a clean slice rather than something closer to a loose custard. Six hours is the minimum that works and overnight is better. Cutting into it after two hours is not eating it early, it is eating a different and worse dessert. It is one of the rare bakes that is genuinely better on day two.
QCan I use tub cream cheese instead of block?
I would not. Spreadable cream cheese in a tub has extra water and stabilizing gums added so it stays soft straight from the fridge, and both work against you here. The extra water has to be driven off during baking, and the gums keep the texture soft in a way that never quite sets into a sliceable cheesecake. Use full-fat blocks and check the label actually says cream cheese rather than cream cheese spread. Low-fat versions have the same problem for the same reason.
QDo I need to preheat the air fryer for cheesecake?
Yes, three minutes at 300°F. Some cheesecake recipes tell you not to, on the theory that a gentler start is kinder to a custard. In practice a cold start just means the first several minutes happen at an unknown and rising temperature, which makes your timing meaningless and does nothing useful for the set. Preheat, then bake to temperature rather than to the clock, and the starting conditions stop mattering.
QMy cheesecake is still wobbly in the middle. Is it done?
Probably, and this is why the wobble test causes so much trouble. A correctly baked cheesecake at 150°F absolutely does still wobble in the center when you nudge the pan, and it firms up entirely during chilling. The problem is that a wobble at 148°F and a wobble at 162°F look almost identical through a hot basket, so people bake on and overshoot. Measure it instead. If the center reads 150°F, take it out and trust the fridge to do the rest.
QCan I make this without a crust?
Yes, and it is a good option if you want it gluten free without hunting for substitute crumbs. Butter the pan well, skip the crust steps entirely, and take 3 or 4 minutes off the bake, because the crust normally insulates the base a little and without it the bottom heats faster. Everything else is the same, including the 150°F target. A crustless cheesecake is slightly more fragile to move, so leave it on the springform base to serve.
QCan I double the recipe?
Not into one pan. Doubling gives you a deep cheesecake in a basket where the element is only a few inches above it, and the top will be well past 170°F long before the middle gets near 150. That is the exact combination that cracks. Bake two 6-inch cheesecakes one after the other, or use two 4-inch pans side by side if they fit with airflow around them. If you genuinely need a big cheesecake, that is the one job a conventional oven and a water bath still do better.
QWhy is my cheesecake grainy?
It was overbaked, and the graininess is water that the egg proteins squeezed out as they tightened past their setting point. You often cannot see it until after chilling, when the texture turns slightly curdled and a little liquid weeps out at the edges. Nothing fixes it after the fact, so it is a next-time problem: pull at 150°F, and consider leaving the tablespoon of cornstarch in, since starch gets between the proteins and widens the window between properly set and overset.
Never overbake again
Get our one-page times & temps cheat sheet, plus a new tested recipe each week.
No spam · unsubscribe anytime