

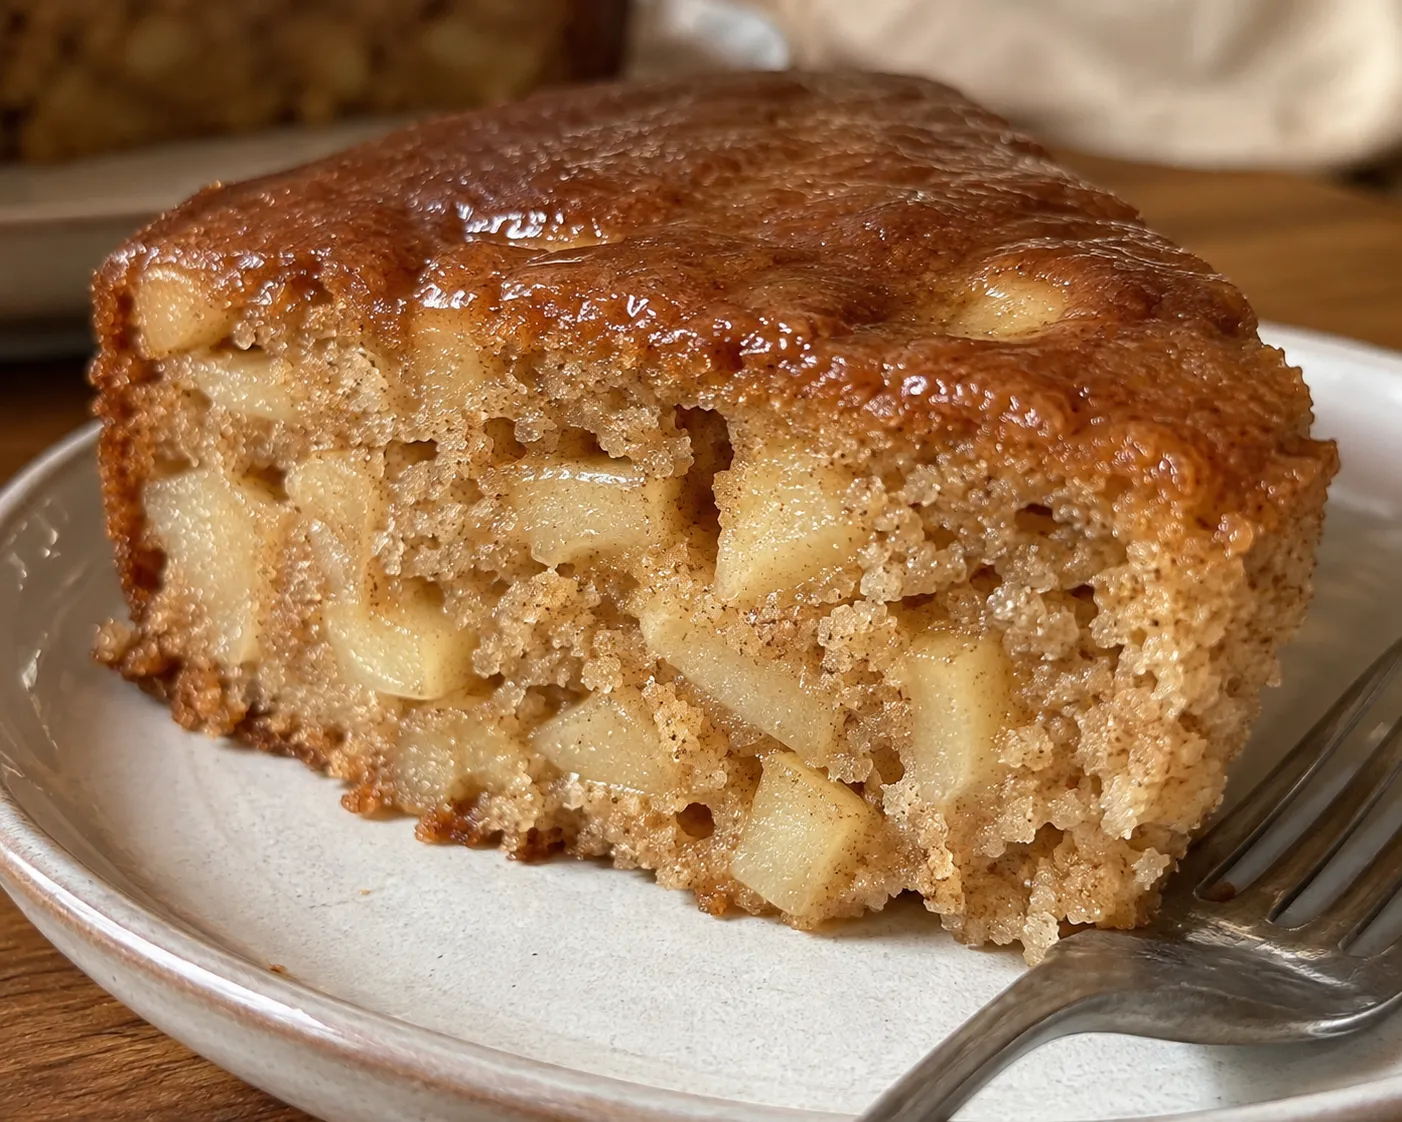
I made this cake four times in a week last October before I worked out what was wrong with it. It looked right every time. Golden top, decent rise, apples visible through the crumb. Then you cut it and there was a damp band running through the middle, not raw exactly, but dense and slightly sticky in a way that no amount of extra time seemed to fix. Adding ten minutes just gave me a dry edge and the same damp band.
The problem was not the bake. It was the apples, and it was in the batter before the cake ever went in.
Quick answer: Dice the apples small, toss them with a spoon of the sugar and let them drain in a sieve for 20 minutes, then discard or reduce the liquid that comes out. Bake in a 6-inch tin filled half full at 320°F (160°C), tented with foil for 20 minutes, then uncovered for 10 to 14. Pull the cake at 205 to 210°F in the center. Turn it out of the tin after 10 minutes, not longer.
The water problem nobody mentions
An apple is about 85 percent water. A medium one weighs around 6 ounces, so once you have peeled and cored it you are still holding roughly four and a half ounces of water and a bit of fiber and sugar. Two apples, which is what this cake takes, carry close to a cup of water into the batter.
Now look at what else is in there. One cup of flour, one egg and a yolk, two tablespoons of milk. The recipe's own liquid is a fraction of what the apples bring. You are not adding fruit to a cake batter. You are adding a cup of water to a cake batter and hoping it behaves.
In a conventional oven it mostly does behave, because the cavity is large, the air is relatively still, and steam leaves the cake slowly and evenly from every surface. An air fryer is the opposite of that on both counts at once, and this is the part that matters:
The fan dries the top
Fast moving air strips moisture from the surface within minutes and sets it into a crust. Once that crust forms, it is a lid.
The apples wet the bottom
Heat drives water out of every piece of apple. It has nowhere upward to go, so it collects in the batter around and beneath the fruit.
Two gradients, one small cake
You get a dry rim and a wet band in the same slice. Extra time makes the dry part drier without doing much for the wet part.
This is why "just bake it longer" does not work, and why almost nobody selling you an air fryer apple cake recipe wants to talk about fresh apples at all. Look at what is actually ranking for this search. One of the most popular results uses unsweetened applesauce and says outright that it saves you peeling and cooking apples. Another is a fritter batter. Another is a four-ingredient version with one cup of diced apple and three eggs in one cup of flour, baked for 12 to 15 minutes, which in my kitchen is not close to enough time for that much wet fruit.
Applesauce is a fine cake. I am not being sniffy about it. But applesauce has already had its water dealt with by someone else, in a factory, and calling the result an apple cake is a bit of a stretch. If you want the pieces of soft apple that make an apple cake worth eating, you have to handle the water yourself.
If your bakes are coming out wet in general and not just this one, the causes are usually the same three, and our air fryer baking troubleshooting guide works through them. For the opposite problem, how to avoid dry air fryer bakes covers it.
The 20-minute drain
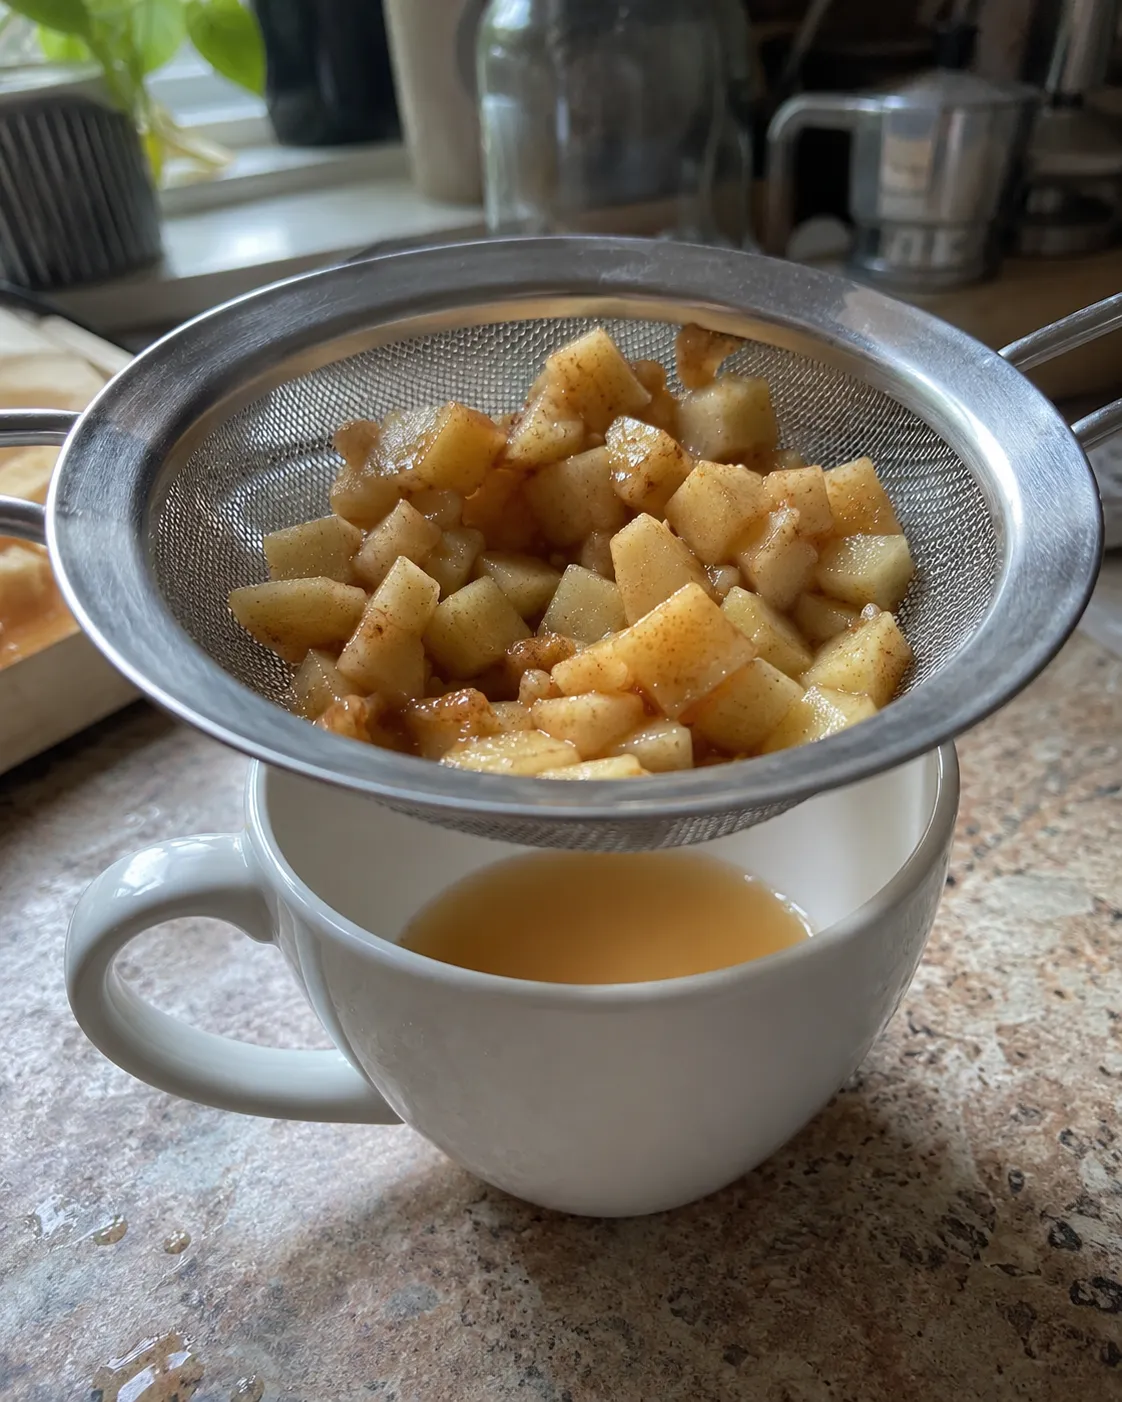
Pie bakers have known about this for a very long time and call it macerating. You toss the cut fruit with a little sugar and leave it. The sugar pulls water out of the apple by osmosis, the pieces slump slightly, and you pour off liquid that was going to end up in your cake either way. Doing it in a sieve before baking rather than in the oven during baking is the whole trick.
Twenty minutes with a tablespoon of the brown sugar gets somewhere between two and four tablespoons of juice out of two diced apples, depending on the variety and how ripe they are. That does not sound like much. It is about a quarter of the free water, and more importantly it is the water that would have run out first and fastest, right when the crumb is trying to set.
Two things I would tell you about doing this:
- Do not go much past 30 minutes. Beyond that the pieces start going limp and translucent, and they lose the bit of bite that makes them read as apple rather than as jam.
- Keep the juice. It is apple flavor and sugar in a small amount of water. Simmer it in a small pan for a minute or two until it thickens slightly and brush it over the warm cake. You get the flavor back without the water. It takes about ninety seconds and it is the single best thing you can do to this cake after the draining itself.
There is a second, smaller version of the same idea in the ingredient list. This cake uses one whole egg plus one extra yolk rather than two whole eggs. Egg white is close to 90 percent water. The yolk gives you the structure, the fat and the emulsifying power without carrying more water into a batter that already has a water problem. It is a small thing and it is free.
Which apples, and how to cut them
Apple variety matters more here than it would in a full-sized oven cake, because you have less margin for the extra water and less room for large pieces.
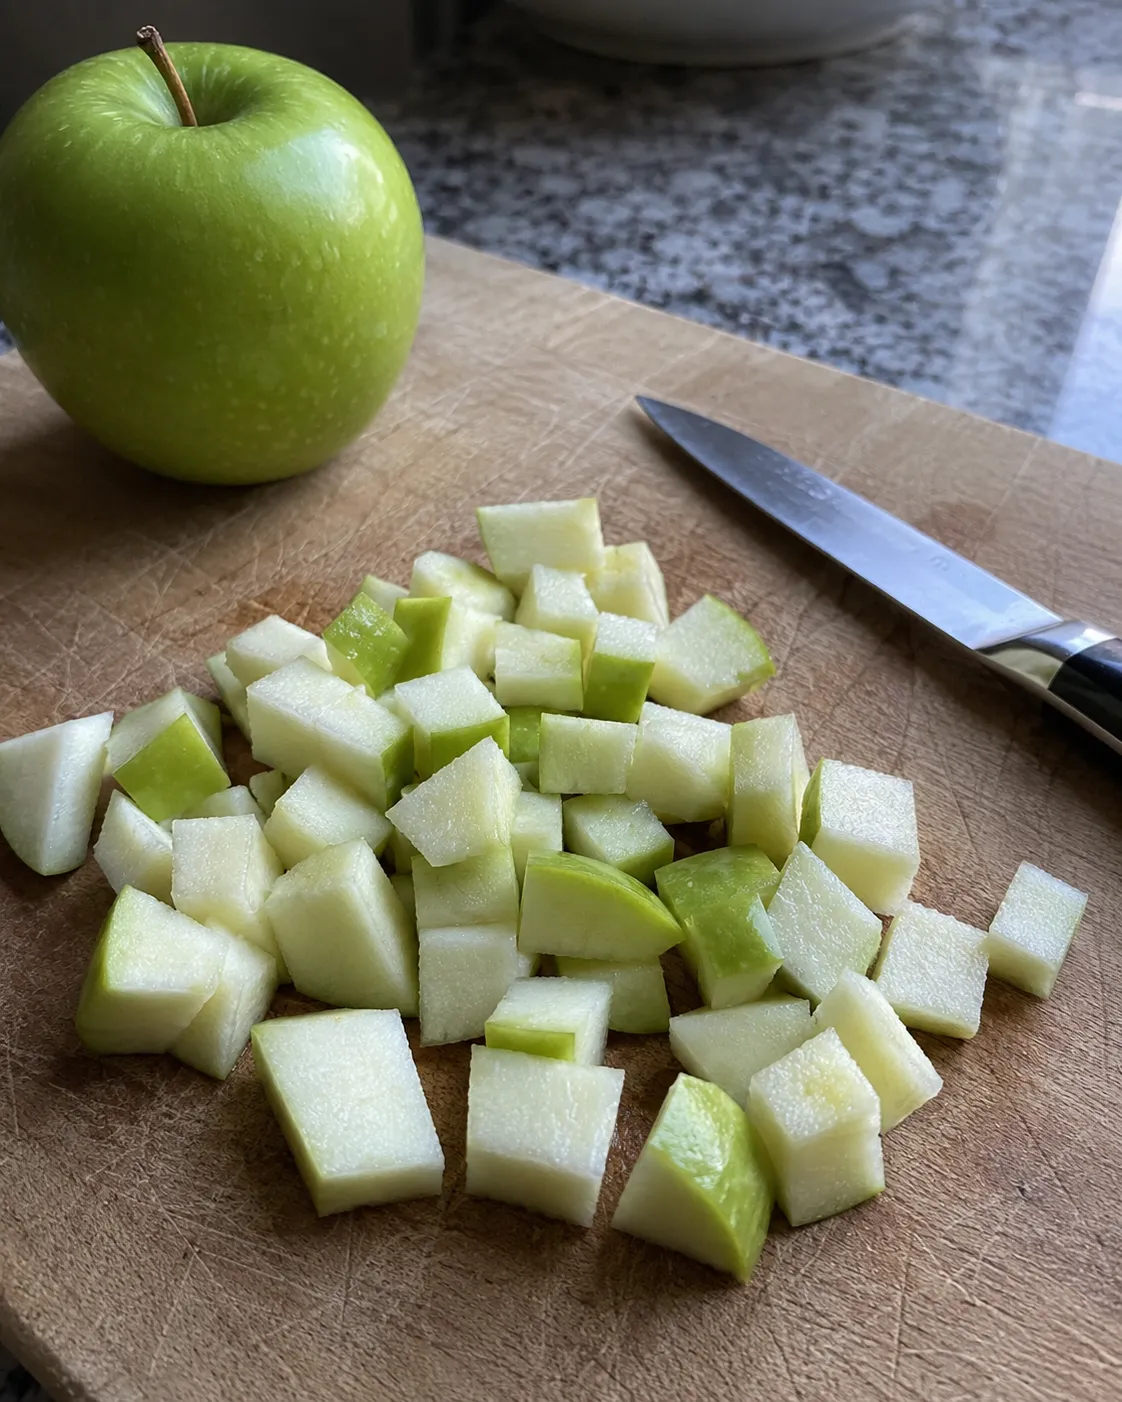
What you want is a firm, dense, tart apple. Granny Smith is the reliable one. The flesh is comparatively low in moisture, the cells hold together under heat instead of collapsing, and the acidity gives you something to taste against all that brown sugar. Honeycrisp tastes wonderful and holds its shape reasonably well, but it is noticeably juicier, so if you use it, drain it a full 25 minutes and expect a little more liquid in the sieve. A mix of one of each is genuinely the best version of this cake.
What you want to avoid is anything that goes mealy. Red Delicious and McIntosh both break down into wet pulp at baking temperatures, which gives you the sogginess without any of the texture you were paying for.
| Apple | Holds shape | Water | Use it? |
|---|---|---|---|
| Granny Smith | Excellent | Lower, dense flesh | First choice |
| Honeycrisp | Good, softens | High and very juicy | Yes, drain longer |
| Braeburn, Pink Lady | Very good | Moderate | Yes |
| Fuji, Gala | Fair | Moderate, sweeter | Fine, cut the sugar slightly |
| Golden Delicious | Fair to poor | Moderate | Acceptable at a push |
| Red Delicious, McIntosh | Poor, goes mealy | High | No |
Dice, do not slice
Most apple cake recipes tell you to slice, often because a fan of slices on top photographs well. In a 6-inch cake that is 2 inches deep, slices are a mistake. A slice is a flat sheet of water sitting in the middle of the batter, and it gives you two problems: the crumb directly around it stays wet, and the cake wants to split along that seam when you cut it.
Dice to about half an inch. Small enough that the pieces distribute and their water disperses instead of pooling, big enough that you can still feel them. Peel them, too. Skin does not soften in 32 minutes and you end up chewing little strips of it.
The flour toss. After draining, tip the apple pieces back into the sieve or a plate and toss them with a tablespoon taken from the measured flour, so they are lightly dusted. This does two useful things: the flour absorbs surface moisture, and it gives the pieces enough grip on the batter that they stay suspended instead of sinking to the bottom during the first few minutes of the bake. Take that tablespoon from the cup you already measured. Do not add extra.
What one bowl actually means here
I want to be straight with you about this, because "one bowl" gets used loosely.
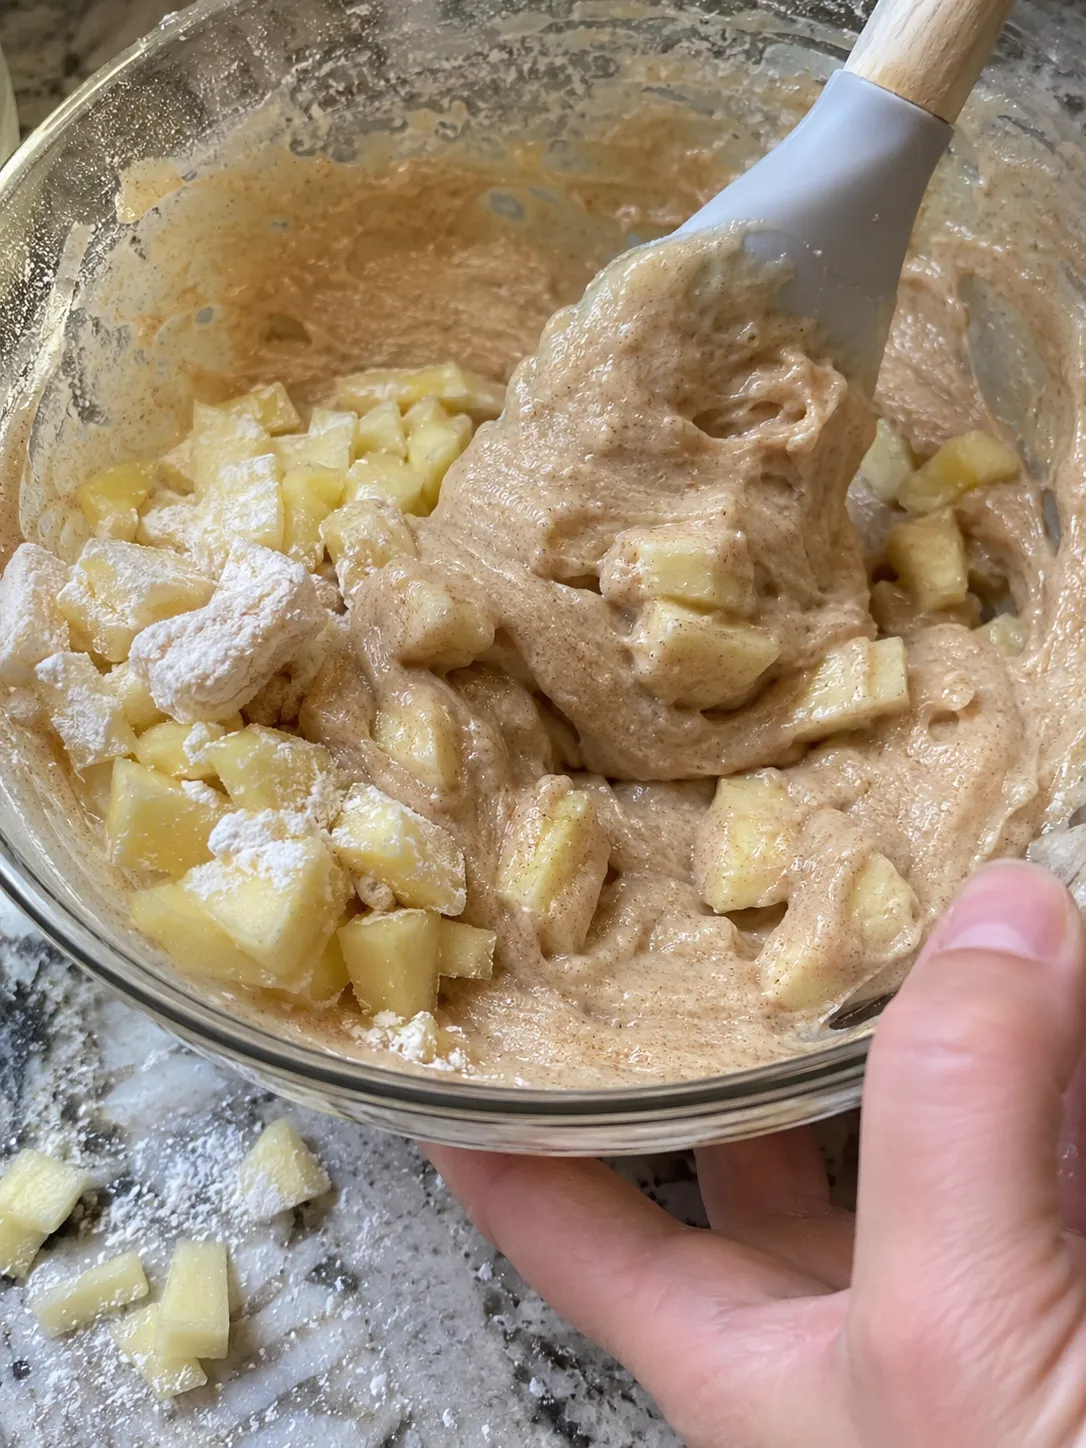
The batter is genuinely one bowl. Melted butter, brown sugar, egg, yolk and vanilla get whisked in it. The dry ingredients go straight on top of that, no separate bowl and no sifting. The apples go in last. One bowl, one whisk, one spatula.
The apples drain in a sieve set over a mug, which is not a bowl, and I am going to keep telling myself that. If you want the honest count it is one bowl, one sieve and a mug, and the sieve does its work while you are getting everything else out of the cupboard.
The reason a melted-butter, one-bowl method suits this cake specifically is that there is no creaming step to protect. In carrot cake or a plain butter cake, creaming butter and sugar is where all the lift comes from, so rushing it costs you. Here the lift comes from baking powder and soda, and the apples would deflate a delicately creamed batter anyway. Melted butter also coats the flour faster, which limits gluten development, and a tender crumb is what you want against firm pieces of fruit.
One more thing that is specific to this recipe: it uses a quarter teaspoon of baking soda alongside the baking powder, and it can, because there is real acid here. Apples are acidic, Granny Smith especially so, and brown sugar contains molasses, which is acidic too. Soda needs an acid to react with or it does nothing useful and leaves a soapy taste behind. In this batter it has plenty to work with, and it also encourages a little browning, which is welcome on a cake that is otherwise pale.
Ingredients
This makes one 6-inch cake, eight small slices. Scaling notes are further down, and our recipe scaler will do the arithmetic if you want a different tin size.
For the apples
- 2 medium Granny Smith apples, about 12 oz / 340g whole, peeled, cored and diced to 1/2 inch (about 1 1/2 cups diced)
- 1 tablespoon of the brown sugar, taken from the amount below
- 1 tablespoon of the flour, taken from the amount below
For the cake
- 1 cup (125g) all-purpose flour
- 1/2 cup (100g) light brown sugar, packed
- 1 teaspoon baking powder
- 1/4 teaspoon baking soda
- 1 1/4 teaspoons ground cinnamon
- 1/4 teaspoon ground nutmeg, ideally grated fresh
- 1/4 teaspoon salt
- 5 tablespoons (70g) unsalted butter, melted and cooled slightly
- 1 large egg plus 1 large egg yolk, room temperature
- 2 tablespoons (30ml) whole milk
- 1 teaspoon vanilla extract
Notes on a few of them
- Brown sugar, not white. Molasses brings acidity for the soda, a little extra moisture-holding capacity, and a flavor that suits apple far better than plain sweetness. Dark brown works and gives a deeper, almost toffee note.
- Melted butter, or oil. A third of a cup of neutral oil works and gives a marginally moister cake that keeps a day longer. Butter tastes better. I use butter.
- Fresh nutmeg if you have it. Pre-ground nutmeg loses most of what makes it interesting within a few months of opening. This is a cake where you notice.
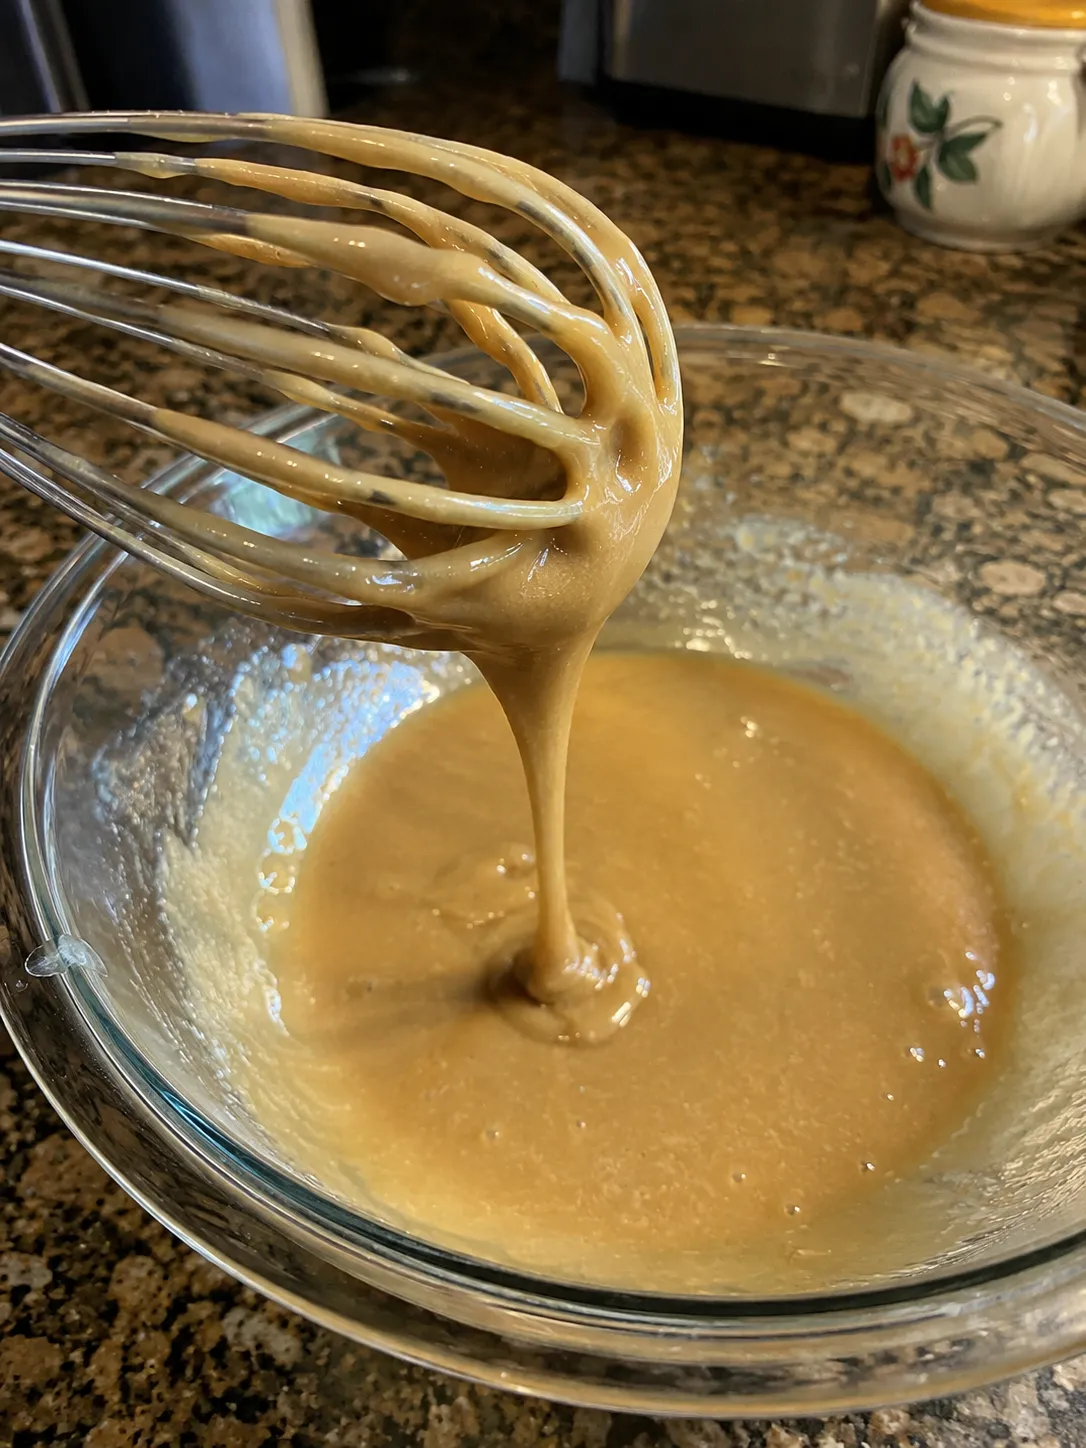
- Only two tablespoons of milk. That is deliberate and it is not a typo. The batter should look thick, closer to a cookie dough than a pourable cake batter, before the apples go in. The apples will loosen it as they bake. If yours will genuinely not fold together, add one more tablespoon and no more.
How to make it
- Dice and drain the apples. Peel, core and dice two apples to about half an inch. Toss with 1 tablespoon of the brown sugar in a sieve set over a mug and leave for 20 minutes. Get on with everything else while they sit. Keep the juice that collects.
- Line the tin. A 6-inch round tin, parchment circle in the base, collar up the sides. The collar earns its place here because apple cake sticks more than a plain one does.
- Melt the butter and let it cool for a couple of minutes so it does not scramble the egg.
- Whisk the wet. In your one bowl, whisk the melted butter with the remaining brown sugar until smooth, then the whole egg, then the yolk, then the milk and vanilla. About 30 seconds by hand. You are not aerating anything, just combining.
- Tip the dry straight on top. Flour (minus the tablespoon set aside), baking powder, baking soda, cinnamon, nutmeg and salt. Break up any clumps with a fork on top of the wet mixture before you start folding, so the leaveners spread out.
- Fold, and stop early. Fold with a spatula until the last streak of flour has just disappeared. The batter will be thick. That is correct. Overmixing at this stage builds gluten and gives you a tough crumb.
- Drain and flour the apples. Press the apples gently in the sieve, pour the juice into a small pan and set it aside. Toss the drained pieces with the reserved tablespoon of flour, then fold them into the batter in two goes. Fold, do not stir.
- Fill the tin. Scrape it in and level the top with the back of a spoon, which takes a moment because the batter is stiff. It should come no more than halfway up the tin. Tap the tin on the counter twice.
- Preheat the air fryer to 320°F (160°C) for 3 minutes. Batter that sits in a cold basket while it slowly warms up lets the butter separate before anything sets.
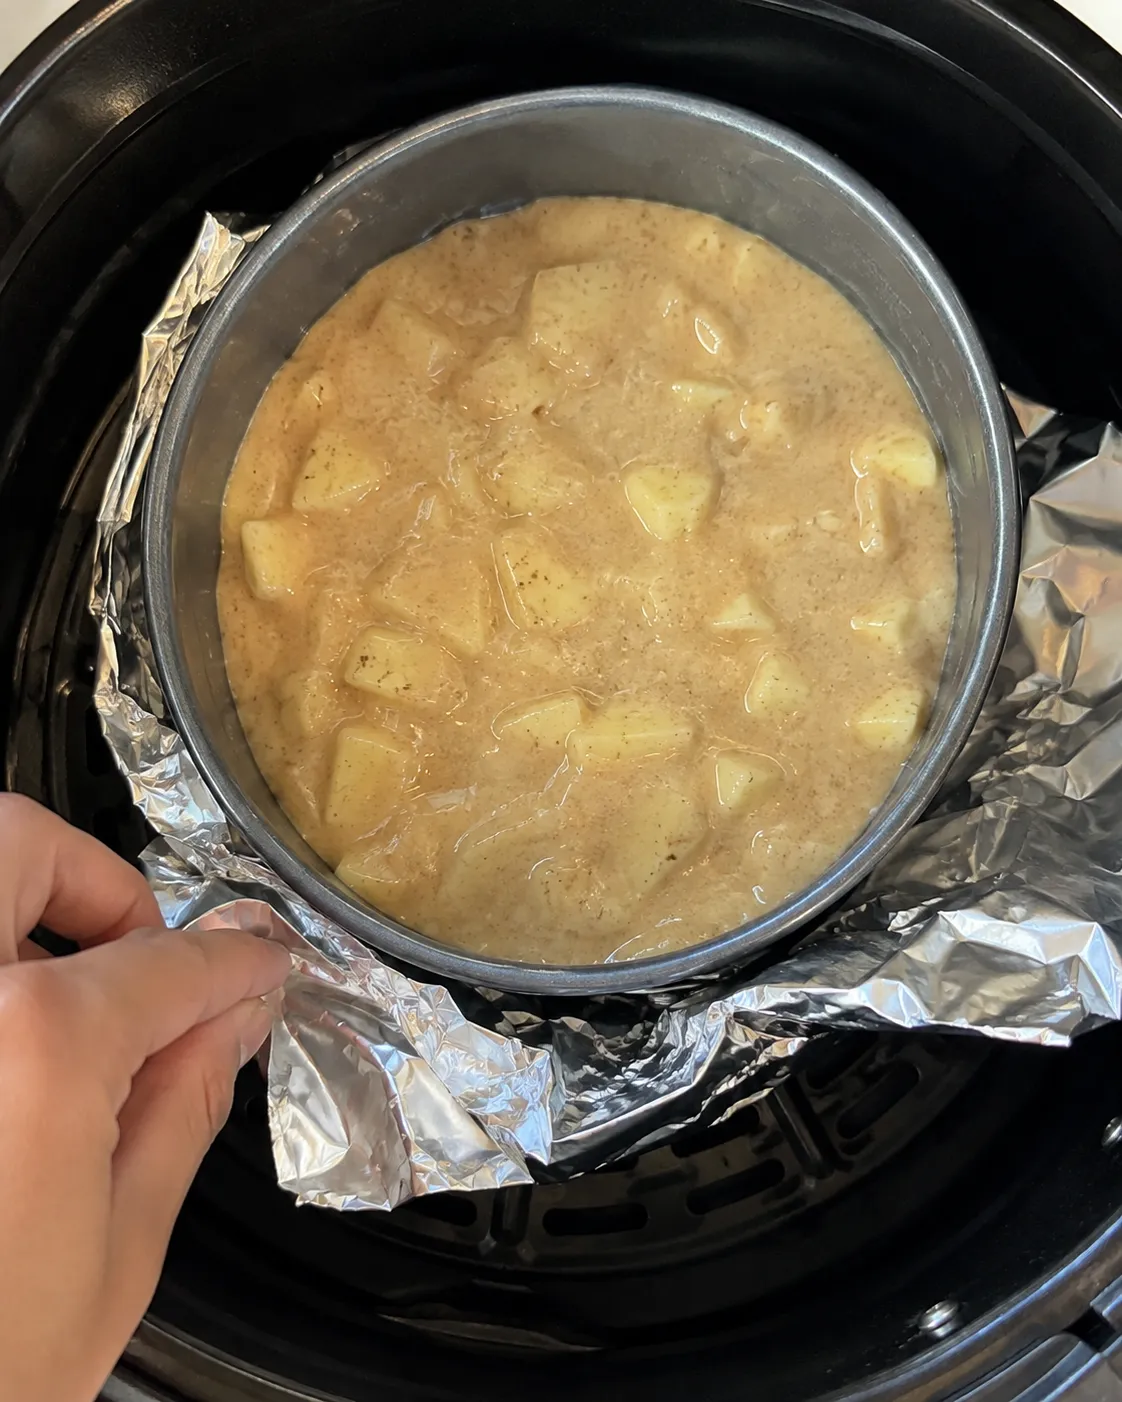
- Bake tented, 20 minutes. Tent foil loosely over the tin and tuck it under the rim so the fan cannot lift it into the element. This is not optional in a basket model.
- Uncover, 10 to 14 minutes more. Take the foil off and let the top color. Start checking at 10.
- Check the temperature, not the toothpick. Push an instant-read thermometer in at an angle to reach the middle of the depth. You want 205 to 210°F. If it reads under 200, give it 3 more minutes and check again.
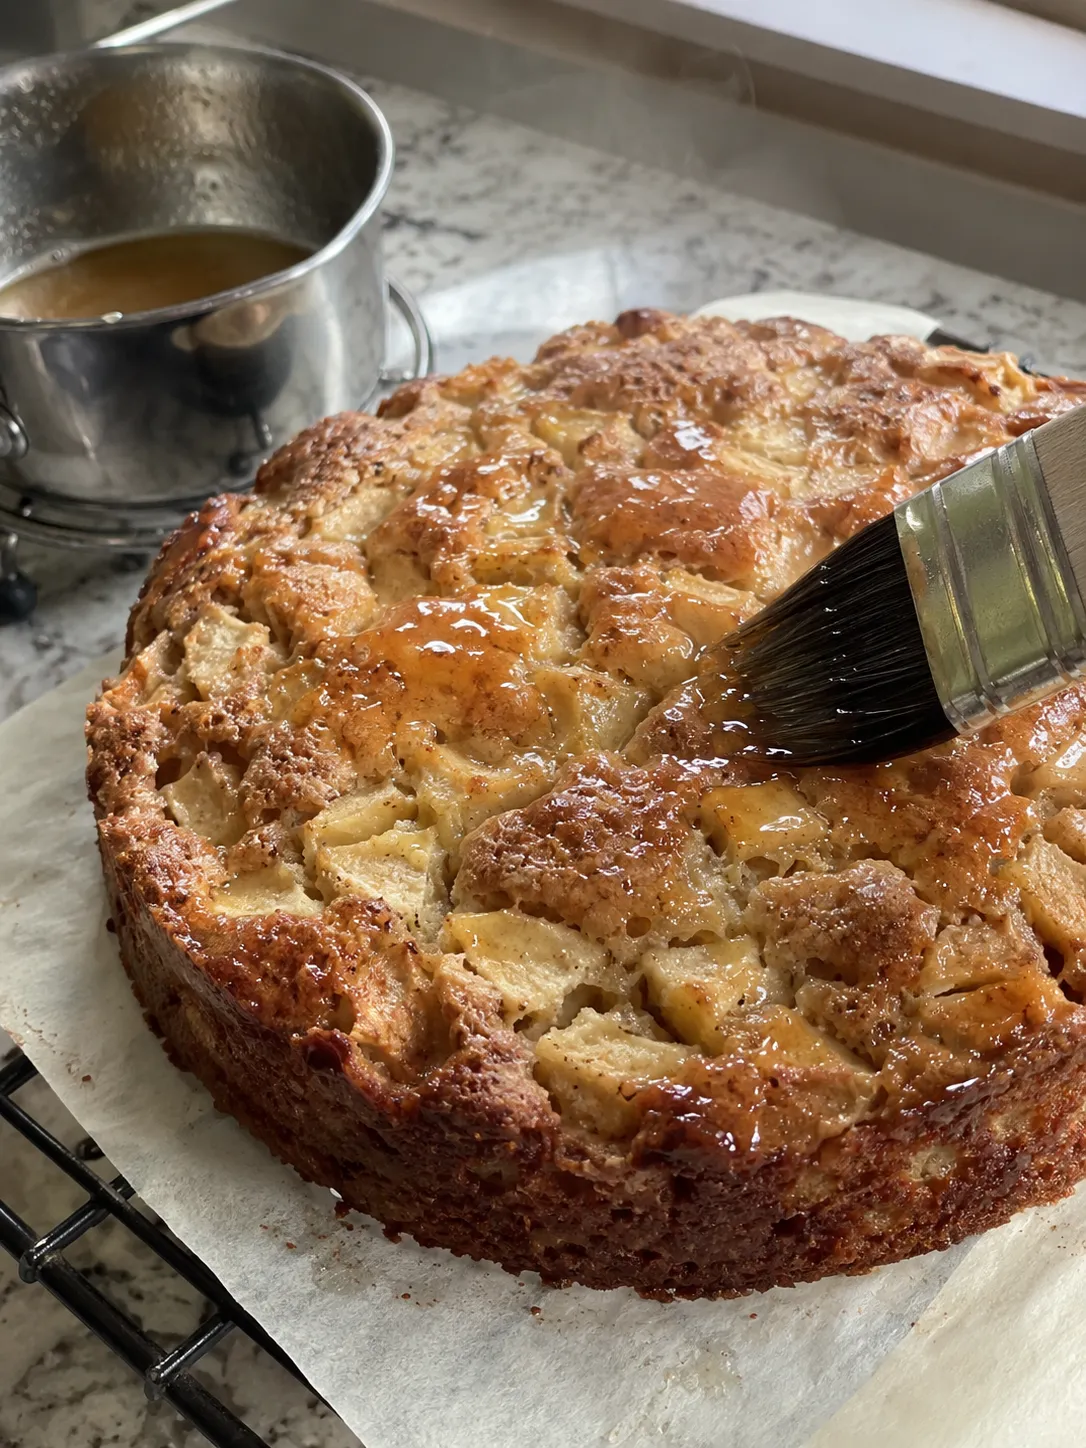
- Reduce the juice and brush. While the cake is in its last few minutes, simmer the reserved apple juice for a minute or two until it thickens slightly. Brush it over the top of the cake as soon as it comes out, while it is still hot.
- Turn it out at 10 minutes. Not 20, not "when cool." Lift it out by the parchment onto a rack. Leaving an apple cake sitting in its hot tin traps steam under the base and softens it, and you undo some of the work you just did.
The foil needs to be tucked, not draped. A loose sheet of foil in a basket air fryer will get picked up by the fan and pressed against the heating element. Fold the edges under the rim of the tin, or run a strip under the tin and up both sides. Our guide to foil and parchment in an air fryer covers what is safe and what is not.
Why the toothpick test fails here
Every apple cake recipe I read while working on this one ends the same way: bake until a toothpick inserted into the center comes out clean. On this cake, more than almost any other, that instruction is close to useless, and it is worth understanding why.
A finished apple cake is not a uniform material. It is set crumb with pieces of hot, soft, wet fruit suspended in it. When you push a toothpick in, one of two things happens:
It goes through a piece of apple
It comes out wet, because apple is wet even when fully cooked. You read that as underbaked and put it back in. The cake is now heading for dry.
It goes through crumb between apples
It comes out clean, because that particular half inch of crumb has set. That tells you nothing about the wet band an inch to the left.
You learn almost nothing
The result depends on where the stick landed, not on whether the cake is done. It is a coin flip dressed up as a test.
A thermometer does not have this problem, because temperature is a property of the whole region around the probe rather than a smear on a stick. When the center of a cake reads 205°F, the starch has gelatinized and the egg proteins have coagulated everywhere that matters. It is done.
Why 205 to 210°F when our guide on cakes sinking and most of the rest of this site say 200 to 205 for a plain cake? Because of the water again. A wetter batter needs the crumb held above the setting point slightly longer to drive off the extra moisture the apples released, otherwise the structure sets around water that is still there and you get the dense band. Five degrees is not much. On this cake it is the difference.
If you do not own an instant-read thermometer, this is the recipe that will convince you to buy one. Until then, the least bad substitute is to press the center of the cake gently with a fingertip. A done apple cake springs back and feels firm. An underdone one gives, and you can feel that it is soft underneath the crust. Combine it with a skewer test in three different spots rather than one. Temperatures for other bakes are collected in the air fryer baking chart.
Pan size and fill level
A 6-inch round is the right tin for this. It fits a 4-quart basket with airflow to spare, and the depth of batter suits the bake time.
Fill it half full, which is what this quantity does. Half, not two thirds, and definitely not to the rim. That rule matters more in an air fryer than in an oven because the element is only a few inches above the tin, and a cake that rises to within an inch of a glowing element browns hard on top long before the middle is ready. Apple cake is at particular risk because the fruit adds volume without adding structure.
| Tin | Batter | Temp | Tented | Uncovered |
|---|---|---|---|---|
| 6-inch round | 1 x recipe | 320°F | 20 min | 10 to 14 min |
| 7-inch round | 1 x recipe | 320°F | 16 min | 8 to 12 min |
| Loaf, 6 x 3 inch | 1 x recipe | 310°F | 24 min | 12 to 16 min |
| 8 silicone cups | 1 x recipe | 320°F | None needed | 15 to 18 min |
Times are a starting point for a basket model. Every machine runs differently. The internal temperature is the part that does not change.
Not sure what actually fits your machine, measure the basket and let the pan size calculator tell you rather than guessing and finding out with a cake in your hand. If you are working from a conventional oven recipe for apple cake and want to bring it across, the air fryer conversion calculator handles the temperature and time adjustment, though I would still drop the result by another 10°F for anything this wet. Silicone is a good option here, and it insulates, so knock about 10°F off and add a couple of minutes. Using silicone molds in an air fryer goes through it.
Fixing what goes wrong
| What you got | Why | Fix |
|---|---|---|
| Damp, dense band through the middle | Apple water. Either you skipped the drain or the apples were sliced rather than diced. | Drain 20 minutes, dice to 1/2 inch, and bake to 205 to 210°F rather than by time. |
| All the apple sank to the bottom | Pieces were too heavy for the batter, or they went in wet and slid straight through it. | Drain properly and toss in the reserved tablespoon of flour. Keep the batter thick. |
| Dark top, wet center | Baked uncovered from the start, so the crust set within minutes and then just kept browning. | Tent for the first 20 minutes. Tuck the foil under the rim. |
| Sank in the middle after cooling | Pulled too early. The crumb had not set enough to hold the risen shape without help from the crust. | Thermometer. Full detail in why air fryer cakes sink. |
| Soggy base, good everywhere else | The cake cooled in the tin and steamed its own bottom. | Turn it out onto a rack at 10 minutes. |
| Tastes soapy or metallic | Baking soda that was not evenly distributed, so someone got a concentrated pocket. | Break the dry ingredients up with a fork on top of the wet before folding. |
| Dry edges, wet middle | Temperature too high for the depth of batter and the distance to the element. | Drop to 310°F and add 5 minutes. Check your machine against basket versus oven-style. |
| Apple pieces still firm | Diced too large, or a very underripe apple. | Half inch maximum. The drain helps here too, since macerated apple starts softening before it goes in. |
Variations and what to serve it with
- Streusel top. Two tablespoons each of flour, brown sugar and cold butter, rubbed to crumbs, scattered on after you remove the foil. It also soaks up a little surface moisture, which is a bonus here. Do not add it before the foil comes off or it will steam instead of crisping.
- Caramel apple. Skip the juice glaze and spoon warm salted caramel over instead. Add a pinch of flaky salt.
- Apple and walnut. A third of a cup of chopped toasted walnuts folded in with the apples. Toast them first or they taste raw against the spice.
- More spice. A quarter teaspoon each of ground ginger and allspice on top of what is there turns it toward the flavor of air fryer pumpkin bread, which is no bad thing in October.
- Muffins. Divide into eight silicone cups and bake 15 to 18 minutes at 320°F, no foil needed. Individual portions almost never come out wet in the middle, because no part of them is far from the heat. Same principle as air fryer carrot muffins.
- Cream cheese frosting if you want it dressed up, though I think this one is better plain, warm, with cream poured over it. Frosting a cake that already has a glaze is a lot.
If you liked this and want more in the same direction, air fryer carrot cake has the same wet-ingredient challenge and solves it differently, air fryer banana bread is the most forgiving thing on this site, and air fryer cinnamon rolls are the other thing I make constantly once the weather turns. For whole apples rather than cake, air fryer baked apples take about 15 minutes and no mixing at all.
Storage and reheating
Apple cake keeps better than a plain cake and worse than banana bread. The fruit holds water in the crumb, which is good for day two, but that same water is what makes it go sticky by day four.
- Room temperature: 3 days in an airtight container, once completely cool. Putting a warm apple cake in a sealed box is how you get a wet lid and a soggy top.
- Refrigerated: up to 5 days, and necessary if you frosted it. Cold dulls it, so bring slices back to room temperature before eating.
- Frozen: 3 months, wrapped in plastic then foil, ideally in slices so you can take one at a time. Glaze it after thawing rather than before.
- Reheating: 90 seconds at 300°F in the air fryer brings a slice back much better than a microwave does, which turns the apple pieces rubbery. Watch it, since the sugary glaze can catch.
Curious whether running the air fryer for half an hour actually costs less than heating your oven for a single small cake, the running cost calculator will work it out for your electricity rate. For a cake this size the air fryer wins comfortably. For three cakes at once it does not. All four of our air fryer baking tools are in one place if you want a look.
Frequently asked questions
QCan I use applesauce instead of fresh apples?
You can, and it makes a perfectly nice cake, but it is a different one. Swap in 3/4 cup of unsweetened applesauce for the diced apples, skip the draining and the flour toss, and cut the milk entirely. What you lose is the texture, which is the main reason to make an apple cake rather than a spice cake. What you gain is about 25 minutes and a recipe that is much harder to get wrong. Most of the popular air fryer apple cake recipes online are applesauce cakes for exactly that reason.
QDo I really have to drain the apples?
If you want to skip it, dice the apples smaller, use only 1 cup of diced apple instead of 1 1/2, leave out the milk, and add 4 to 6 minutes to the uncovered stage. That gets you most of the way there. But 20 minutes in a sieve while you do everything else is the cheapest fix available, and it is the difference between a cake with a damp band and one without. It is the reason this recipe exists.
QWhat temperature do you bake apple cake in an air fryer?
320°F (160°C) in a 6-inch round tin, tented with foil for 20 minutes and then uncovered for another 10 to 14. That is at the low end of what you will see published, and it is deliberate. The heating element sits only a few inches above the tin, so a higher setting sets and browns the top long before a wet apple batter can cook through underneath.
QHow do I know when air fryer apple cake is done?
The center should read 205 to 210°F on an instant-read thermometer, pushed in at an angle so it reaches the middle of the depth. Slightly higher than a plain cake, because the extra water from the apples needs longer above the setting point to drive off. The toothpick test is unusually unreliable on this cake, because a toothpick that lands in a piece of apple comes out wet no matter how well baked the cake is, and one that lands in crumb between apples comes out clean no matter how wet the rest of it is.
QWhy is my air fryer apple cake wet in the middle?
Water from the apples that had nowhere to go. Two medium apples carry close to a cup of water into a batter whose own liquid is a few tablespoons. The fan sets a crust on top within minutes, that crust acts as a lid, and the steam collects in the crumb around the fruit instead of escaping. Drain the diced apples with a spoon of sugar for 20 minutes first, dice rather than slice, tent for the first two thirds of the bake, and go by internal temperature rather than time.
QWhat are the best apples for this cake?
Granny Smith, because the flesh is dense and comparatively low in moisture, it holds its shape under heat instead of collapsing, and the acidity balances the brown sugar. Honeycrisp tastes excellent and holds up well but is much juicier, so drain it for a full 25 minutes. A mix of the two is the best version. Avoid Red Delicious and McIntosh, which go mealy and give you the wetness without the texture.
QWhy did all my apple pieces sink to the bottom?
Two reasons, usually together. The pieces went in wet and slippery so nothing gripped them, and the batter was too loose to hold them. Drain the apples, toss them in a tablespoon of the measured flour so they have a dry, slightly tacky surface, and resist the urge to thin the batter. It should be thick enough that it needs spreading rather than pouring.
QCan I make this in a loaf tin?
Yes, a 6 by 3 inch loaf tin if it fits your basket with airflow around it. Drop to 310°F, tent for 24 minutes and give it 12 to 16 uncovered. A loaf is deeper than a round cake of the same volume, and time through a cake goes up roughly with the square of the thickness rather than in proportion to it, so the extra depth costs more time than you would expect.
QCan I make it dairy free or vegan?
Dairy free is easy. Use 1/3 cup neutral oil instead of the butter and any plant milk for the two tablespoons. Fully vegan is harder, because the egg and yolk are doing structural work in a batter that is already carrying a lot of water. If you want to try, use 1/4 cup of thick unsweetened yogurt substitute plus an extra 1/4 teaspoon of baking powder, expect a denser cake, and still bake to temperature.
QDo I need to peel the apples?
Yes for this one. Skin does not soften in 32 minutes at 320°F, so you end up with strips of it in an otherwise soft crumb. It is also the part of the apple that resists releasing water, which sounds helpful but just means those pieces stay firm while the peeled ones cook. In a rustic oven cake baked for an hour you can leave it on. Here you cannot.
QCan I double the recipe?
Not into one tin. Doubling gives you a deep batter with the element right above it, which is the worst combination for a cake that already has a moisture problem. Bake two 6-inch cakes one after the other, or make the muffin version, which doubles without any trouble at all. If you do insist on a bigger tin, drop to 305°F, tent for the first half, and expect to add a lot of time.
QDo I have to preheat the air fryer?
Yes, three minutes at 320°F. A wet batter sitting in a basket that is slowly coming up to temperature gives the melted butter time to separate out before any structure sets, and you get a greasy layer at the base. Whether you need to preheat goes through when it matters and when it does not.
Get the fall baking guide
Temperatures, tin sizes and internal targets for the twelve things I bake most between September and December. One email, no nonsense.
No spam · unsubscribe anytime