

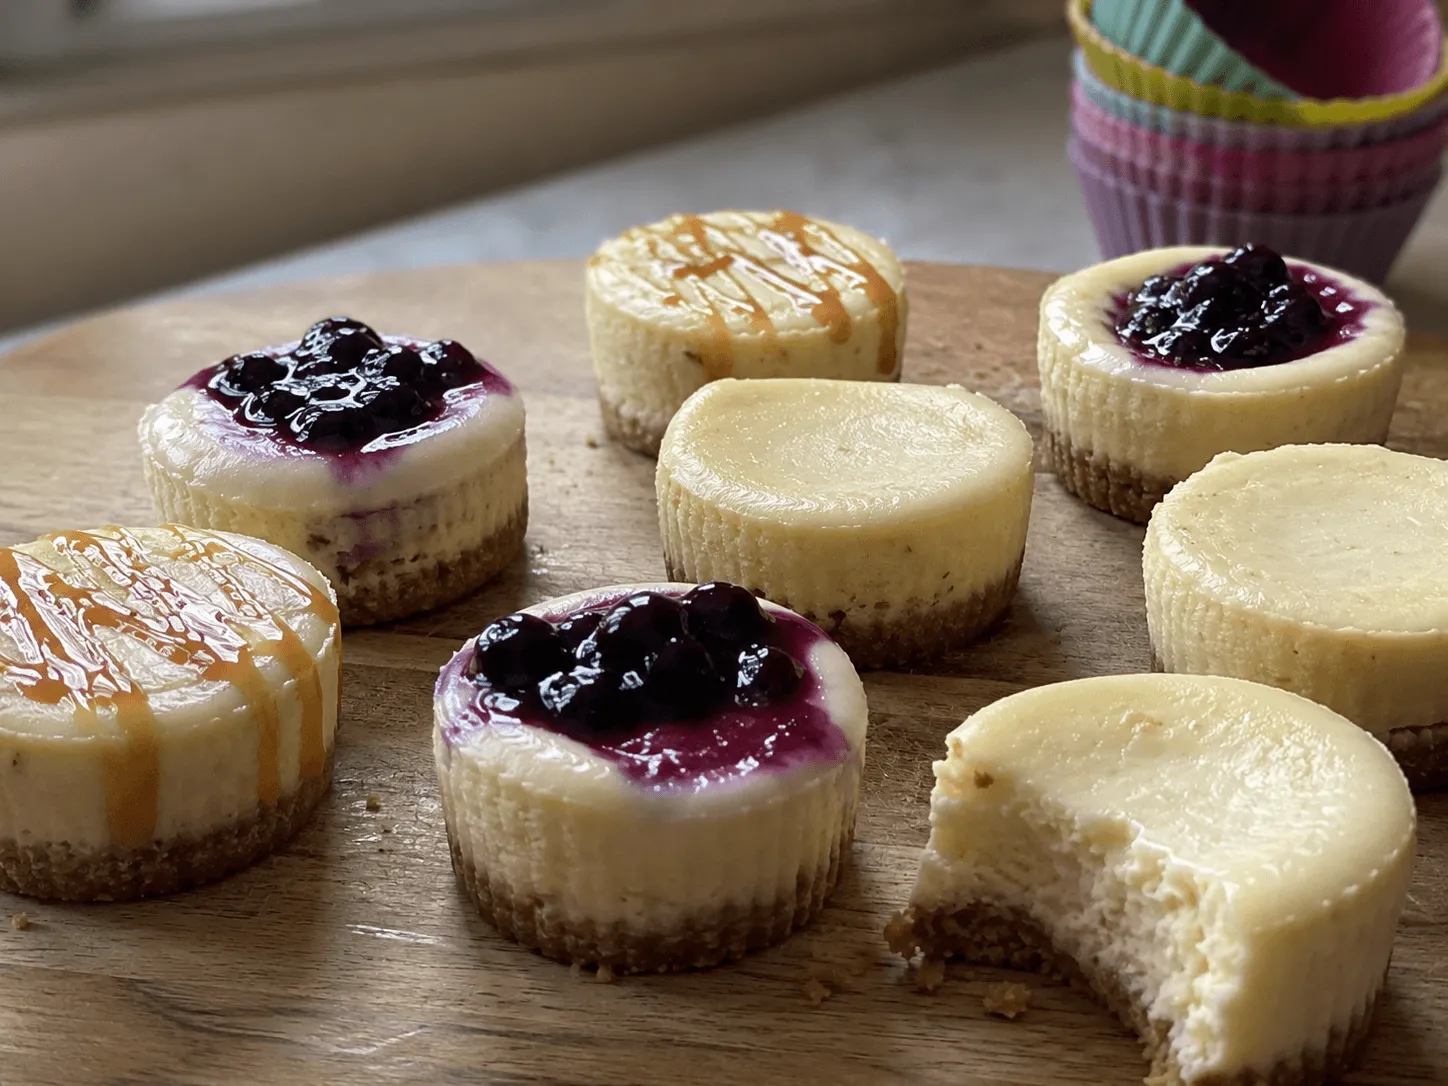
I made these the first time because I had half a block of cream cheese left over from a 6-inch air fryer cheesecake and thought minis would be the low-stakes version. Eight small ones instead of one big one. Less to go wrong.
Six of the eight cracked. The big one had not.
That bothered me enough to go and work out why, and the answer turns out to be the useful thing on this page, because it is the opposite of what every recipe for these tells you.
Quick answer: Bake in silicone cupcake cups at 300°F for 12 to 15 minutes, filled almost to the top. Par-bake the crust at 300°F for 4 minutes, not the 325°F most recipes give you. Pull them at 150°F in the center and start checking at 12 minutes, because the window is short. Then chill 4 hours minimum before you try to get one out of its cup, and 6 if you want the texture right.
A mini is not an easier cheesecake
Shrink a cheesecake and you do not just shorten the bake. You change the shape of the problem.
A 6-inch cheesecake is a squat cylinder with a lot of volume behind not much surface. A mini in a cupcake cup is a small lump with a great deal of surface for how little is inside it. Run the numbers on the two and the mini has more than twice the surface area per unit of volume. That single ratio drives everything else.
It bakes about twice as fast
Heat only has to travel half as far to reach the middle, and time through a solid goes with roughly the square of the distance. The 6-inch takes half an hour. These take thirteen minutes.
And the window shrinks with it
The last fifteen degrees on the big one take about four minutes, which is plenty of room to check and decide. On a mini the same fifteen degrees go by in under two.
It sets almost all at once
A big cheesecake has a real gradient from edge to center, so the middle is still soft while the edge is done. A mini is close to uniform, so when it goes over, all of it goes over.
That third one is the part that surprised me. A gradient sounds like a problem, and on a full-size cheesecake it is the thing you manage. But it is also a safety margin. The soft middle of a 6-inch buys you minutes. A mini has no soft middle to buy them with.
So the mini is not the forgiving version. It is the version where a thermometer stops being a nice idea and starts being the whole method. On the 6-inch page I argue the wobble test is a guess. On a mini it is not even that, because a mini in a flexible cup wobbles whether it is done or not.
What to bake them in
Here is the thing the top recipes for this quietly disagree on without ever mentioning it. Published times run from twelve minutes to twenty-five. Same dessert, same sort of temperature, double the time.
Sort them by what they baked in and it resolves immediately. The twelve minute recipes used silicone cups. The twenty-five minute ones used 6 ounce ramekins. That is not machine variation, it is a different depth of custard, and the same thing is going on as in our air fryer mug cake, where a mug and a ramekin holding identical batter differ by nine minutes.
| Vessel | Time at 300°F | Pull at | Can you unmold it? |
|---|---|---|---|
| Silicone cupcake cups, about 2 inches | 12 to 15 min | 150°F | Yes, once fully cold |
| 6-cup metal muffin tin, lined | 10 to 13 min | 150°F | Yes. Metal conducts, so it runs faster |
| 4 oz ceramic ramekins | 16 to 20 min | 145°F | No. Serve in the dish |
| 6 oz ceramic ramekins | 20 to 25 min | 145°F | No. Serve in the dish |
Two of the most-shared recipes for air fryer mini cheesecakes are ramekin recipes. They are good recipes. But you eat those with a spoon out of the dish, which is a different dessert from something you can pick up and hand to somebody. If you want actual portions, you want silicone or a tin. Measuring what fits your basket before you buy anything is what the pan size calculator is for.
Why silicone rather than paper
Two reasons, and only the second one is specific to cheesecake.
- Paper cannot hold its shape in moving air. Without a tin around it a paper case tilts and unfolds, and the filling spreads. This is the same problem covered on the air fryer cupcakes page, along with the safety point that matters more than people think: an empty liner weighs almost nothing and the fan will lift it into the element. Never leave a spare one in the basket.
- Paper wicks fat out of the crust. A graham crust is basically crumbs held together by melted butter, and paper pulls that butter out of the bottom edge while it bakes. You get a crust that is greasy on the outside of the case and crumbly on the inside. Silicone absorbs nothing, so the butter stays where you put it. Using silicone molds in an air fryer covers the general handling, and the accessories guide covers which ones are worth owning.
One thing nobody mentions about loose silicone cups. They are floppy, and a floppy cup on a perforated crisper plate tips as you carry the basket. I lost two over the side before I worked out the fix, which is to stand the cups inside a metal muffin tin, or on a small solid tray, so they have something rigid holding them upright. It also fixes the spacing for free.
And the springform question
A springform pan exists to solve exactly one problem: a cheesecake is glued to its pan and cannot be turned upside down to get it out. So the pan comes apart instead.
A silicone cup solves the same problem from the other direction. You do not lift the cheesecake out of a rigid wall, you peel the wall off the cheesecake. That is genuinely simpler, and it is why minis are the one cheesecake format where skipping the springform costs you nothing at all.
There is a catch, and it is the whole of the unmolding section below: peeling only works cold. Try it warm and you will have cheesecake on your fingers.
The crust burns in the first four minutes
This is the part I got wrong the longest, and it took me a while to see why it was even happening.
Every recipe I read par-bakes the crust somewhere between 320 and 325°F, for three to six minutes. That is a normal oven instruction and it is fine in an oven. In a basket it is how you get a crust that tastes faintly of ash.
Two things stack up. Sugar starts to caramelize at around 320°F, so a par-bake at 325 is sitting right on the threshold rather than safely under it. And the underside of the cup is not sitting on solid metal, it is sitting on a perforated plate with fast hot air moving underneath it. The crumb is exposed from below in a way it never is in a tin on an oven rack.
The par-bake is the only time the crust is naked. Once the filling goes in, the crust is under a layer of wet custard, and water holds the surface it touches near 212°F no matter how hot the air gets. The crust physically cannot burn during the main bake. Every crust problem you have ever had with these happened in those first few minutes, which is why the fix is to make those minutes cooler rather than to fiddle with the long bake.
So: 300°F for 4 minutes. It will not look very different when it comes out, and that is correct. You are setting the butter, not browning the crumbs. Judge it by smell rather than color. When the kitchen smells like toasted graham crackers, it is done. This is the same logic as blind baking a pastry case, just with a much shorter fuse.
Skip the par-bake entirely and you get the other failure, a wet layer between crust and filling. Thirteen minutes under custard is not long enough to set a raw crumb crust, which is why you cannot just leave it out the way you can on a longer bake.
150°F, and how the cup changes carryover
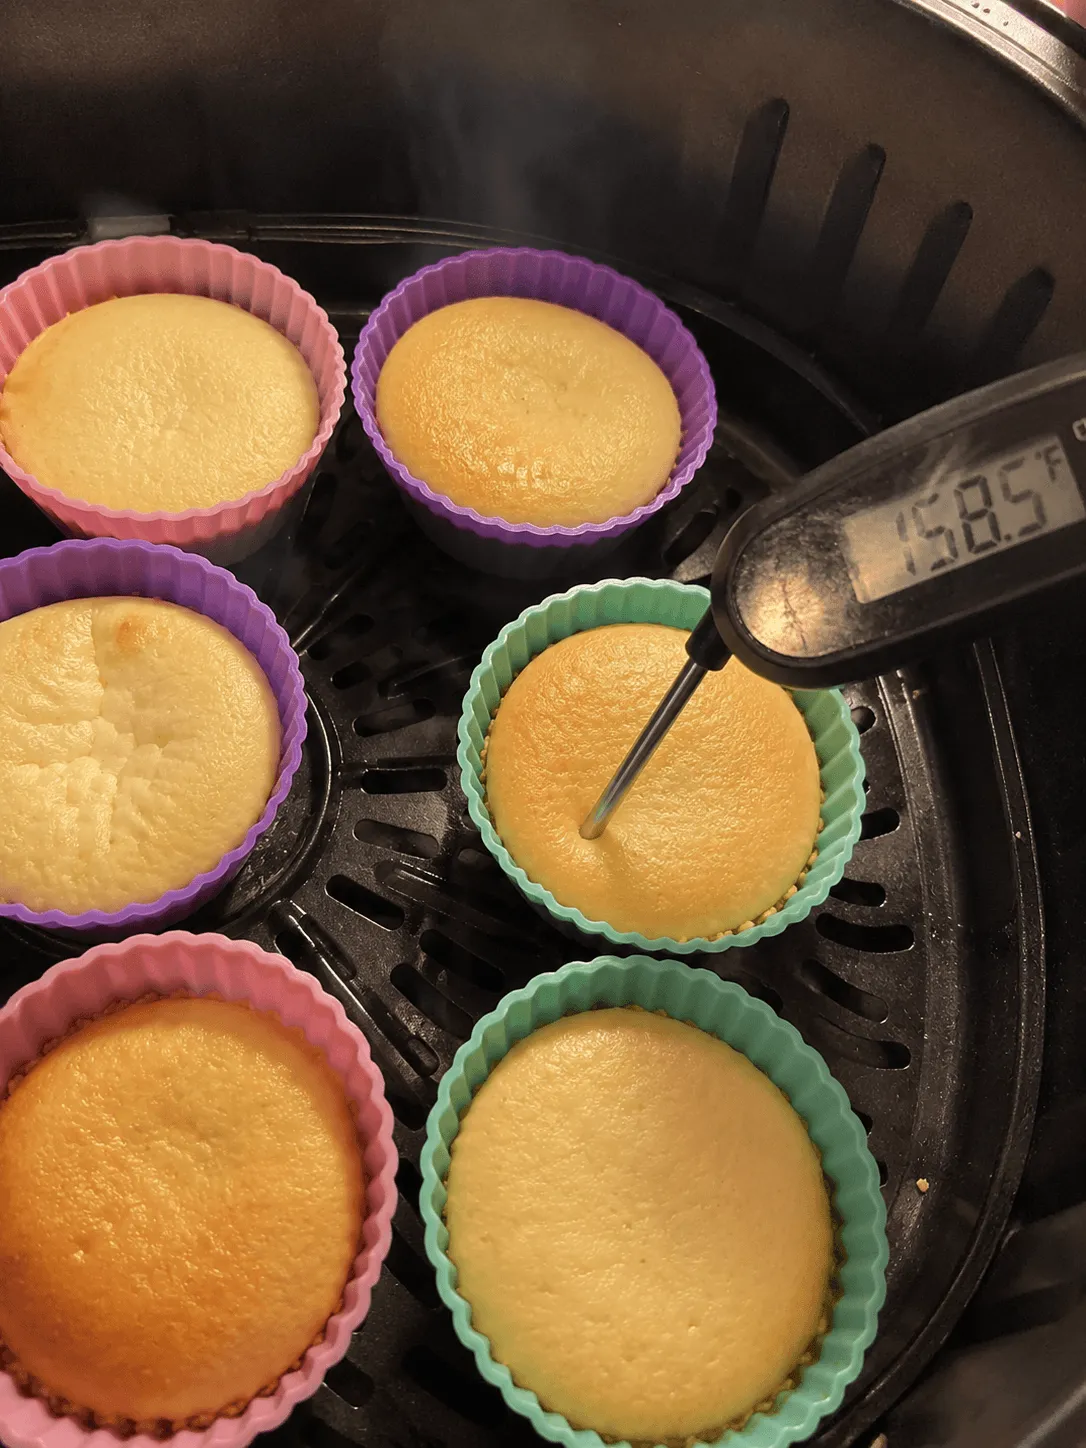
The number is 150°F in the center, and it is the same number as on the full-size cheesecake because it is a property of the egg and not of the size. Egg white starts thickening near 145°F and becomes a tender solid at about 150. Past roughly 160 the proteins pull tight and squeeze out the water they were holding, which is what turns the texture grainy and puts the top under enough tension to split.
What does change with size is what happens after it leaves the basket.
| Baked in | Stored heat in the vessel | Carryover after it comes out | So pull at |
|---|---|---|---|
| Silicone cup | Almost none. About 15g of a material that holds very little heat | A degree or two | 150°F |
| Metal muffin tin | Moderate, but spread across six cups | Two or three degrees | 148°F |
| Ceramic ramekin | High. Around 200g of hot stoneware wrapped around a small custard | Five to seven degrees | 145°F |
This is carryover cooking, and it is the reason a ramekin recipe and a silicone recipe should not give you the same pull temperature. Nobody writing about these makes the distinction, which is why a cheesecake that read 150 in a ramekin can still come out grainy. Internal targets for everything else on the site are in the air fryer baking chart.
Push the probe in from the side at an angle rather than straight down through the top, and stop at about the middle. Straight down leaves a visible hole in the one surface anybody looks at. Going in at an angle from near the edge puts the hole somewhere the topping will cover.
And test the one that looks least done rather than the one nearest you. In a basket, position matters: the hot spot is real, and with eight cups in there some are in it and some are not. If yours come out visibly uneven, rotating them halfway through fixes it, exactly as it does for cupcakes.
Ingredients
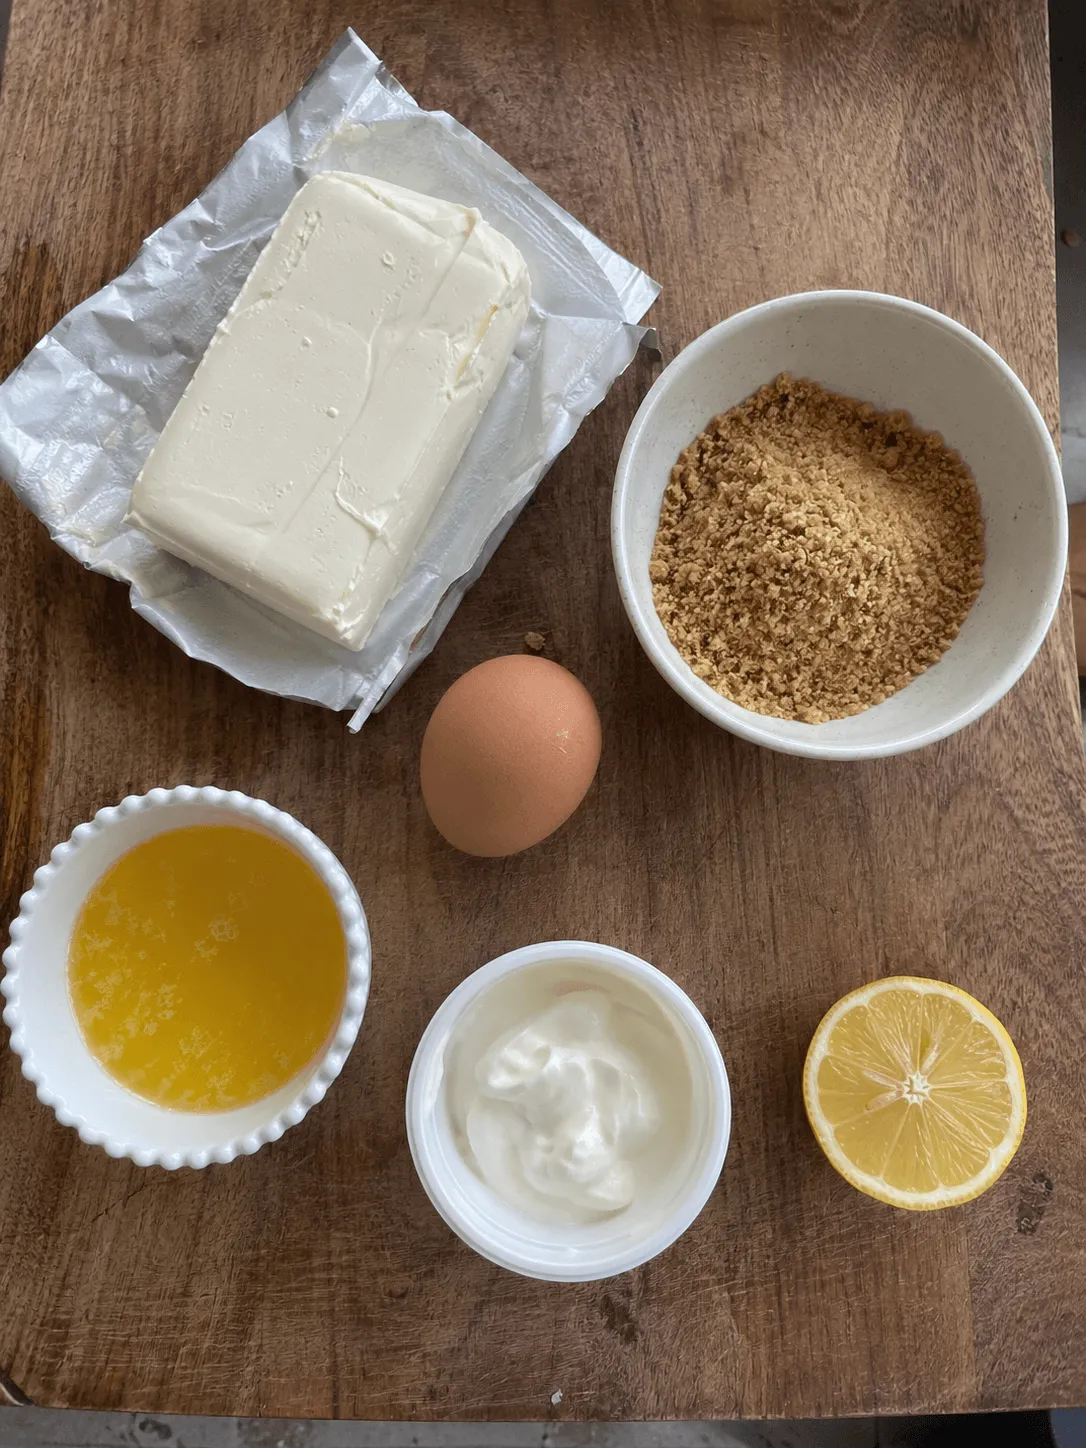
Makes 8. Everything at room temperature, and that is not a throwaway instruction here: cold cream cheese will not go smooth on low speed, and beating it harder to force it is how air gets in.
- 2/3 cup (80g) graham cracker crumbs, about 5 full sheets
- 2 1/2 tablespoons (35g) unsalted butter, melted
- 1 tablespoon granulated sugar
- Pinch of salt
- 8 oz (225g) full-fat block cream cheese, room temperature
- 1/4 cup (50g) granulated sugar
- 1 1/2 teaspoons cornstarch
- 1 large egg, room temperature
- 3 tablespoons (45g) sour cream, room temperature
- 1/2 teaspoon vanilla extract
- 1/2 teaspoon lemon juice
- Pinch of salt
Three notes
- A whole egg, and here is why that differs from the rest of the site. Our mug cake and vanilla cake both lean on yolks and cut the white back, because in a small cake the white is mostly water and makes things bouncy. A cheesecake is a custard, not a cake, and the white is the structural protein doing the setting. Go yolk-only here and you get a lovely soft cheesecake that will not survive being pushed out of a silicone cup. The white is what lets you unmold it in one piece.
- The cornstarch is not optional in a mini. On the 6-inch it is a nice safety net. Here it is the safety net, because starch granules get in between the egg proteins and slow down how fast they tighten. That widens the window between set and overset, and the window is the thing you are short of. A teaspoon and a half is enough that you will never taste it.
- Block cream cheese, not the tub. Spreadable cream cheese has extra water and stabilizing gums so it stays soft straight from the fridge. The water has to be baked off and the gums keep it from ever setting firm, which on a mini means it will not hold its shape when the cup comes away. Check the label says cream cheese and not cream cheese spread.
How to make them
- Stand 8 silicone cups in a muffin tin or on a small tray so they cannot tip, and set them somewhere you can carry them to the basket without carrying them one at a time.
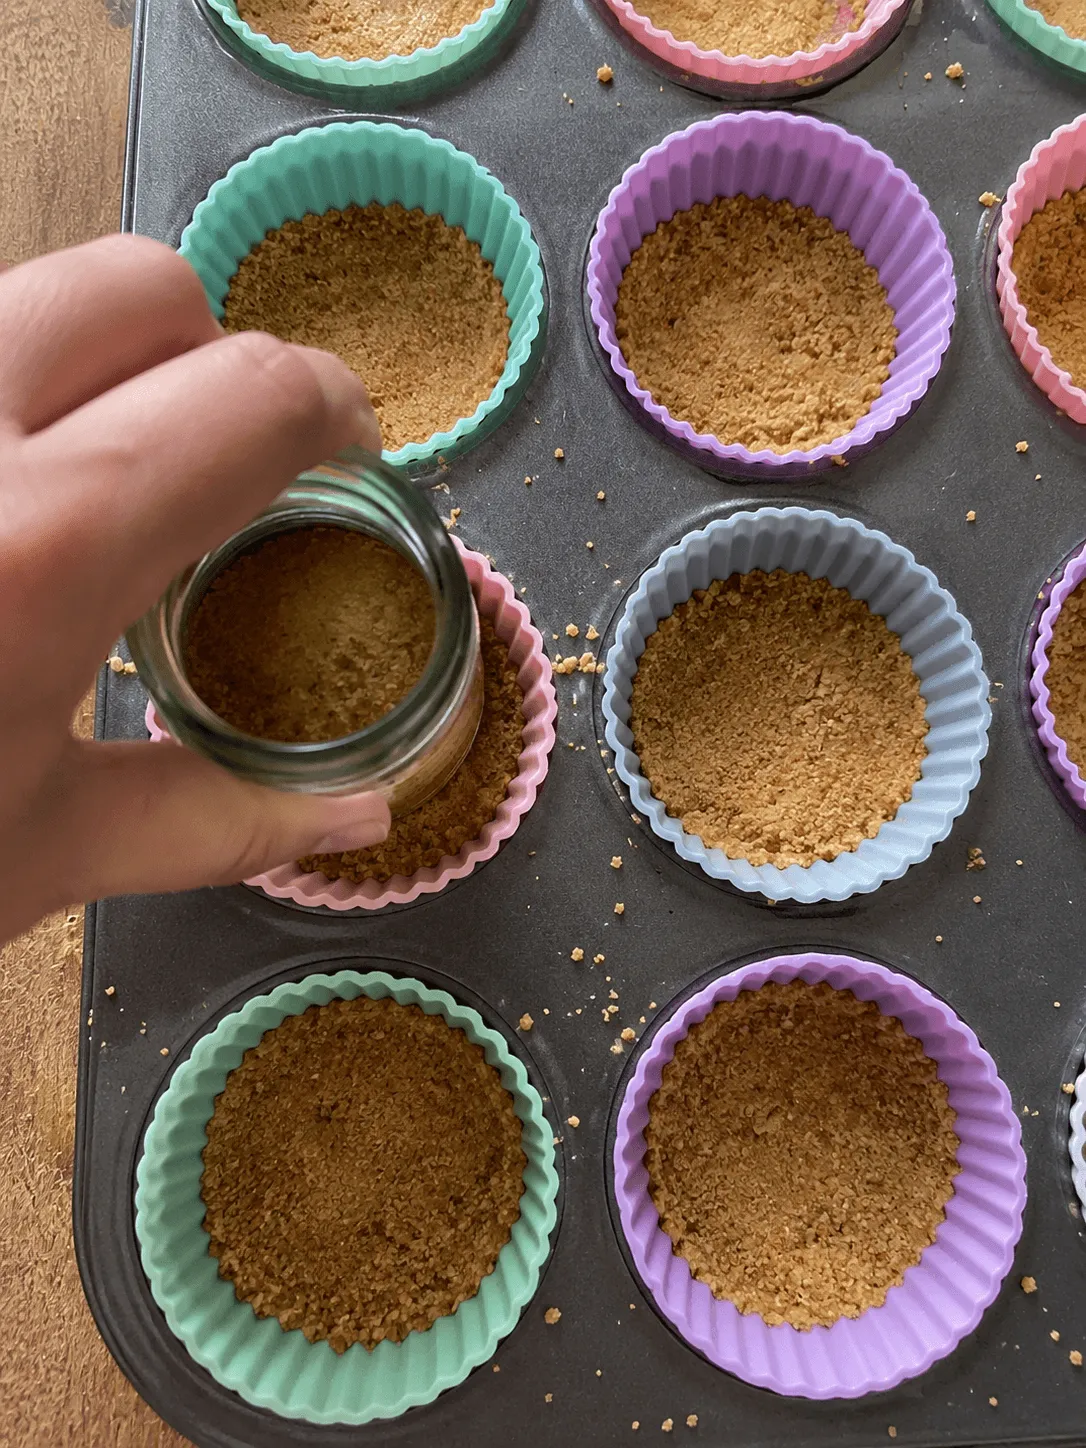
- Mix the crust. Graham crumbs, the tablespoon of sugar, the pinch of salt and the melted butter, stirred to wet sand. Divide between the eight cups, about a tablespoon each.
- Press it down hard. The end of a rolling pin or the base of a spice jar works. Loosely pressed crumbs fall apart the moment you peel the cup away, and this is the single most common reason a mini looks fine in the cup and collapses on the plate.
- Preheat to 300°F (150°C) for 3 minutes, then par-bake the crusts for 4 minutes. Not 325. Take them out and let them cool while you mix the filling. Whether you need to preheat covers why a short bake cares about this more than a long one.
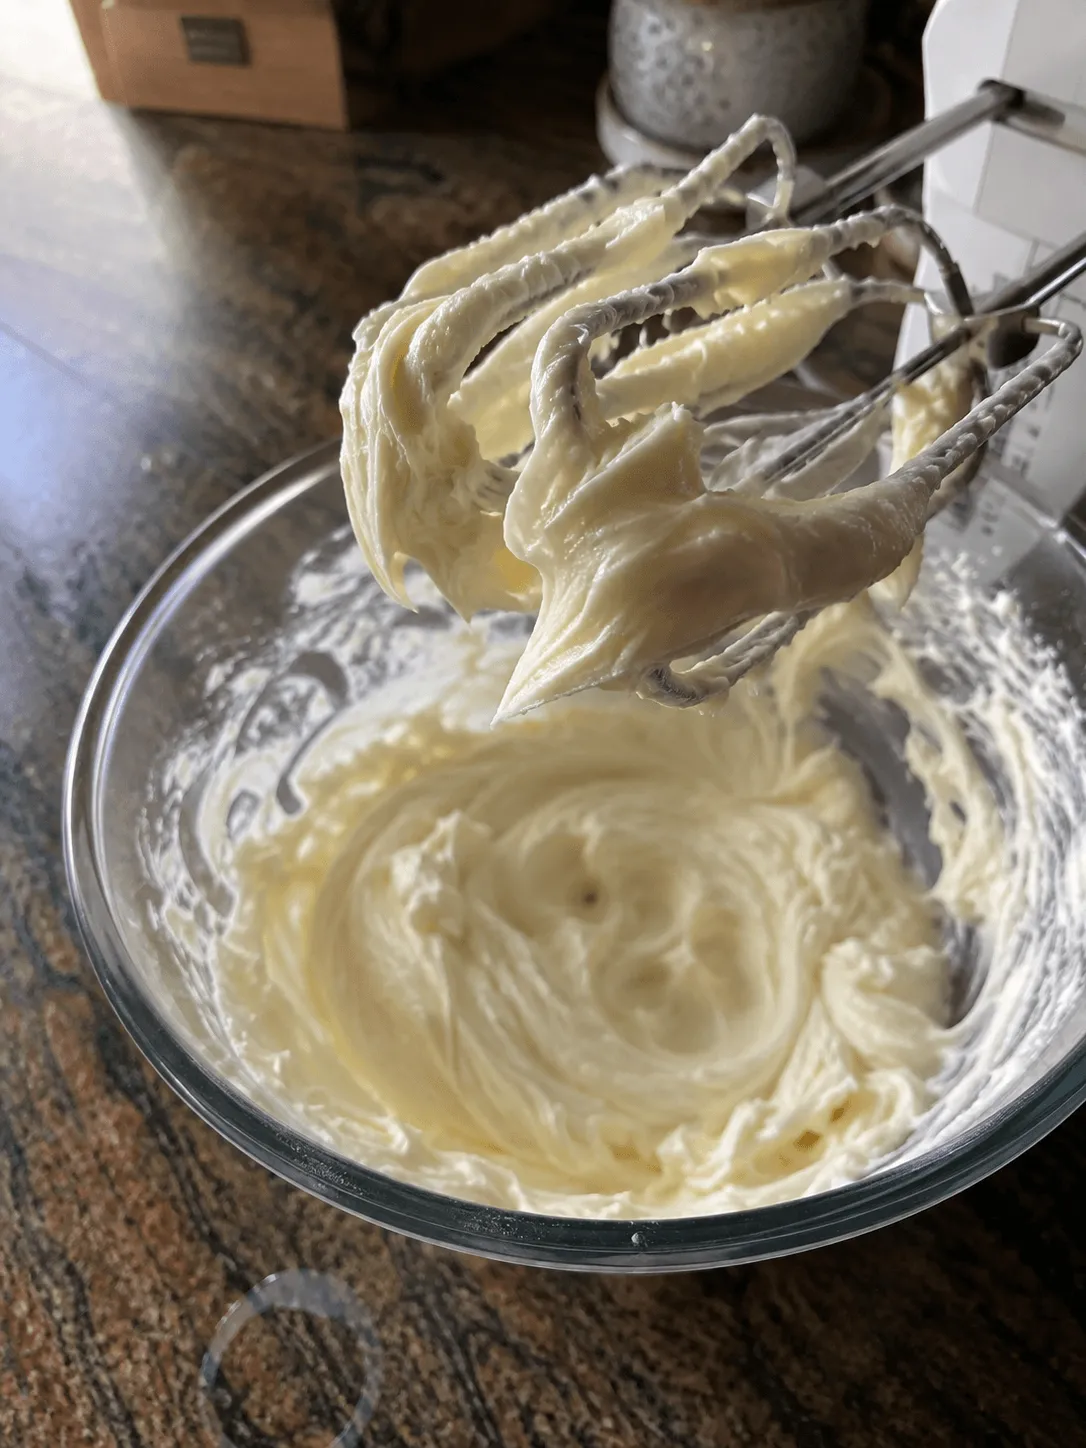
- Beat the cream cheese alone, on low, until completely smooth. Scrape the bowl twice. No sugar yet. Any lump still in there now will still be there at the end.
- Add the sugar and cornstarch, still on low, about 30 seconds, just until it disappears.
- Add the egg on the lowest speed and stop the second it looks uniform. This is where air gets in, and air is what domes a top and then cracks it as it falls.
- Fold in the sour cream, vanilla, lemon juice and salt by hand with a spatula, about 20 seconds. Not with the mixer.
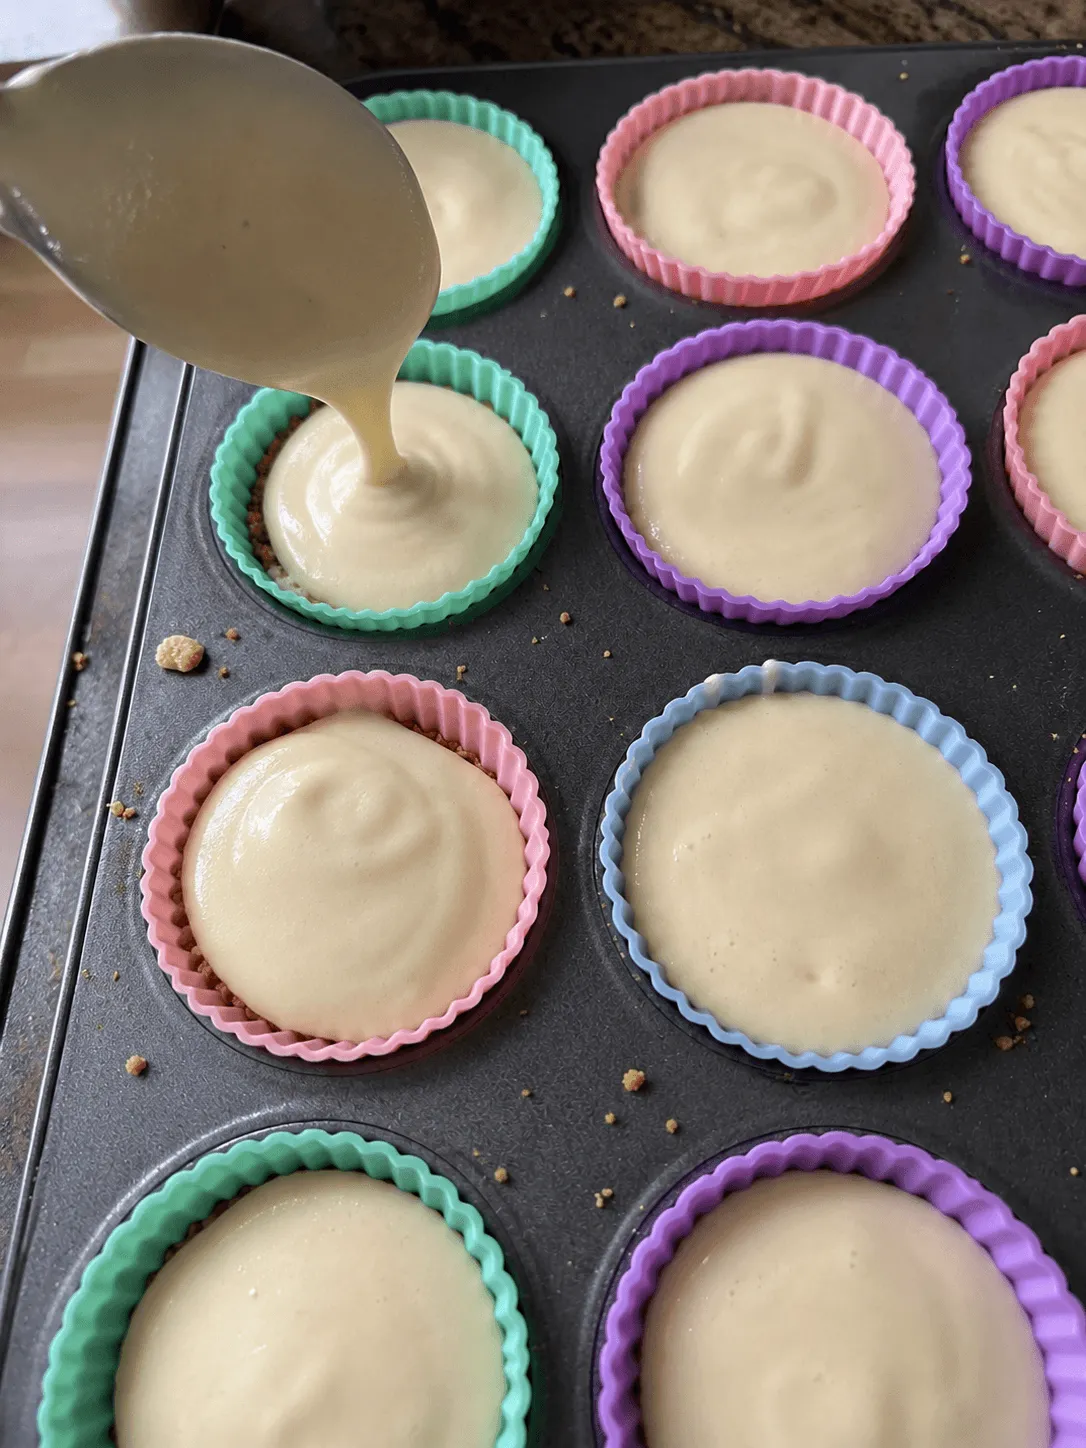
- Fill the cups to about a quarter inch below the rim. Nearly full, which is the opposite of what you do with cupcakes. There is no baking powder in here and almost no beaten-in air, so these rise an eighth of an inch at most and settle back.
- Tap the tray firmly on the counter eight or ten times and pop any bubbles that surface with a toothpick.
- Bake 12 to 15 minutes at 300°F. Leave them alone for the first 10.
- Start checking at 12 minutes. Probe the one that looks least done, in from the side at an angle, stopping around the middle. You want 150°F. Under 145, give it 90 seconds and check again, not three minutes.
- Take them out of the basket straight away and set the tray on a rack. Unlike the 6-inch, these do not need a slow cool in the switched-off machine, because there is not enough thermal mass in a silicone cup to shock them.
- Cool to room temperature, then chill at least 4 hours before you try to unmold, and 6 if you can wait. Overnight is better again.
- Peel, top and serve. The next section is how.
Why 300°F and not 325. Recipes for these run from 300 to 325, and the hot ones are where the cracked and browned tops come from. A cheesecake has no starch structure to speak of and no leavening, so there is nothing useful that a higher temperature does for it. All it does is widen the gap between the surface temperature and the center temperature, which on something this small you have no time to close. If you are converting an oven recipe rather than starting from this one, run its numbers through the air fryer calculator first, then ignore the time it gives you and go by 150°F.
Getting them out of the cups
This is the part the recipes skip, and it is the reason people end up believing they cannot make mini cheesecakes.
Every recipe I looked at says to chill for one to two hours. That is roughly how long a two inch cheesecake takes to get cold, and it is a perfectly honest number for that. But cold and firm are two different clocks, and unmolding needs the second one.
The egg sets in the basket
That happens at 150°F and it is done by the time it comes out. It gives you a custard that holds together in a dish. It does not give you something that stands up on a plate.
The fat sets in the fridge
Butterfat and the fat in cream cheese are liquid above about 90°F, soft and plastic between 50 and 70, and properly solid below about 45. That solid fat is most of the structure of a cold cheesecake.
And it keeps setting
Fat does not finish crystallizing the moment it hits fridge temperature. It carries on for hours. This is why a cheesecake is better on day two, and it is not a folk belief.
So four hours is the earliest I would try, six is comfortable, and overnight is the one I actually recommend. At two hours they are cold and they will still smear.
The technique matters too, and it is not the obvious one:
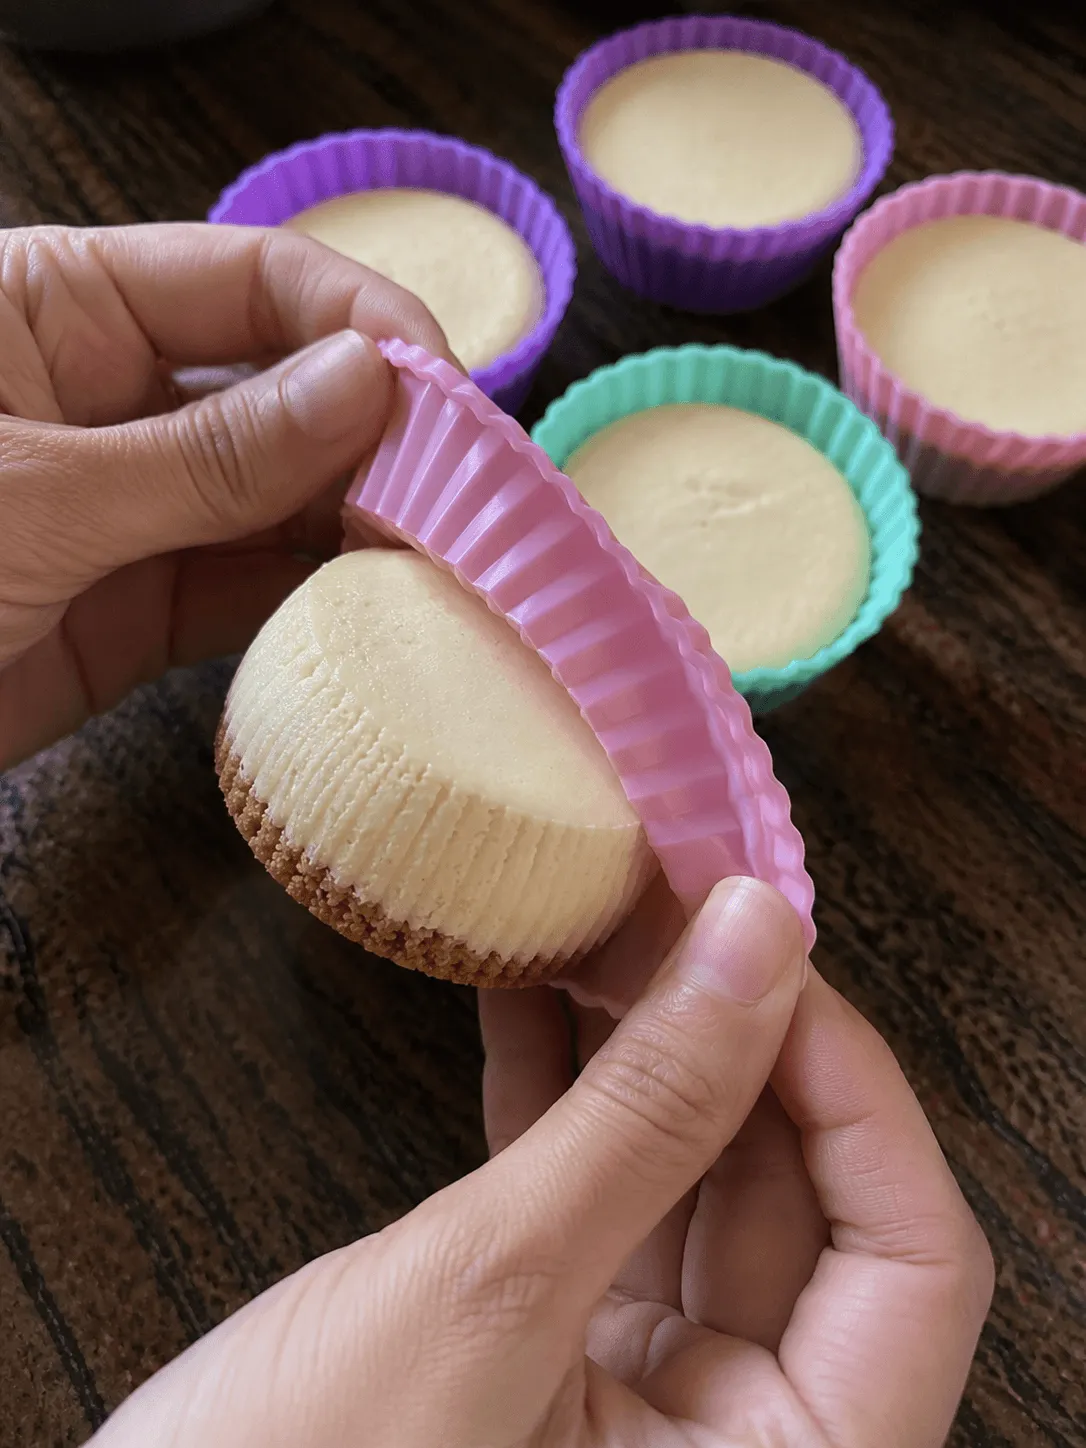
- Peel the cup down and outward, rolling the silicone away from the side the way you would peel a wrapper. Do not push up from underneath. Pushing compresses the crust from below and cracks it, which is a shame after you spent the effort pressing it firmly.
- Work the rim first, all the way round, before you commit to the base. Cheesecake contracts as it chills and the top edge is usually the last bit still holding on.
- If one refuses, put the whole thing back in the fridge for another hour rather than fighting it. Cold is the fix for every unmolding problem here.
- Ramekins do not unmold. Not with patience, not with a knife, not with warm water round the outside. If you baked these in ceramic, serve them in the ceramic and put the topping on in the dish. That is a good dessert, it is just not a portable one.
Once they are out, they sit happily on a plate for a couple of hours and travel well in a flat container. That portability is really the whole point of making minis rather than one big one, and it only exists if you gave them the time.
Fixing what goes wrong
| What you got | Why | Fix |
|---|---|---|
| Cracked tops | Past 150°F. On a mini this is nearly always the cause, because the window is so short. | Check at 12 minutes, not 15. Keep the cornstarch in. |
| Domed, then sank | Air beaten in. It expanded, lifted the top and then collapsed. | Low speed throughout, and stop the moment the egg disappears. |
| Grainy, with liquid weeping out | Overbaked. The proteins tightened and squeezed the water out. See curdling. | Nothing fixes it after the fact. Next time, 150°F. |
| Bitter or scorched crust | Par-baked too hot, with hot air on the underside through the plate. | 300°F for 4 minutes. Judge it by smell, not color. |
| Wet layer under the filling | The crust was not par-baked at all. | Four minutes is enough. Thirteen under custard is not. |
| Crust falls apart on unmolding | Pressed too loosely, or short on butter. | Press hard with a flat solid object. Wet sand, not dry crumbs. |
| Will not leave the cup | Not chilled long enough. The fat is still soft. | Back in the fridge. Four hours minimum, six is better. |
| Sank in the middle | Pulled before the center set. | 150°F. More on this in why air fryer cakes sink. |
| Some done, some not | Basket position. Some cups sat in the airflow and some did not. | Rotate at the halfway mark and always test the palest one. |
| Lopsided or leaning | Floppy silicone cups tipped on the perforated plate. | Stand them in a muffin tin or on a solid tray. |
| Lumpy filling | Cream cheese was cold when you started. | An hour on the counter. There is no shortcut that does not add air. |
If problems run across your bakes generally rather than just this one, the troubleshooting guide has the wider version, and how to avoid dry air fryer bakes covers the moisture side.
Flavors and toppings
The advantage of eight small ones is that they do not have to match. I usually do two or three toppings across a batch.
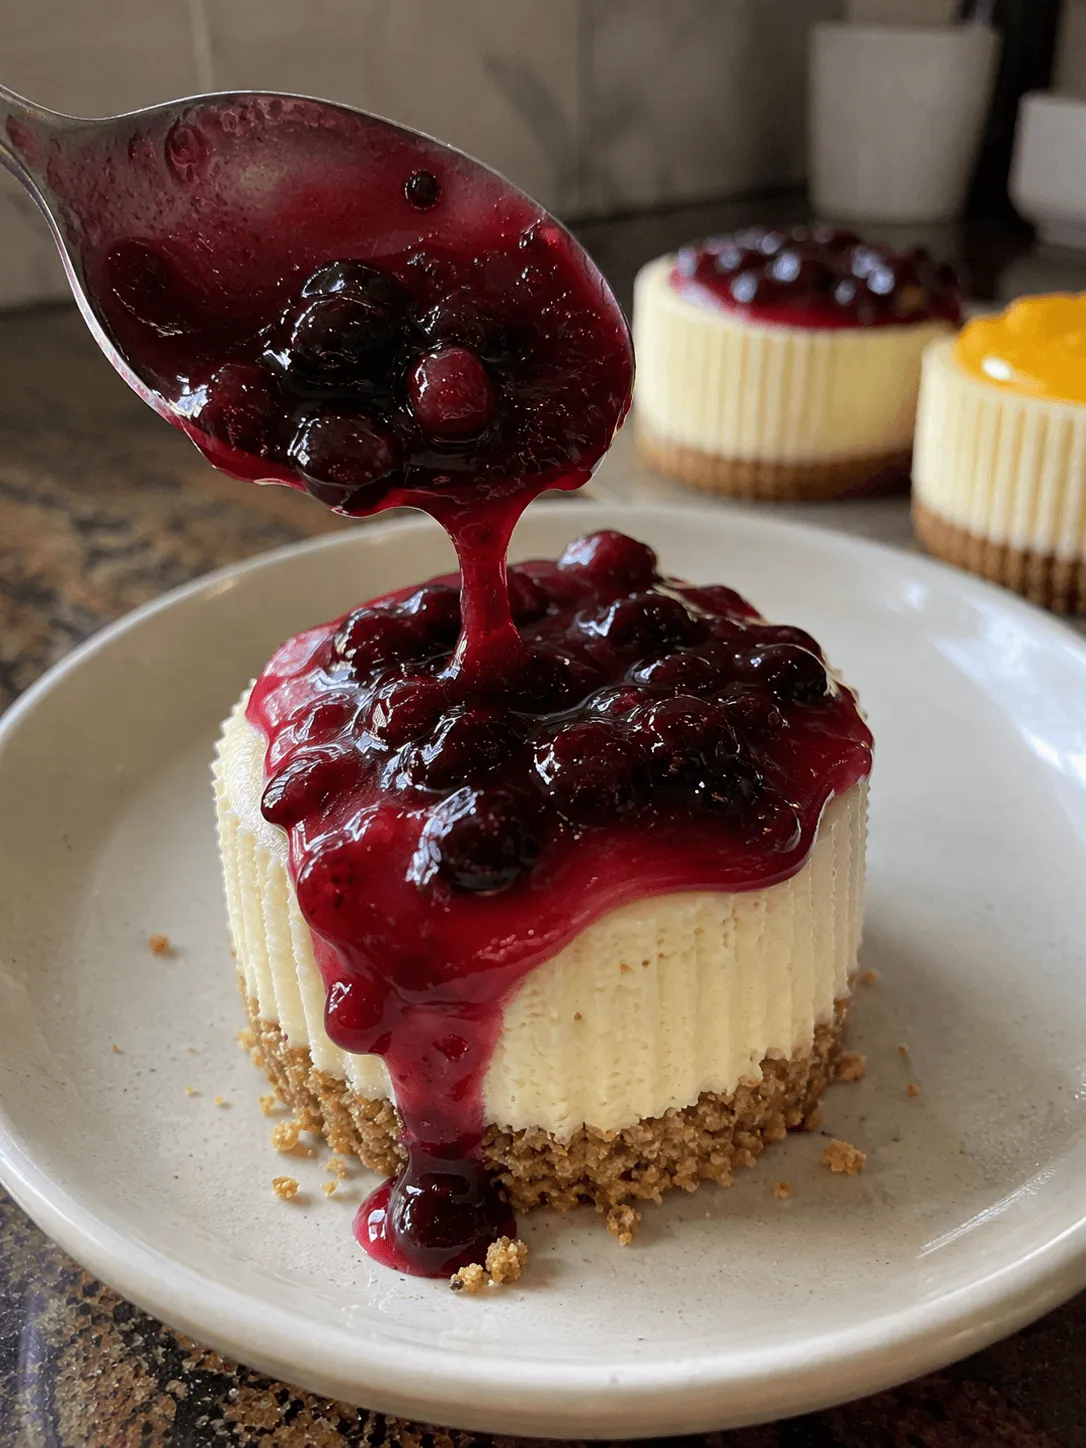
- Berry compote. A cup of berries, two tablespoons of sugar and a teaspoon of cornstarch slaked in cold water, simmered four minutes. Cool it fully before it goes on, or it slumps down the sides.
- Salted caramel. Go on right before serving. Caramel left on overnight in the fridge draws water out of the surface and goes runny.
- Lemon. The zest of a whole lemon into the filling and a bump to a full teaspoon of juice. The brightest version and the one that suits minis best.
- Chocolate. Two tablespoons of cocoa into the filling with the sugar, and an extra tablespoon of sour cream, since cocoa is thirsty. Check the temperature rather than the look, because chocolate gives you nothing to read.
- Biscoff crust. Swap the graham crumbs for crushed speculoos and drop the tablespoon of sugar, since they are sweeter already.
- Baked apple topping. Chopped spiced apple spooned on, which is essentially the top of our air fryer baked apples on a cheesecake.
- Making sixteen instead of eight. The recipe doubles cleanly, but bake it as two batches rather than crowding the basket, and take about a minute off the second one because the machine is heat soaked by then. The recipe scaler handles other multiples.
If small desserts out of a basket is the general idea you are after, air fryer brownies and air fryer lava cake are the two I make most often after these.
Storage and freezing
- In the fridge, in their cups: 4 days, covered. Leaving them in the silicone is the best way to store them, because the cup protects the sides.
- Unmolded and topped: 2 days. Fruit toppings start to weep after that and wet the top.
- Frozen: 2 months, and they freeze better than a full-size cheesecake does because they are small enough to freeze through quickly. Unmold first, freeze them uncovered on a tray until solid, then bag them.
- Thawing: overnight in the fridge, never on the counter. A mini thawed at room temperature sweats and the crust goes soft.
- Do not freeze them topped. Compote and caramel both separate. Top after thawing.
Eight small cheesecakes and thirteen minutes of running time is about as cheap as baking gets, and if you want the real figure for your electricity rate the running cost calculator will work it out against heating a full oven for the same job. All four air fryer tools are in one place, and if you are wondering what else is worth attempting in a basket, what you can and cannot bake in an air fryer is the honest list. The full recipe index has everything else.
Frequently asked questions
QCan you make mini cheesecakes in an air fryer without a springform pan?
Yes, and minis are the one cheesecake format where a springform is genuinely unnecessary rather than just replaceable. A springform exists because a cheesecake is glued to its pan and cannot be turned upside down, so the pan comes apart instead. A silicone cupcake cup solves the same problem from the other side: you peel the wall off the cheesecake rather than lifting the cheesecake out of the wall. The catch is that peeling only works once they are properly cold, so chill for at least 4 hours before you try. Ceramic ramekins also work for baking but do not unmold at all, so those get served in the dish.
QHow long do mini cheesecakes take in an air fryer?
12 to 15 minutes at 300F in silicone cupcake cups, and start checking at 12. The reason published times for these run all the way from 12 to 25 minutes is that the recipes are not using the same vessel and mostly do not say so. A 6 oz ceramic ramekin holds a much deeper column of custard than a 2 inch cup does, and takes 20 to 25 minutes. A metal muffin tin runs faster than silicone, 10 to 13, because metal conducts heat better. The internal target of 150F in the center is the same in all of them, which is why it is a more useful instruction than any number of minutes.
QWhat temperature should mini cheesecakes be inside?
150F in the center, measured by pushing an instant-read thermometer in from the side at an angle rather than down through the top, so the hole does not show. Egg white starts thickening around 145F and becomes a tender solid near 150. Past about 160 the proteins contract and squeeze out the water they were holding, which is what makes the texture grainy and cracks the top. One adjustment most recipes miss: if you are baking in ceramic ramekins, pull at 145F instead, because a hot ramekin carries over another five to seven degrees after it leaves the basket. A silicone cup carries over a degree or two, so 150 is the right pull there.
QCan you use paper cupcake liners for air fryer mini cheesecakes?
Only inside a muffin tin that supports them, and even then silicone is better for cheesecake specifically. Two problems. First, an unsupported paper case cannot hold its shape against the airflow, so it tilts and unfolds and the filling spreads. Second, and this one is particular to cheesecake, paper wicks the melted butter out of the graham crust while it bakes, so you get a greasy case and a crumbly crust that falls apart when you peel it. Silicone absorbs nothing. There is also a safety point worth repeating: never leave an empty paper liner in a basket, because it weighs almost nothing and the fan will lift it into the heating element.
QWhy did my mini cheesecakes crack when my full-size one did not?
Because a mini is harder to time, not easier. Shrinking a cheesecake more than doubles its surface area relative to its volume, which means it bakes about twice as fast and the window between properly set and overset shrinks with it. On a 6-inch the last fifteen degrees take about four minutes, which is plenty of room to check and decide. On a mini the same fifteen degrees pass in under two. A big cheesecake also has a real gradient from edge to middle, and that soft middle is a safety margin. A mini sets almost uniformly, so when it goes over, all of it goes over at once. Check at 12 minutes and treat the thermometer as the method rather than a backup.
QHow long do mini cheesecakes need to chill before you can get them out?
At least 4 hours, and 6 is better. Most recipes say one to two hours, which is honestly how long a two inch cheesecake takes to get cold, but cold and firm are two different clocks. The egg sets in the basket at 150F and that holds it together in a dish. The fat sets in the fridge, and solid fat is most of the structure of a cold cheesecake. Butterfat is soft and plastic between 50 and 70F and only properly solid below about 45, and it keeps crystallizing for hours after it reaches fridge temperature. At two hours they are cold and they will still smear. Overnight is the version I actually recommend.
QCan I use a muffin tin in the air fryer for these?
Yes, and a 6-cup tin is arguably the best option if one fits your basket with about an inch of airflow around it. It holds the spacing so nothing can shift, it stops loose silicone cups tipping over as you carry the basket, and metal conducts heat much better than silicone does, so the sides bake faster. Take about 2 minutes off the time, so 10 to 13 minutes, and still pull at 150F. Line it with silicone cups rather than paper for the reasons above. Measure your basket before buying, since the gap between a tin that fits and one that does not is usually about half an inch.
QDo I need to par-bake the crust?
Yes, but cooler than you have been told. Four minutes at 300F, not three to six at 325. Two things make a basket different from an oven here. Sugar begins to caramelize around 320F, so a par-bake at 325 sits right on the threshold, and the underside of the cup is over a perforated plate with fast hot air moving beneath it rather than on solid metal. The par-bake is also the only time the crust is exposed, because once the filling goes in the wet custard holds the crust surface near 212F no matter how hot the air is. So every crust problem happens in those four minutes. Skipping it entirely gives you the other failure, a wet layer under the filling, because thirteen minutes under custard will not set a raw crumb crust.
QHow full should I fill the cups?
To about a quarter inch below the rim, which is nearly full and the opposite of the two thirds rule for cupcakes. The difference is leavening. A cupcake has baking powder and a lot of beaten-in air, so it climbs hard and will mushroom over the side if you overfill it. A cheesecake has no chemical leavener at all, and if you have mixed it properly on low it has very little air in it either, so it rises about an eighth of an inch and settles back down. Filling them low just gives you a thin cheesecake with a lot of crust, which is the most common way these come out disappointing.
QCan I make these without a crust?
Yes, and it is a straightforward way to make them gluten free without hunting down substitute crumbs. Skip the crust steps, and take about a minute off the bake, since the crust normally insulates the base a little. Everything else stays the same, including the 150F target. The one thing to know is that crustless minis are more fragile to unmold, because the crust is what gives the base something rigid to sit on. Give them the full overnight chill rather than four hours, and peel rather than push.
QCan I use egg yolks only, like other small air fryer bakes?
Not for these, and it is a real exception to how we treat small bakes elsewhere on the site. Our mug cake and vanilla cake both cut the egg white back, because in a small cake the white is mostly water and gives you a bouncy, faintly omelette-like texture. A cheesecake is a custard rather than a cake, and the white is the structural protein that does the setting. Go yolk-only and you get a very soft, very good cheesecake that will not hold together when you peel the cup off it. One whole egg to 8 oz of cream cheese is what makes these unmoldable, which is the entire point of making them in cups.
QCan I freeze mini cheesecakes?
Yes, and they freeze noticeably better than a full-size cheesecake because they are small enough to freeze through quickly, which means smaller ice crystals and less damage to the texture. Unmold them first, freeze them uncovered on a tray until solid, then bag them so they do not stick together. Two months is comfortable. Thaw overnight in the fridge rather than on the counter, because a mini thawed at room temperature sweats and softens the crust. Do not freeze them with fruit compote or caramel on, since both separate. Top them after thawing.
Never overbake again
Get our one-page times & temps cheat sheet, plus a new tested recipe each week.
No spam · unsubscribe anytime