

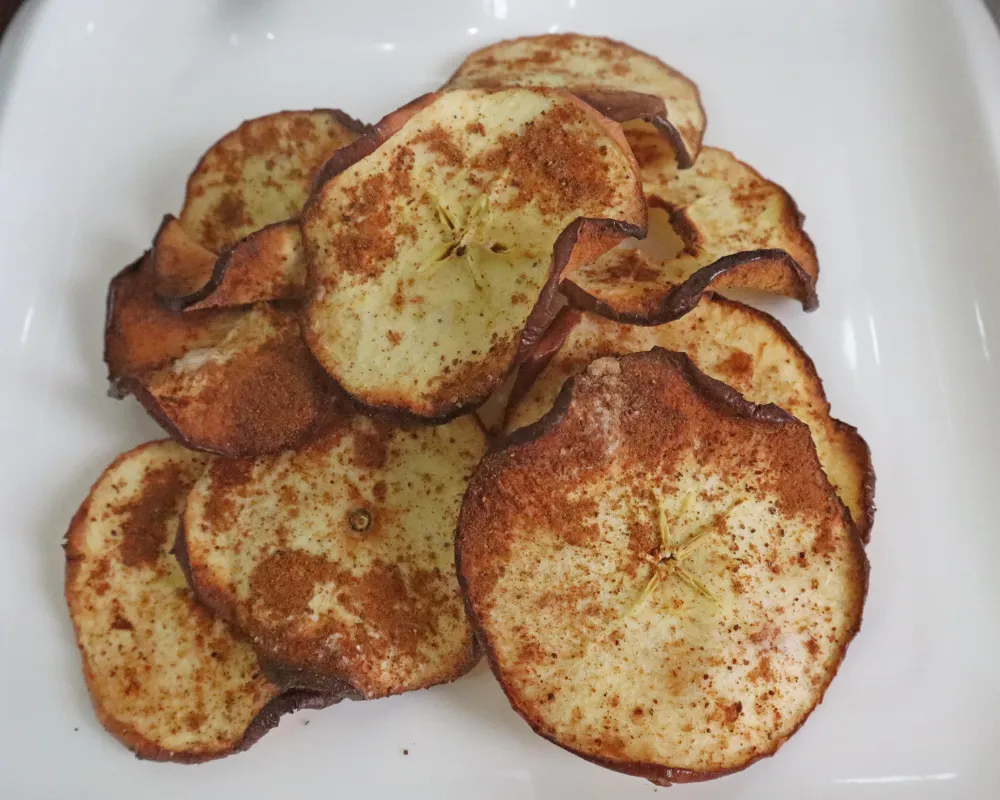
I made these three times before I got a chip that actually snapped, and the reason took me embarrassingly long to work out, because I was reading recipes that all sounded confident and gave completely different numbers.
One said 320°F for eleven minutes. Another said 200°F for ninety. I tried the fast one first, obviously. What came out had dark brittle edges and a middle that folded like a piece of leather.
Quick answer: Slice 1/8 inch thick on a mandoline. Dry at 200°F for 45 to 75 minutes, turning them twice, until they feel dry and stiff but not colored. Optional 3 minutes at 300°F at the end if you want more color. Then cool them completely on a rack, because they are not crisp until they are cold. No oil at any point.
Two recipes wearing one name
Search this and you land on two camps that never acknowledge each other.
| Camp | Numbers | What it really is |
|---|---|---|
| The fast one | 300 to 320°F, 11 to 15 min | Roasting. Works only on a wafer-thin slice, and one popular version quietly specifies 1/32 of an inch to make it possible. |
| The slow one | 190 to 200°F, 45 to 90 min | Dehydrating. This is what an apple chip actually is, and it is what a food dehydrator does. |
Neither camp is lying. They are cooking different things and describing them with the same three words. If you take a 1/8 inch slice, which is what most recipes tell you to cut, and put it into the fast camp's 320°F for twelve minutes, you get the burnt-edge leathery-middle result. That is not your air fryer running hot. That is a dehydrating job being done at roasting temperature.
An apple chip is not a cooked thing. It is a dried thing. A fresh apple slice is about 85 percent water, and to get it to shatter rather than bend you have to remove almost all of that. Not most of it, almost all of it. There is no temperature that does that in eleven minutes without wrecking what is left behind, and the reason why is the next section.
Why they burn before they dry
This is the bit no recipe I read explains, and it is the whole thing.
An apple is not just water. It is roughly 85 percent water and about 10 percent sugar, and that sugar is mostly fructose rather than the sucrose in your sugar bowl. That distinction matters more than it sounds, because the two brown at very different temperatures.
Fructose starts browning
The sugar in fruit begins to color and caramelize from around here. It is far lower than most people assume, and it is why honey and fruit scorch so easily.
Table sugar caramelizes
Sucrose needs much more heat before it does the same thing. Recipes written around sucrose intuition mislead you badly here.
Water leaves at its own pace
A wet surface cannot go above this until the water has gone, so drying takes the time it takes regardless of what the dial says.
Put those together and the problem is obvious. At 300 or 320°F, the thin outer rim of a slice dries first, its temperature immediately climbs past 230°F, and the fructose there starts browning and then burning. Meanwhile the thicker middle of the slice is still full of water and pinned at 212°F, going nowhere. By the time the center is dry the edge is bitter.
Dry them at 200°F instead and no part of the slice can get hot enough to brown, no matter how long you leave it. The water leaves, the sugar does not caramelize, and the chip goes pale and glassy rather than dark and bitter. It takes an hour, and that hour is not the air fryer being slow. It is how long it takes to remove that much water without cooking the sugar.
If you want color, add it at the end. Once the slices are genuinely dry there is no water left to hold the surface down, so a short burst at 300°F browns them in three or four minutes without the leathery middle, because there is no longer a wet middle. That is the two-stage version, and it gives you the best chip on this page. Do not do it the other way round. The glossary entry on caramelization covers the temperatures, and the 212 degree ceiling covers the water half.
Thickness sets the temperature
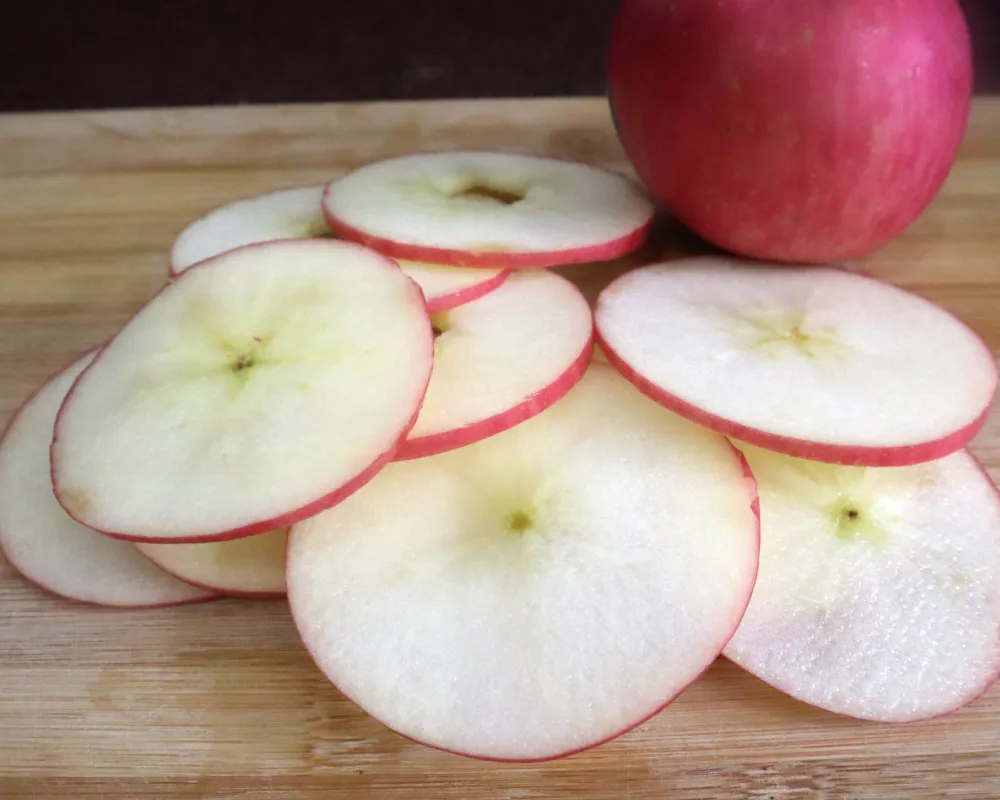
Once you know the sugar is the constraint, the thickness table writes itself. A thinner slice has less water to lose and less distance for it to travel, so it can survive a hotter, faster process. A thicker one cannot.
| Thickness | Best method | Time | Result |
|---|---|---|---|
| 1/32 inch, mandoline on the finest setting | 320°F straight through | 10 to 14 min | A translucent wafer. Very crisp, very fragile, barely tastes of apple. |
| 1/8 inch | 200°F, then optional 300°F burst | 45 to 75 min | The proper chip. Snaps, tastes of apple, holds up in a bowl. |
| 3/16 inch | 200°F | 75 to 100 min | Chewy at the center. Pleasant, closer to a dried apple ring. |
| 1/4 inch and up | 200°F | 2 hours plus | A dried apple ring. Will not go crisp however long you leave it. |
Use a mandoline. This is the one recipe on the site where I will not pretend a knife is fine, because uneven slices are the single biggest cause of a batch where some pieces are burnt and others are still bendy. If you only own a knife, slice as thin and as evenly as you can and accept a wider spread of results.
Slice across the apple rather than down through it, so you get rings with the little star of the core in the middle. Cored or not is up to you. Leaving the core in is prettier and the seeds mostly fall out during handling, though pick out any that stay.
Ingredients
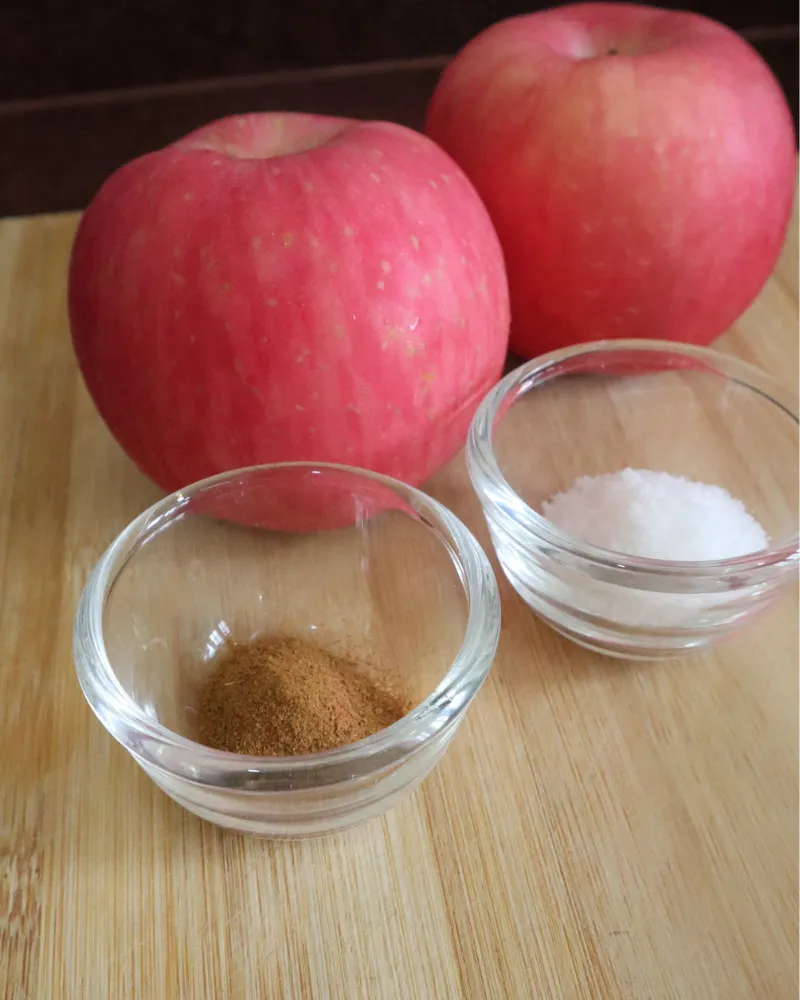
Two apples and, if you want, some cinnamon. That is genuinely all, and unlike most crisp things from a basket there is no oil in this at all.
- 2 medium apples, about 12 oz / 340g, washed
- 1/2 teaspoon ground cinnamon, optional
- Optional: a bowl of cold water with 1 tablespoon lemon juice, for stopping browning
Why there is no oil
Every other crisp thing on this site gets a thin coat of oil, because oil conducts heat evenly across a surface and gives it something to brown with. Our air fryer potato peels need it and are noticeably worse without it.
Apple chips are the exception, and it is worth understanding why rather than just taking my word for it. You are not browning anything, so there is nothing for the oil to help with. Worse, oil on the surface slows evaporation, which is the entire job here, and it turns the finished chip slightly greasy in a way that fruit really does not want. Several recipes tell you to spray them. Skip it.
The cinnamon is a different case. It sticks perfectly well to a damp apple slice with no fat at all, so dust it on before drying and it stays put.
How to make them
- Wash and dry the apples. You are eating the skin, so give them a proper scrub rather than a rinse.
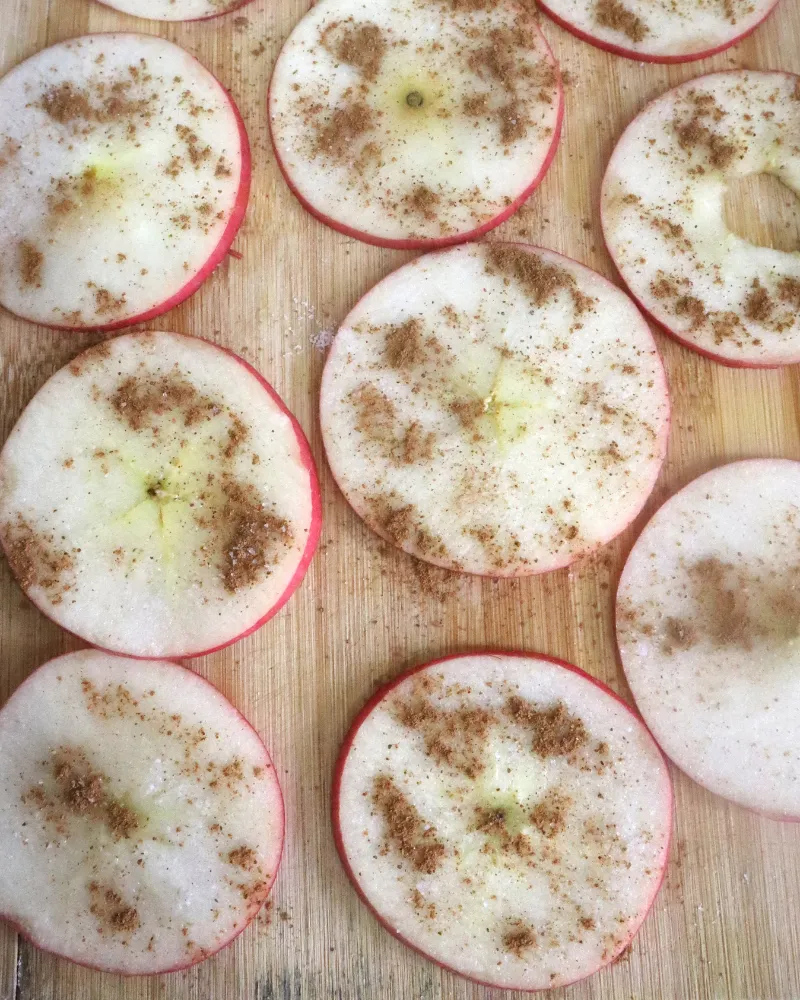
- Slice 1/8 inch thick on a mandoline, cutting across the apple so you get rings. Work quickly once you start, because cut apple browns fast.
- Optional: a 30 second dip in cold water with a tablespoon of lemon juice, if you mind the browning. Then pat both sides properly dry, because any water you add here is water you have to drive off later.
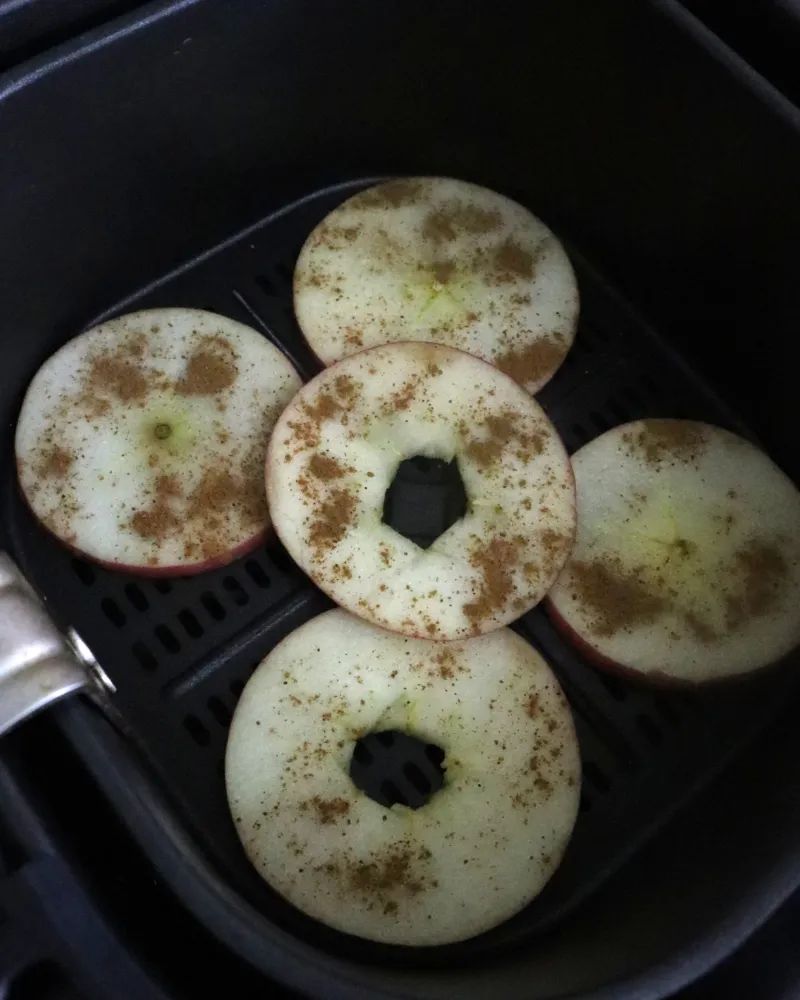
- Dust with cinnamon if you are using it. It sticks to the damp surface without any oil.
- Preheat to 200°F for 3 minutes. Short, but it means the first slices are not sitting in a cool basket sweating.
- Lay them in a single layer, not overlapping. This is a job for two or three batches in most baskets, and crowding is the fastest way to a chewy batch.
- Weigh them down. A metal rack or trivet on top stops the fan lifting them into the element. Details below, and it matters more than it sounds.
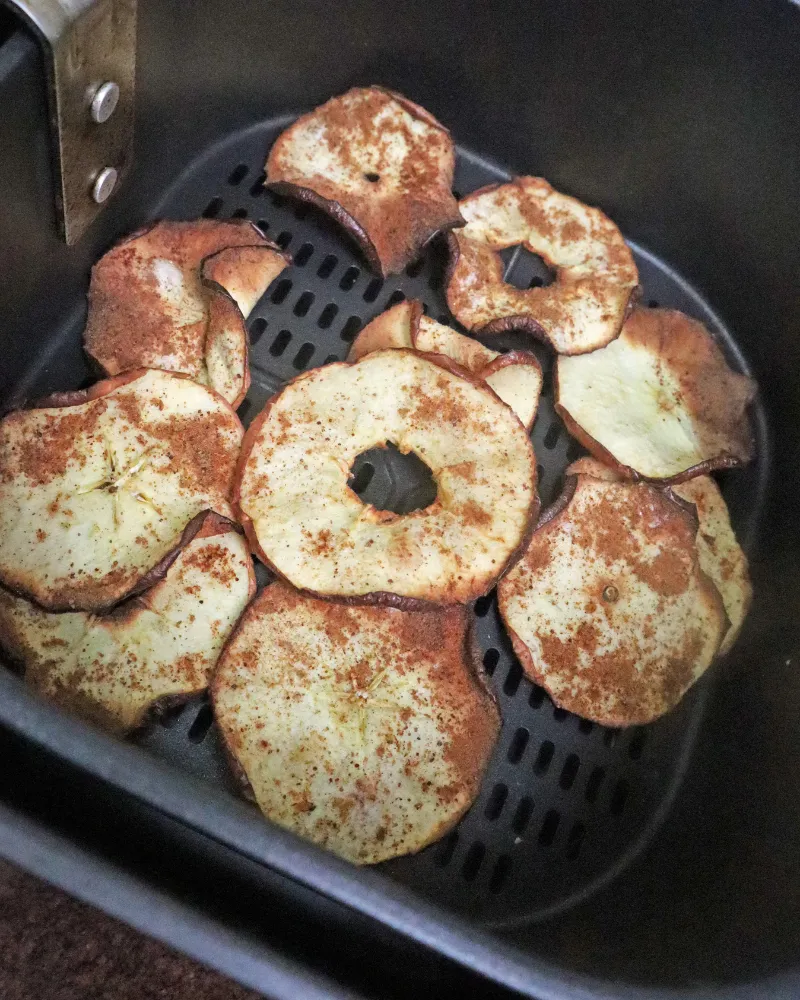
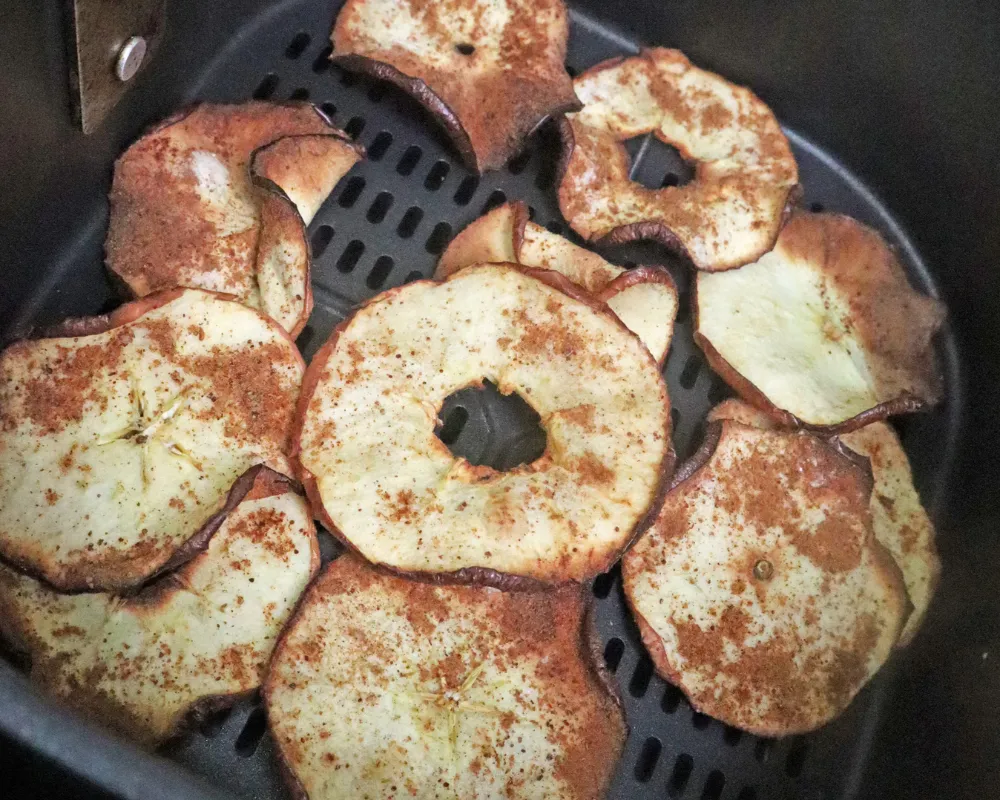
- Dry at 200°F for 45 to 75 minutes, turning them over at 20 and 40 minutes. They will curl. That is normal and it is a good sign.
- Start checking at 45 minutes. A finished slice feels dry and stiff on both sides with no cool damp patch in the middle. It will still bend slightly while hot.
- Optional color burst: once they are dry, 3 to 4 minutes at 300°F. Watch them, because now there is no water protecting the sugar and they will go from golden to bitter quickly.
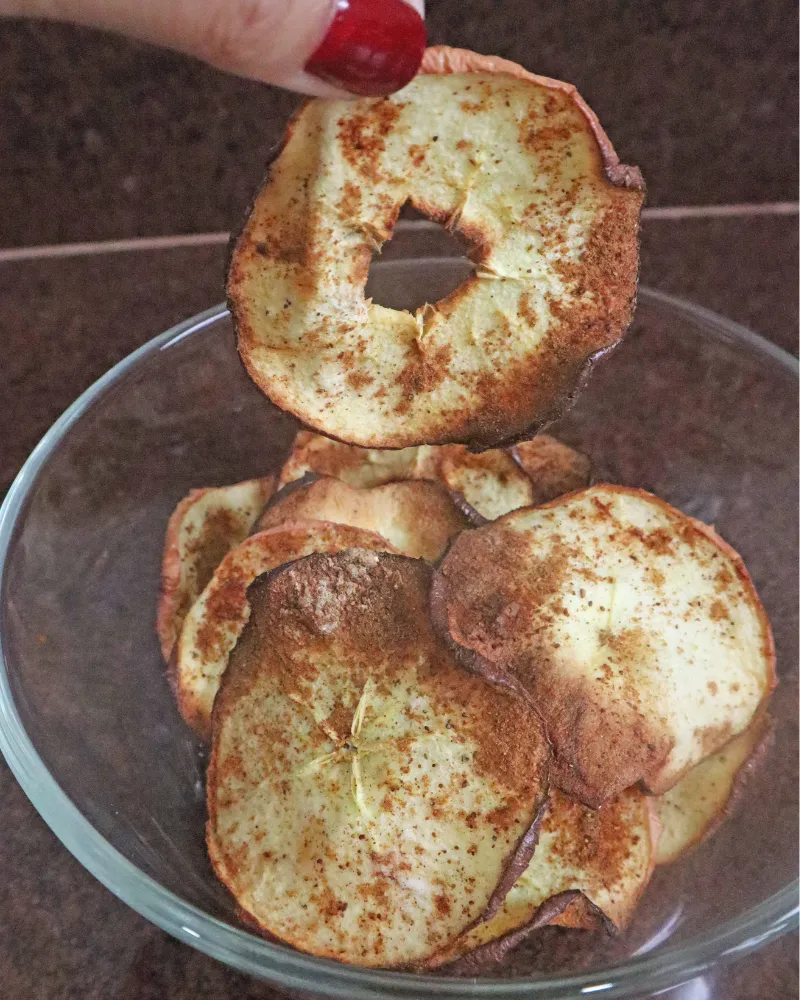
- Cool completely on a rack, spread out and not touching, for at least 15 minutes. They are not crisp until they are cold, and this is the step people skip.
- Test one. A cooled chip should snap cleanly. If it bends, the batch needs another 10 minutes at 200°F.
Do not raise the temperature to speed this up. It is the most tempting thing on this page and it does not work. Above about 230°F the sugar in the exposed edges starts browning while the middle is still wet, and you cannot undo that. If you are short on time, slice thinner rather than turning the dial up.
They are not crisp until they are cold
This is the step that separates people who think this recipe works from people who think it does not, and several recipes do mention it in passing. None of them explain it, so it gets skipped.
When you pull the slices out they will be pliable. Not wet, but bendy, and it feels like they are not done. Almost everybody puts them back in at this point, and that is how you get chips that are simultaneously overdone and disappointing.
Two things happen as they cool, and neither can happen while they are hot:
- The last of the moisture redistributes and leaves. Even a properly dried slice has a little water left, unevenly spread. As it cools that evens out and evaporates off the surface, which is why a chip that felt soft at minute one snaps at minute fifteen.
- The sugar sets glassy. The concentrated fruit sugar in a dry apple slice is soft and pliable when warm and rigid when cold, in the same way a hard candy is. That rigidity is most of what you feel as crispness.
So the test is not how it feels in the basket. It is how a cooled one behaves. Take one out, spread it on the counter for a few minutes, and try to bend it. Snap means the batch is done. Bend means ten more minutes at 200°F for everything, not just that one.
Which apples, and the browning question
Variety matters here in a way it does not for most apple recipes, because you are concentrating everything the apple already has. A sweet apple becomes a very sweet chip, and a bland one becomes a bland one.
| Apple | As a chip | Verdict |
|---|---|---|
| Honeycrisp | High sugar, dense flesh, keeps a lot of flavor | My first choice, though watch the color burst |
| Granny Smith | Tart and lower in sugar, so it browns more slowly and tastes sharper | Best if you find dried fruit too sweet |
| Fuji, Gala | Very sweet, dry down nicely | Good, and usually the cheapest option |
| Pink Lady, Braeburn | Balanced sweet and tart | Excellent all rounders |
| Red Delicious, McIntosh | Mealy flesh that dries to a papery texture with little flavor | Avoid |
The browning question
Cut apple goes brown within minutes because an enzyme in the flesh reacts with oxygen. It is harmless and it does not affect flavor, but it does make the chips look dull rather than golden.
The usual fix is a dip in lemon water, and it works. The honest cost is that you have just added water to something whose entire purpose is losing water, so pat them properly dry and expect a few extra minutes of drying. My own preference is to skip it, work fast, and accept slightly duller chips, but if you are making these to look good in a bowl the dip is worth it.
One thing that genuinely does not help: peeling. The skin holds a good share of the fiber and most of the color, and a peeled chip is limp and pale. Leave it on. The one thing worth checking is that the apples are not green or sprouting anywhere, which is a question we go into properly on the potato peels page, and which does not apply to apples at all. With apples you just need them to be sound fruit.
Keeping them in the basket
A dry apple slice weighs almost nothing, and an air fryer fan moves a lot of air. Left loose, the slices will lift, stick to the element and scorch, and you will get a burnt smell about forty minutes into an otherwise fine batch.
Every recipe that mentions this suggests a rack or trivet on top, and that is the right answer. A few practical notes on top of it:
- Anything oven safe and heavy enough works. A small metal cooling rack, a trivet, or a second crisper plate sitting on top. It does not need to press down, just to be in the way.
- Leave gaps. The rack should not be solid, since the air still needs to reach the slices. A cooling rack is ideal for exactly this reason.
- They get lighter as they dry, so the risk goes up over the hour rather than down. Do not take the rack off partway because they seem settled.
- Oven-style air fryers make this easier, because a flat tray with a rack over it is a natural fit and there is far more room for a single layer. Our basket versus oven-style comparison goes through where each format wins, and this recipe is one of the clearer cases for the oven-style unit.
Fixing what goes wrong
| What you got | Why | Fix |
|---|---|---|
| Dark edges, leathery middle | Roasting temperature on a dehydrating job. The classic. | 200°F for 45 to 75 minutes. Color burst only at the very end. |
| Bendy, not crisp | Either not dry enough, or you tested one while it was still hot. | Cool one completely and try again before adding time. |
| Crisp at first, soft an hour later | Stored before completely cool, so trapped steam softened them. | Cool fully on a rack, then airtight with the lid on tight. |
| Bitter | Sugar scorched, usually during the color burst. | Three minutes maximum at 300°F, watching the whole time. |
| Some burnt, some raw | Uneven slices, or they were overlapping. | Mandoline, single layer, and turn them at 20 and 40 minutes. |
| Slices flew up and stuck to the element | Nothing holding them down. They get lighter as they dry. | A rack or trivet on top for the whole hour. |
| Dull brown color | Normal enzymatic browning from cut apple meeting air. | A 30 second lemon water dip, then pat very dry. |
| Papery and tasteless | Wrong apple. Red Delicious and McIntosh dry to almost nothing. | Honeycrisp, Granny Smith, Pink Lady or Fuji. |
| Took much longer than the recipe | Thicker slices than you thought, or a crowded basket. | Both fixable. Time here is set by thickness more than anything else. |
If burning is a pattern across different foods rather than just here, thin light items are always the first to go: how to prevent burning in an air fryer covers it, and the troubleshooting guide has the rest.
Uses and variations
- Cinnamon, obviously. Half a teaspoon dusted on before drying. Add a pinch of nutmeg and a little ground ginger and it turns into an apple pie flavor without any sugar.
- Nothing at all. Genuinely worth trying once. A plain Honeycrisp chip is intensely appley in a way the cinnamon version covers up.
- A little salt. A very small pinch after they come out. It does the same thing salt does to caramel, which is make the sweetness taste like more.
- Crumbled over things. Yogurt, oatmeal, or a bowl of ice cream. They soften within a minute or two on anything wet, so scatter them at the table.
- On a cheese board. Sharp cheddar and a crisp apple chip is a very good pairing and it looks like far more effort than it was.
- Pear chips. The same method exactly, though pears carry more sugar and more water, so expect 15 to 20 minutes longer and be even more careful with the color burst.
- Blitzed into powder. A few chips in a spice grinder gives you apple powder, which is lovely stirred into oatmeal or dusted over a cake.
If crisp things from a basket are what you are after generally, the same single-layer and cool-to-crisp logic runs through air fryer potato chips, tortilla chips and pasta chips. For apples treated the other way, soft rather than dry, there are air fryer baked apples.
Storage, and why they go soft
Apple chips have one enemy and it is humidity. A dried chip is hygroscopic, which means it actively pulls moisture back out of the air, and it will keep doing that until it is as soft as the day you started.
- Cool completely first. Not almost. A chip that goes into a container even slightly warm releases steam into a sealed box and softens the whole batch overnight. This is the single most common storage mistake.
- Airtight, at room temperature: 1 to 2 weeks. A glass jar with a proper seal beats a plastic tub with a snap lid.
- Do not refrigerate. A fridge is humid and cold, which is precisely the wrong environment. They will be soft in a day.
- Re-crisp if they soften: 10 minutes at 200°F, then cool completely again. This works well and you can do it repeatedly.
- A silica gel packet from a vitamin jar, dropped into the container, genuinely extends their life. Not essential, but it works.
An hour of air fryer time is more than most recipes here, so it is a fair question whether this is worth running the machine for. The running cost calculator will give you the number for your electricity rate, and against an oven held at 200°F for the same hour the air fryer still wins on a small batch. If you are adapting an oven or dehydrator recipe, the air fryer calculator handles the conversion, though for this one I would keep the temperature exactly as written and only adjust the time. All four air fryer tools are in one place, and the accessories guide covers racks and trivets worth owning.
Frequently asked questions
QWhy are my air fryer apple chips not crispy?
Two likely reasons. The first is that you tested one while it was still hot. Apple chips are pliable straight out of the basket and only turn crisp as they cool, because the last of the moisture redistributes and leaves and the concentrated fruit sugar sets glassy. Cool one on the counter for a few minutes before you judge the batch. The second is that they genuinely are not dry enough, which usually means the slices were thicker than 1/8 inch, they were overlapping in the basket, or you used a roasting temperature that browned the edges before the middles could dry.
QWhat temperature and how long for apple chips in an air fryer?
200°F for 45 to 75 minutes for 1/8 inch slices, turning them at 20 and 40 minutes, then an optional 3 to 4 minutes at 300°F for color. You will find recipes saying 320°F for 11 minutes, and those are describing a wafer sliced at about 1/32 of an inch, which is a different food. On a normal 1/8 inch slice that temperature browns the edges long before the center dries. An apple chip is a dehydrating job, not a roasting one.
QWhy do my apple chips burn on the edges but stay soft in the middle?
Because apple sugar browns at a much lower temperature than people expect. Apples are about 10 percent sugar and it is mostly fructose, which starts caramelizing from around 230°F, while table sugar needs closer to 320°F. At a roasting temperature the thin outer rim of a slice dries first, immediately climbs past 230°F and starts scorching, while the thicker middle is still full of water and pinned at 212°F. Dry at 200°F instead and no part of the slice can get hot enough to brown, however long you leave it.
QHow thin should I slice apples for chips?
1/8 inch, on a mandoline. That is the thickness that gives you a chip which snaps but still tastes of apple. Thinner, around 1/32 of an inch, gives a translucent wafer that crisps in about 12 minutes but has very little flavor left. Thicker, from 3/16 of an inch up, stays chewy in the center however long you dry it and becomes a dried apple ring rather than a chip. This is the one recipe where I would not tell you a knife is fine, because uneven slices are the main reason a batch has both burnt pieces and bendy ones.
QDo I need oil for air fryer apple chips?
No, and I would skip it even though several recipes tell you to spray them. Oil earns its place on most crisp things because it conducts heat evenly and gives a surface something to brown with, but here you are not browning anything. Worse, oil on the surface slows evaporation, which is the entire job, and it leaves the finished chip faintly greasy in a way fruit does not suit. Cinnamon sticks perfectly well to a damp apple slice without any fat at all.
QWhich apples are best for apple chips?
Honeycrisp is my first choice, because it has dense flesh and enough sugar and flavor to survive being concentrated. Granny Smith is the best pick if you find dried fruit too sweet, since it is tart and lower in sugar so it also browns more slowly. Fuji, Gala, Pink Lady and Braeburn all work well. Avoid Red Delicious and McIntosh, which have mealy flesh that dries to a papery texture with almost no flavor. Variety matters more here than in most apple recipes because drying concentrates whatever the apple already had.
QHow do I stop the apple slices flying around?
Put a metal rack or trivet on top of them. A dry apple slice weighs almost nothing and an air fryer fan moves enough air to lift it into the heating element, where it scorches. Anything oven safe and open enough for air to pass through works: a small cooling rack, a trivet, or a second crisper plate laid over the top. Leave it on for the whole hour, because the slices get lighter as they dry, so the risk goes up over time rather than down.
QShould I peel the apples?
No. The skin holds a good share of the fiber and most of the color, and a peeled chip comes out limp and pale. It also helps the slice hold together as it dries and curls. Just wash the apples properly first, since you are eating the outside. Coring is optional: leaving the core in gives you rings with a little star in the middle, which looks better, and the seeds mostly fall out during handling, though pick out any that stay.
QHow do I keep apple chips from turning brown?
Dip the slices in cold water with a tablespoon of lemon juice for about 30 seconds, then pat both sides properly dry. The browning is a harmless enzyme reaction with oxygen and it does not affect flavor, only appearance. The honest cost of the dip is that you have just added water to something whose whole purpose is losing water, so expect a few extra minutes of drying. Working quickly and accepting slightly duller chips is a perfectly good alternative.
QWhy did my apple chips go soft after a day?
Either they went into the container before they were completely cool, or the container is not properly airtight. A chip that is even slightly warm releases steam into a sealed box and softens the whole batch overnight. Beyond that, dried apple is hygroscopic, meaning it actively pulls moisture back out of the air, so a snap-lid tub is not enough. Use a jar with a real seal, keep it at room temperature rather than in the fridge, and drop in a silica gel packet if you have one. They re-crisp perfectly at 200°F for 10 minutes.
QCan I use the dehydrate setting on my air fryer?
Yes, and if your machine has one it is the right tool for this. A dehydrate mode is usually a low temperature, often around 130 to 170°F, with the fan running continuously, and it will give you an excellent chip in 2 to 4 hours. It is slower than 200°F but even gentler on the sugar, so there is no risk of browning at all. If you have the setting and the patience, use it. If not, 200°F on the normal setting does the same job in about an hour.
QCan I make a bigger batch?
Only by doing more rounds, not by filling the basket higher. Apple slices dry in a single layer and nowhere else, because a slice with another slice on top of it is not losing water from that side. Two apples fills most baskets across two or three rounds already. The good news is that unlike most recipes here the batches do not need adjusting, since at 200°F the machine is nowhere near hot enough for heat soak to change anything, so every round runs the same. An oven-style air fryer with a full tray is genuinely better for a big batch.
Never overbake again
Get our one-page times & temps cheat sheet, plus a new tested recipe each week.
No spam · unsubscribe anytime