
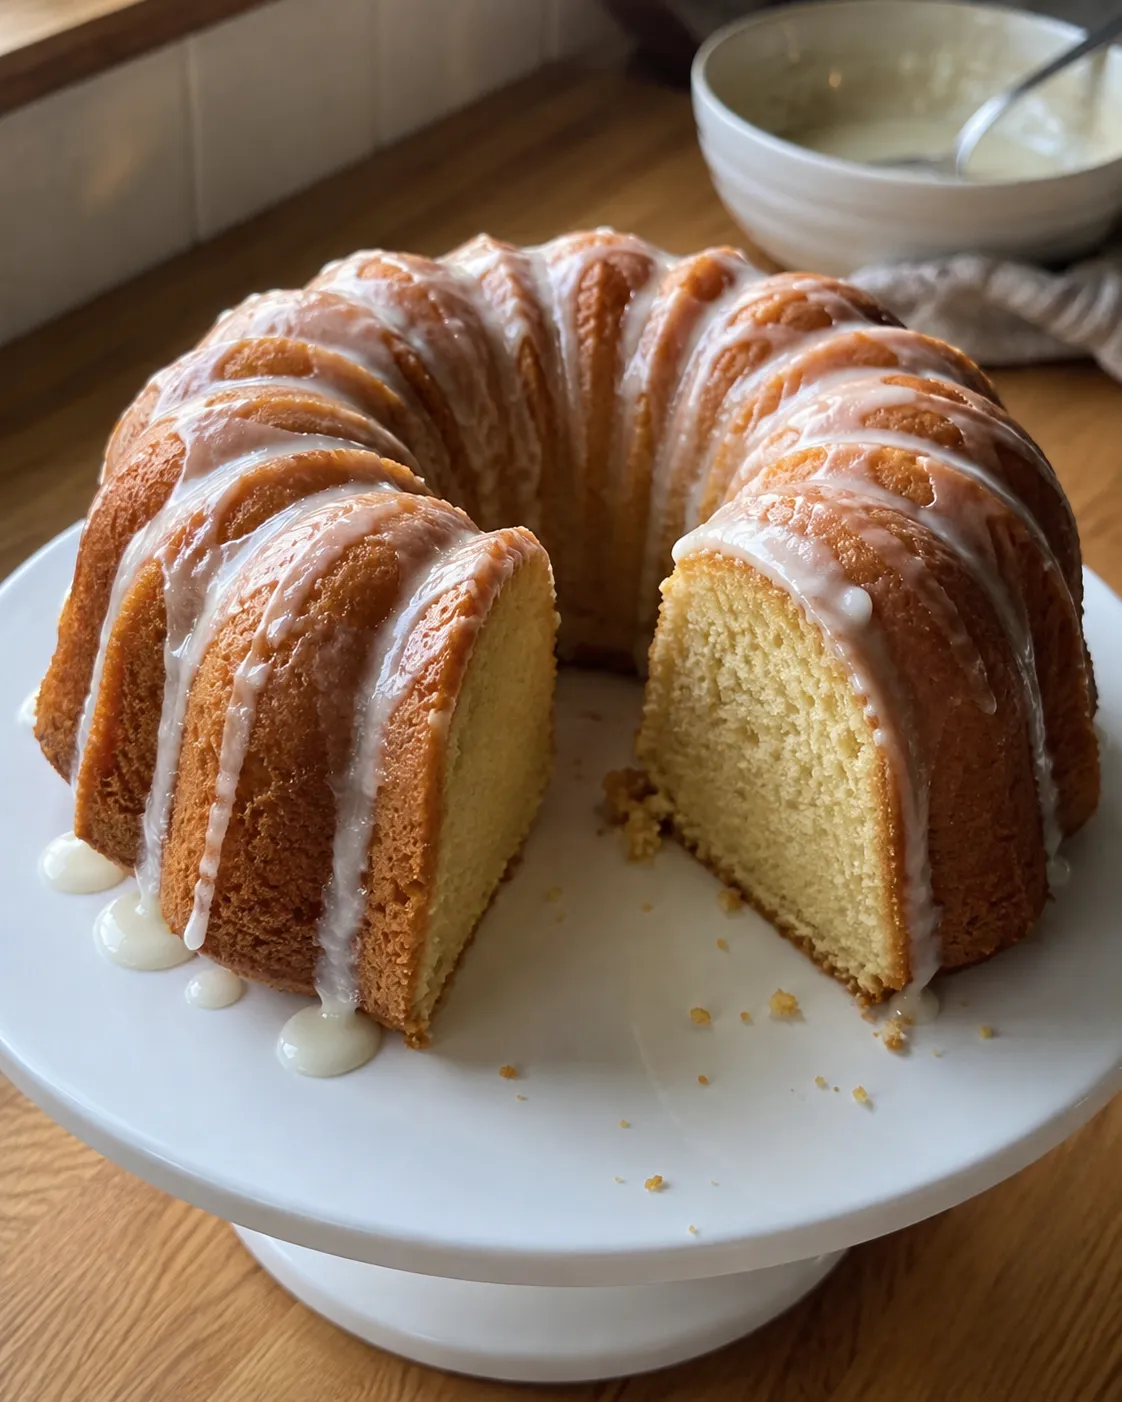
I bought the pan before I measured the basket, which is the wrong order and I knew it at the time. It fit, with about a finger of room on each side, and then the first cake came out with a pale seam running around the outside and a top that had gone too dark somewhere around minute twenty.
Working out why took a while, because the recipes I was reading disagreed with each other by more than double. One said fifteen minutes. One said thirty eight. Same temperature, same appliance, same dessert.
Quick answer: Measure three things, not one, and the one everybody names is the least likely to fail you. A 6-cup pan, usually sold as a 7-inch bundt, fits most 5 quart baskets and up. Bake at 320°F for 28 to 34 minutes, tent with foil at 18, and pull at 205°F measured in the thick part of the ring. Then ignore the diameter printed on the box and go by cup capacity, because that is the number that sets your bake time and it is almost never on the label.
Does it fit? Three numbers, about a minute
Every page on this subject tells you to measure the width of your basket. That is one of three measurements and in my experience it is not the one that catches people out.
- Measure the widest point of the pan, which is the rim, not the base. Bundt pans flare. A pan that sits happily on a 6 inch circle can be 7 inches across the top lip, and the lip is what hits the basket wall on the way down. Measure across the outside of the rim.
- Measure the floor of the basket, not the opening. Most baskets taper. The number that matters is the flat part the pan actually stands on, and it is usually an inch smaller than the top.
- Measure floor to element. This is the one people skip and it is the one that fails, because a bundt is tall for its width in a way a round cake pan is not. Stand a ruler on the crisper plate and read off the height to the metal above it.
| Measure | The rule | Why |
|---|---|---|
| Pan rim across | At least 1 inch smaller than the basket floor | Half an inch of air on each side, or the cake bakes unevenly around the outside |
| Pan height | At least 1 1/2 inches below the element | Closer than that and the top is dark at 18 minutes rather than 24 |
| Pan capacity | See the next section | This is the one that sets your time, and it is not a fit question at all |
If you have not measured your basket yet, the pan size calculator takes those three numbers and gives you the largest round pan that fits with proper airflow. A bundt stands on a circle, so that figure carries straight over: your pan rim has to come in under it. What the calculator will not do is tell you how much batter a bundt holds, because a bundt is mostly a hole. That part is below.
One more thing worth knowing before you buy anything: an oven-style unit with a flat shelf takes a much bigger pan than a basket does, and if you already own one this whole section gets easier. Basket versus oven-style goes through where each format wins, and pans are one of the clearer cases. If you are actually shopping rather than working with what you have, the best air fryers for baking covers which models have the head room a tall pan needs.
Inches lie. Cups do not.
Here is the thing that resolved the timing mess for me, and I have not seen it stated plainly anywhere.
Published air fryer bundt recipes run from 15 minutes to 38 minutes. Not at different temperatures, either. Several of them sit within a few degrees of each other. Sort them by the pan and it stops being mysterious immediately, because the pans are not the same size even when the number on the box is.
A bundt described as 6 inches commonly holds 3 cups. A bundt described as 7 inches commonly holds 6 cups. That is twice the batter for one extra inch of diameter, because bundt pans vary enormously in how deep they are and how much volume the flutes and the central tube take up. Two pans can look almost identical on a shelf and hold completely different amounts.
| Capacity | Usually sold as | Batter | 320°F | Pull at |
|---|---|---|---|---|
| 3 cups, mini | 6 to 6 1/2 inch | About 2 cups | 18 to 22 min | 205°F |
| 6 cups | 7 inch | About 3 1/2 cups | 28 to 34 min | 205°F |
| 9 cups | 8 1/2 inch | About 5 cups | 36 to 44 min, oven-style only | 205°F |
| 10 to 12 cups, standard | 10 inch | About 7 cups | Will not fit a basket at all | Use the oven |
This recipe is written for the 6-cup row. If yours is a different size, the recipe scaler will do the arithmetic on the batter, and the note it gives you about the batter getting deeper or shallower matters more here than usual, for the reason in the next section.
How to find out what your pan actually holds
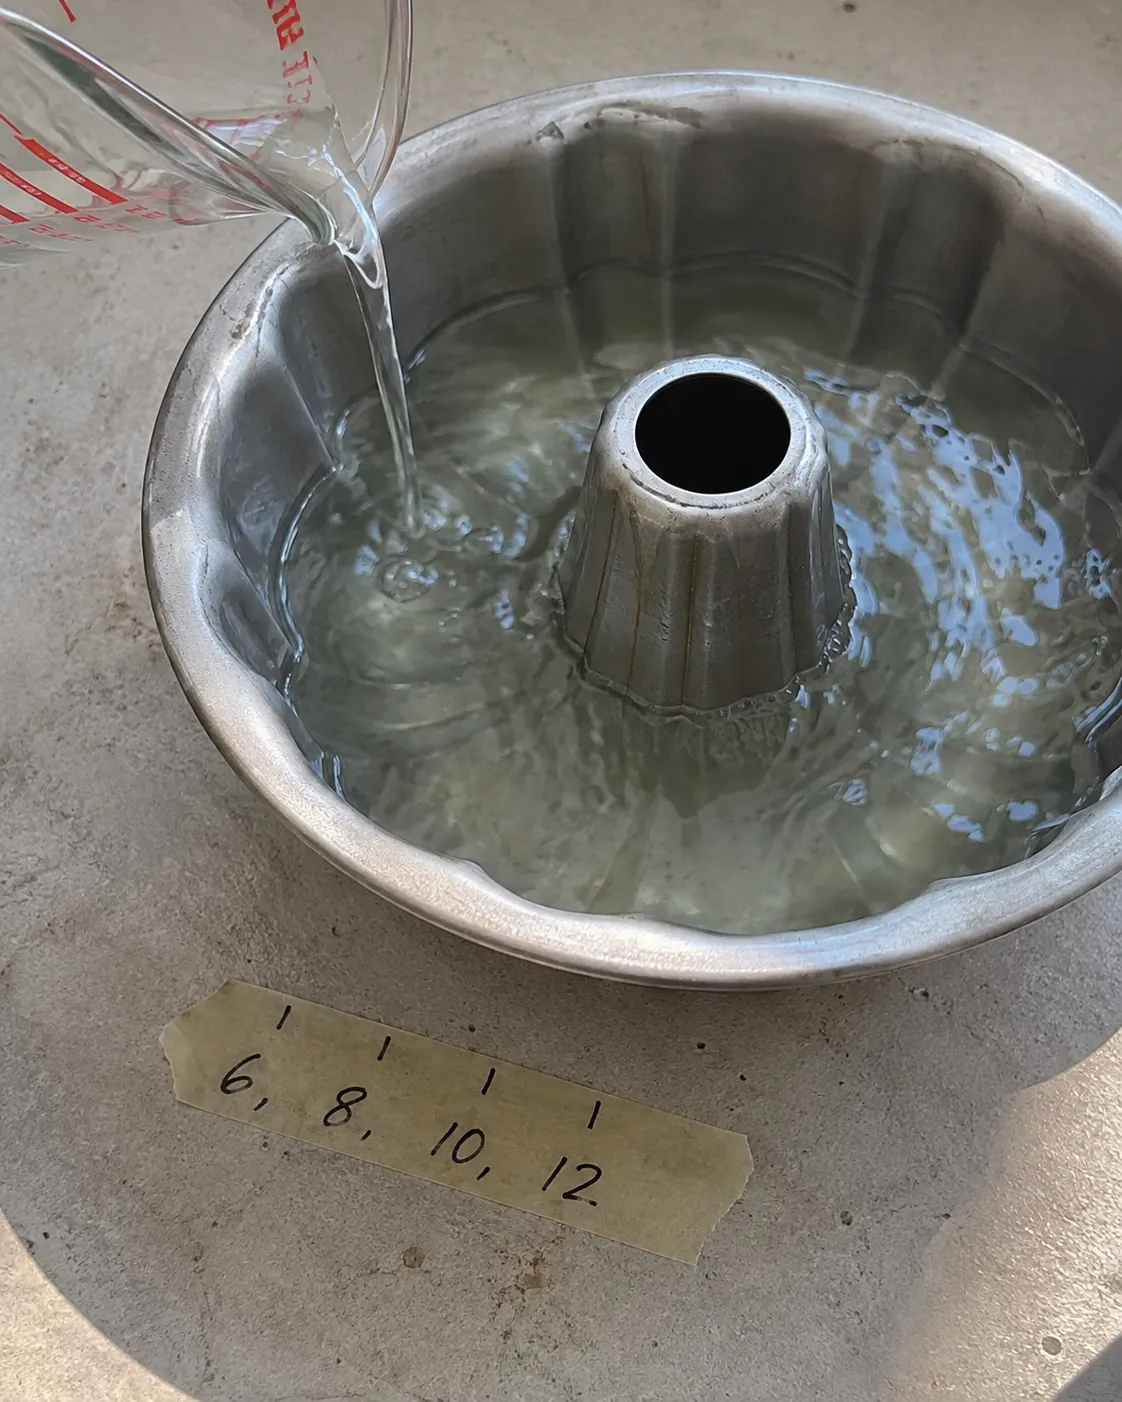
Fill it with water from a measuring cup, one cup at a time, counting, until the water reaches the rim. That is the capacity. It takes two minutes, you only ever do it once, and afterwards you can use any bundt recipe written for any pan because you finally know which row of the table you are in.
Write the number on a strip of masking tape and stick it on the bottom of the pan. I am not being cute, I genuinely did this and it has saved me guessing every time since.
Why a bundt is the right shape for a basket
This is the part I did not expect, and it turned the pan from a novelty into the one I reach for.
Think about what goes wrong with a cake in a basket. The heating element sits two to four inches above the batter and a fan drives air straight down onto it. The top sets and browns fast. Meanwhile the heat has to travel down and inward to the middle, and the middle of a round cake is the point furthest from any hot surface in the whole pan. That gap between a finished surface and an unfinished center is the entire problem, and it has its own entry in our glossary under burnt edge, raw center.
A bundt pan deletes that point. There is no deep middle, because the middle is a metal tube.
One hot surface, one cold spot
The batter is a solid disc. Its slowest point is dead center, as far from metal as anything in the pan can get, and it is the last thing to reach temperature.
Metal on both faces
The batter is a ring an inch or two thick, with a hot pan wall on the outside and a hot tube on the inside. Nothing in it is more than about an inch from metal.
The middle keeps up with the top
Heat arrives from three directions instead of one and it has less distance to travel, so the inside finishes close to when the surface does.
Distance is doing most of the work here. Heat moving through a solid takes time that goes roughly with the square of the distance, so halving how far it has to travel does not halve the time, it quarters it. Take away the deep center and you have taken away the slowest quarter of the bake. The glossary covers the mechanism under conduction.
The practical version. A 6-cup bundt holds more batter than the 6-inch round used in our air fryer vanilla cake and still bakes in a comparable time, without a foil tent for the first two thirds and without the tight window on the center. If you have been fighting cakes that come out dark on top and damp in the middle, the pan is a more effective fix than any temperature change.
And why it dries out faster than anything else
Every advantage costs something and this one is not subtle, so it is worth saying before you make it rather than after.
All those flutes, plus the central tube, plus the ring shape, add up to a lot of surface for a fairly small amount of cake. A 6-cup bundt has roughly twice the metal in contact with batter that a plain 6-inch round pan has. That is exactly why it bakes evenly. It is also why more of it turns into crust and why water leaves it faster.
- More crust, less crumb. A slice of bundt has browned surface on the top, the outside flutes and the inside of the ring. That is three edges to a round cake slice's one.
- Faster moisture loss. Evaporation happens at surfaces, and this shape is nearly all surface. Two minutes past done reads as noticeably dry here where it would barely show on a round cake.
- So 205°F is a ceiling, not a target to overshoot. Our air fryer baking chart has the internal targets for everything else on the site, and this is one of the few where I would stop early rather than late if I had to choose.
There is a nice consequence hiding in this. Traditional bundt recipes are almost always rich ones: sour cream, buttermilk, oil, a heavy hand with the sugar. That is not a coincidence or a style choice, it is compensation for the shape. A lean batter that would be perfectly good baked in a round tin comes out papery in a bundt. So when you convert a recipe, convert the pan and the richness together. How to avoid dry air fryer bakes covers the general version of this argument.
The batter below leans on sour cream and an extra yolk for exactly that reason. It is not a health food and it is not trying to be.
Metal, silicone and dark non-stick
The pan material changes more here than it does for a flat cake, because a bundt has so much of it touching the batter.
| Pan | How it behaves | Adjust |
|---|---|---|
| Light metal, non-stick | Even, predictable, releases well. What the times below assume. | Nothing. Use this. |
| Dark or black non-stick | Absorbs more radiant heat, so the outside browns noticeably sooner | Drop to 310°F and tent at 15 minutes |
| Silicone | Insulates instead of conducting, which cancels most of the advantage above | Drop 10°F, add 3 to 4 minutes, and stand it on a tray |
| Heavy cast aluminum | Beautiful, but a lot of thermal mass to heat before the cake starts | Add 4 to 5 minutes, and check whether it even fits |
The silicone row is the one worth pausing on, because silicone bundt pans are heavily marketed for air fryers and they are the wrong tool for the specific thing that makes a bundt work. The central tube is only useful if it conducts heat into the middle of the ring, and silicone does not conduct, it insulates. You still get the shape and the easy release. You lose most of the evenness. Using silicone molds in an air fryer has the full adjustment, and the accessories guide covers which pans are worth owning.
A full silicone bundt is genuinely awkward to carry. It has no rigid rim, so it folds when you pick it up and the batter goes over the side. Stand it inside a metal cake pan or on a small solid tray before you fill it, and move the tray rather than the mold. This is the same fix that keeps loose silicone cupcake cups upright in our air fryer mini cheesecakes, and it costs nothing.
Ingredients
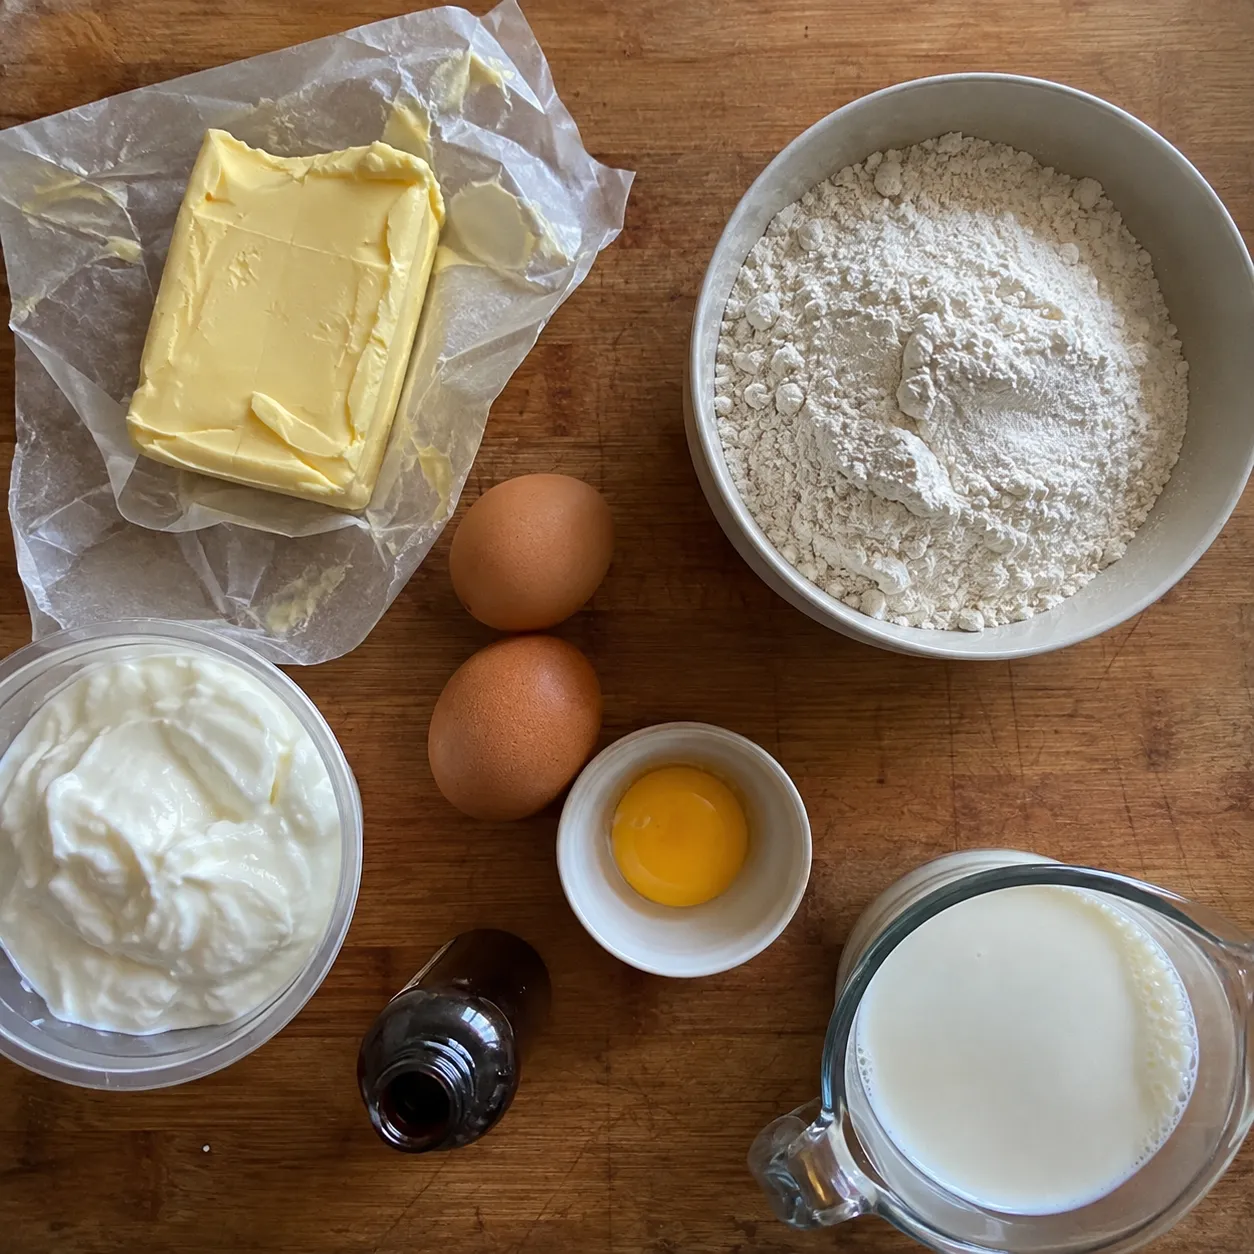
For one 6-cup bundt, which is eight slices. Everything at room temperature, and here that is not filler: cold sour cream seizes the creamed butter into little lumps that never come out.
- 1 1/2 cups (188g) all-purpose flour
- 1 cup (200g) granulated sugar
- 1/2 teaspoon baking powder
- 1/4 teaspoon baking soda
- 1/2 teaspoon salt
- 1/2 cup (113g) unsalted butter, softened
- 2 large eggs plus 1 extra yolk, room temperature
- 1/2 cup (120g) full-fat sour cream, room temperature
- 1/4 cup (60ml) whole milk
- 2 teaspoons vanilla extract
- For the pan: baking spray with flour, or soft butter and flour
Three notes
- The extra yolk is doing structural work. A bundt has to hold its own shape once the pan comes off, including all those ridges, and yolk brings fat and lecithin that keep a rich batter from splitting. Same reasoning as the extra yolk in our air fryer vanilla cake, with more riding on it here.
- Full-fat sour cream, not light. Light sour cream is mostly water with gums in it, and water is the thing this shape is already losing too much of. Full-fat Greek yogurt is a fair swap. Light anything is not.
- Do not increase the leavening. There is half a teaspoon of baking powder in here on purpose. A bundt that rises hard climbs the central tube, domes over the rim, and then you cannot turn it out flat. Lift is not your friend in this pan.
How to make it
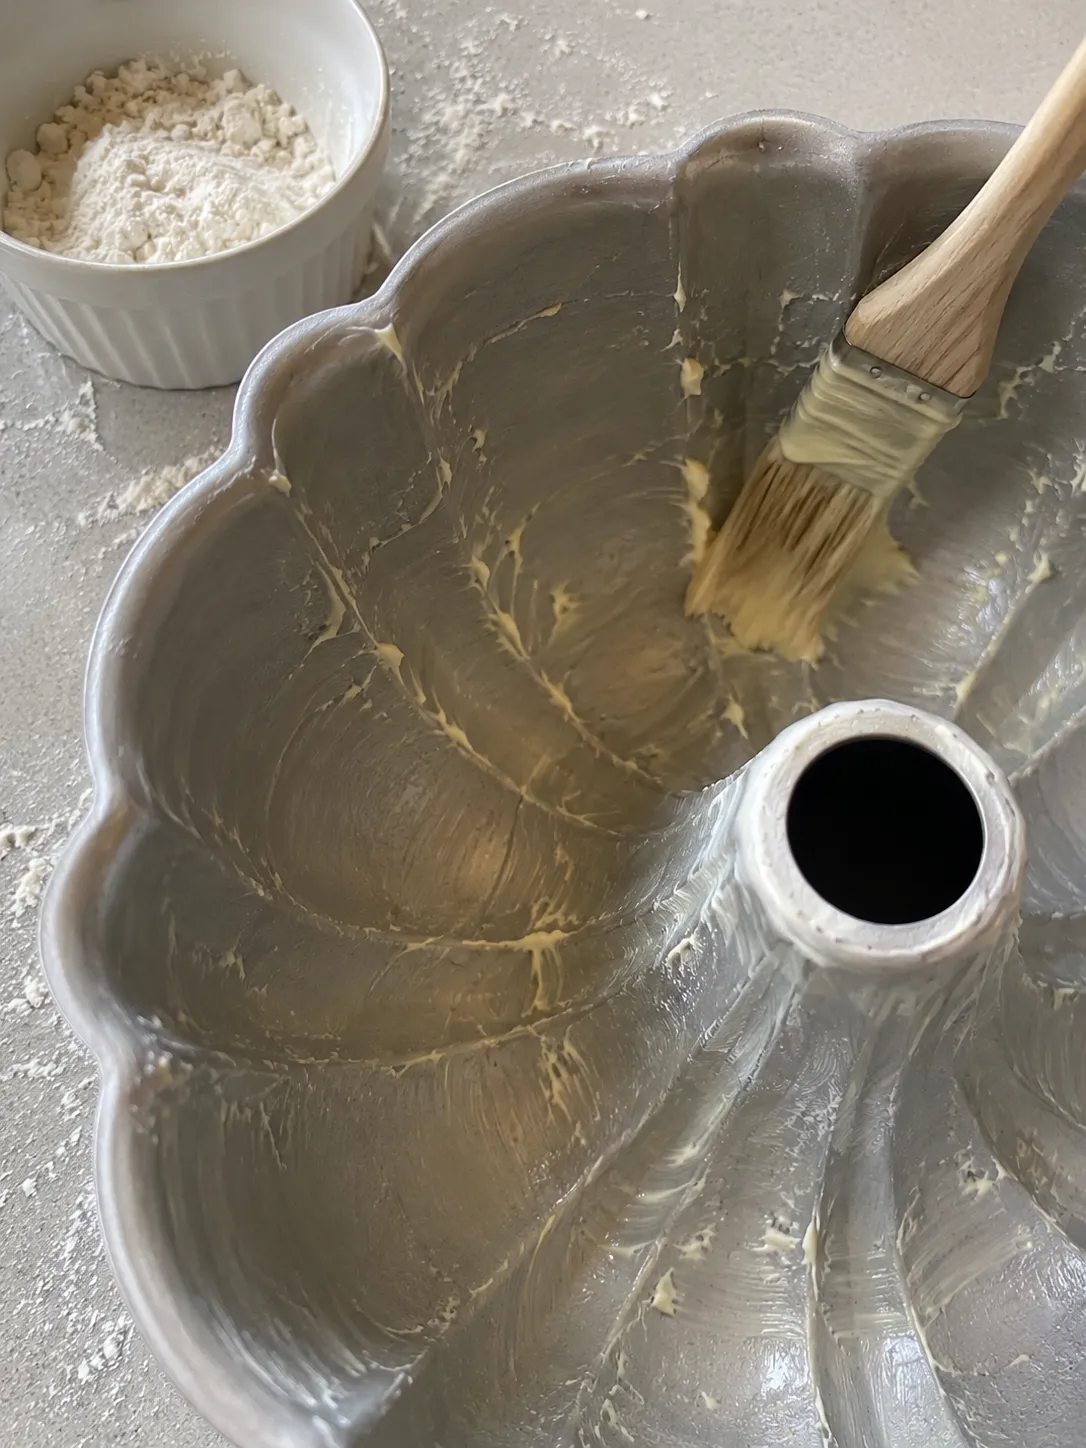
- Grease the pan properly, and do it last. Baking spray with flour in it, into every flute, or soft butter brushed in with a pastry brush followed by a dusting of flour that you tip out. Do this right before the batter goes in, not twenty minutes ahead, because it slides down and pools in the bottom of the flutes while it waits.
- Preheat to 320°F (160°C) for 3 minutes. Whether you need to preheat covers why leavened batters care about this more than most things.
- Whisk the dry ingredients: flour, baking powder, baking soda and salt. Set aside.
- Cream the butter and sugar on medium for about 3 minutes, until it is noticeably paler and looks fluffy rather than grainy.
- Add the eggs and the yolk one at a time, beating just until each disappears. Scrape the bowl.
- Mix the sour cream, milk and vanilla together in a jug.
- Add the dry and the wet alternately, starting and finishing with the dry, in three goes. Mix on low and stop the moment the last streak of flour is gone.
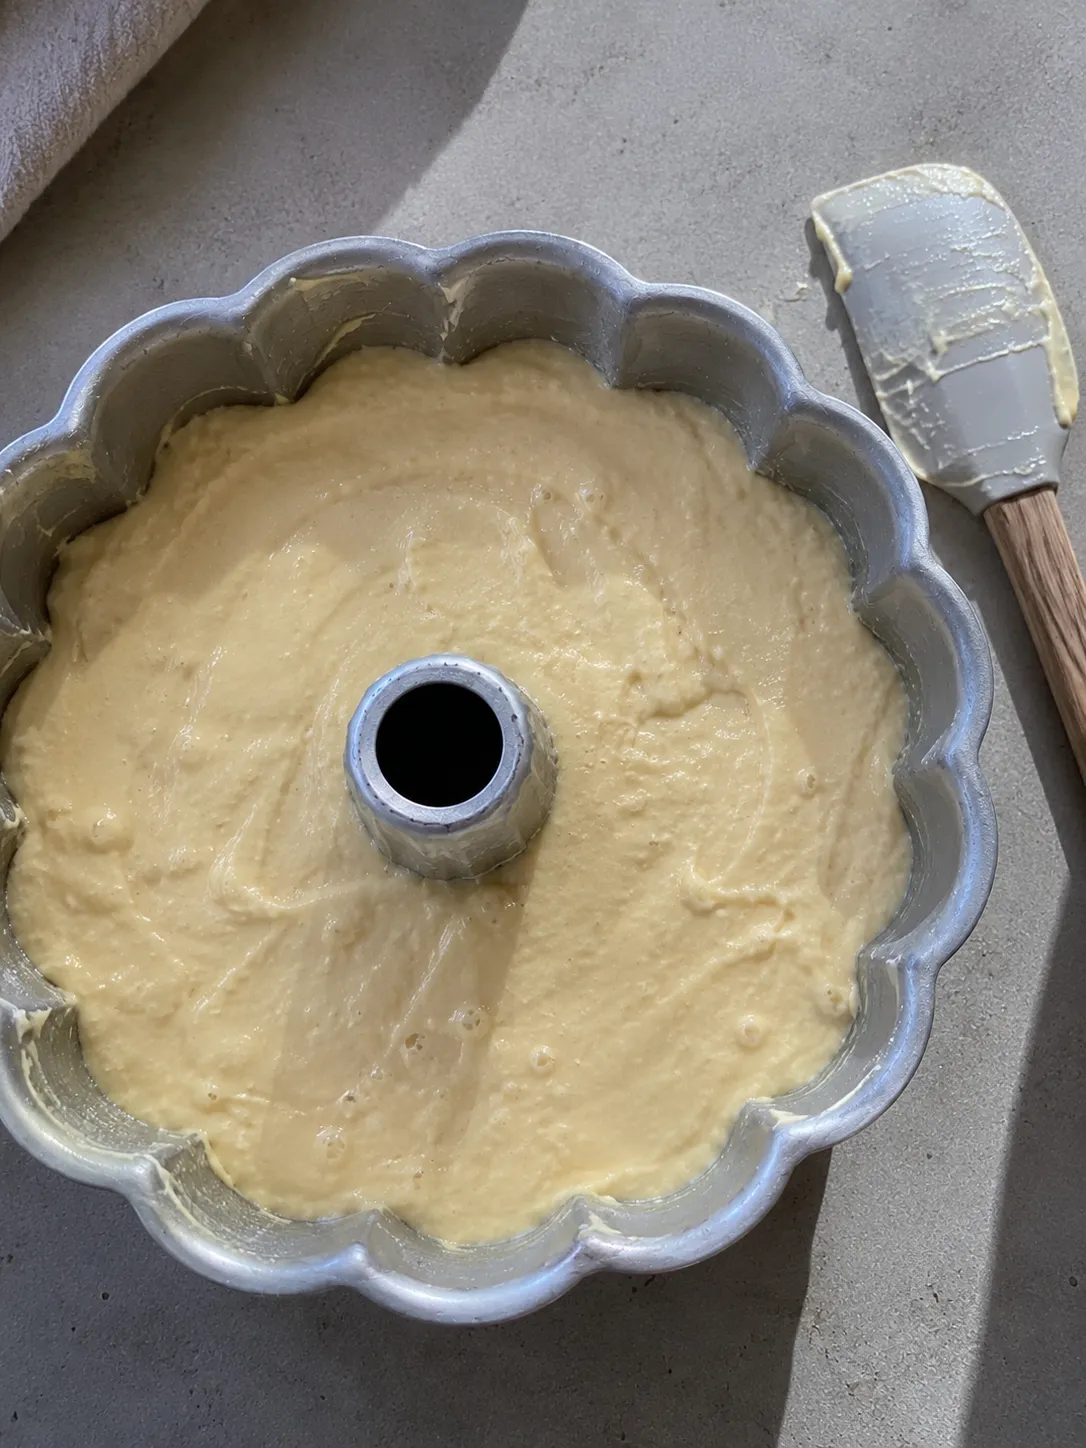
- Fill the pan about two thirds. For a 6-cup pan that is roughly 3 1/2 cups of batter and it will look like less than you expect. Do not fill it higher: this pan has nowhere to overflow except over the rim and onto the element. See fill level.
- Level it and tap the pan on the counter five or six times to settle the batter down into the flutes. Air trapped in a flute becomes a hole in the finished ridge.
- Bake 28 to 34 minutes at 320°F. Leave it alone for the first 18.
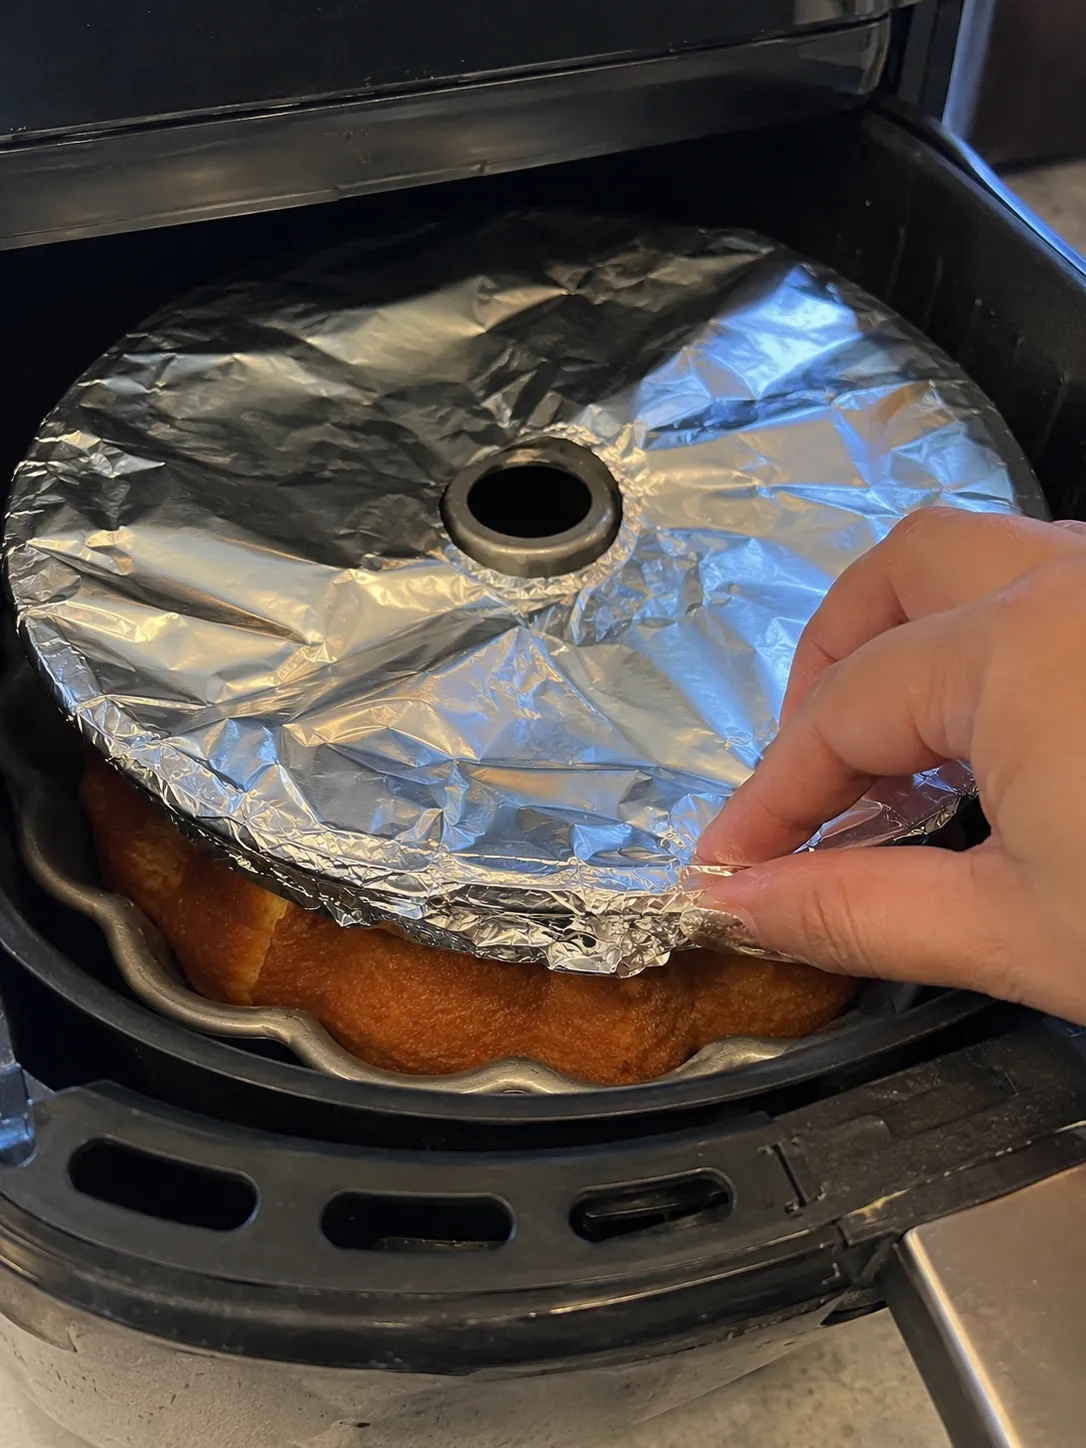
- Tent with foil at 18 minutes. Press the foil down over the rim rather than draping it, because a loose sheet gets lifted into the element by the fan. Foil and parchment in an air fryer goes through that rule properly, and there is a shorter version under tenting.
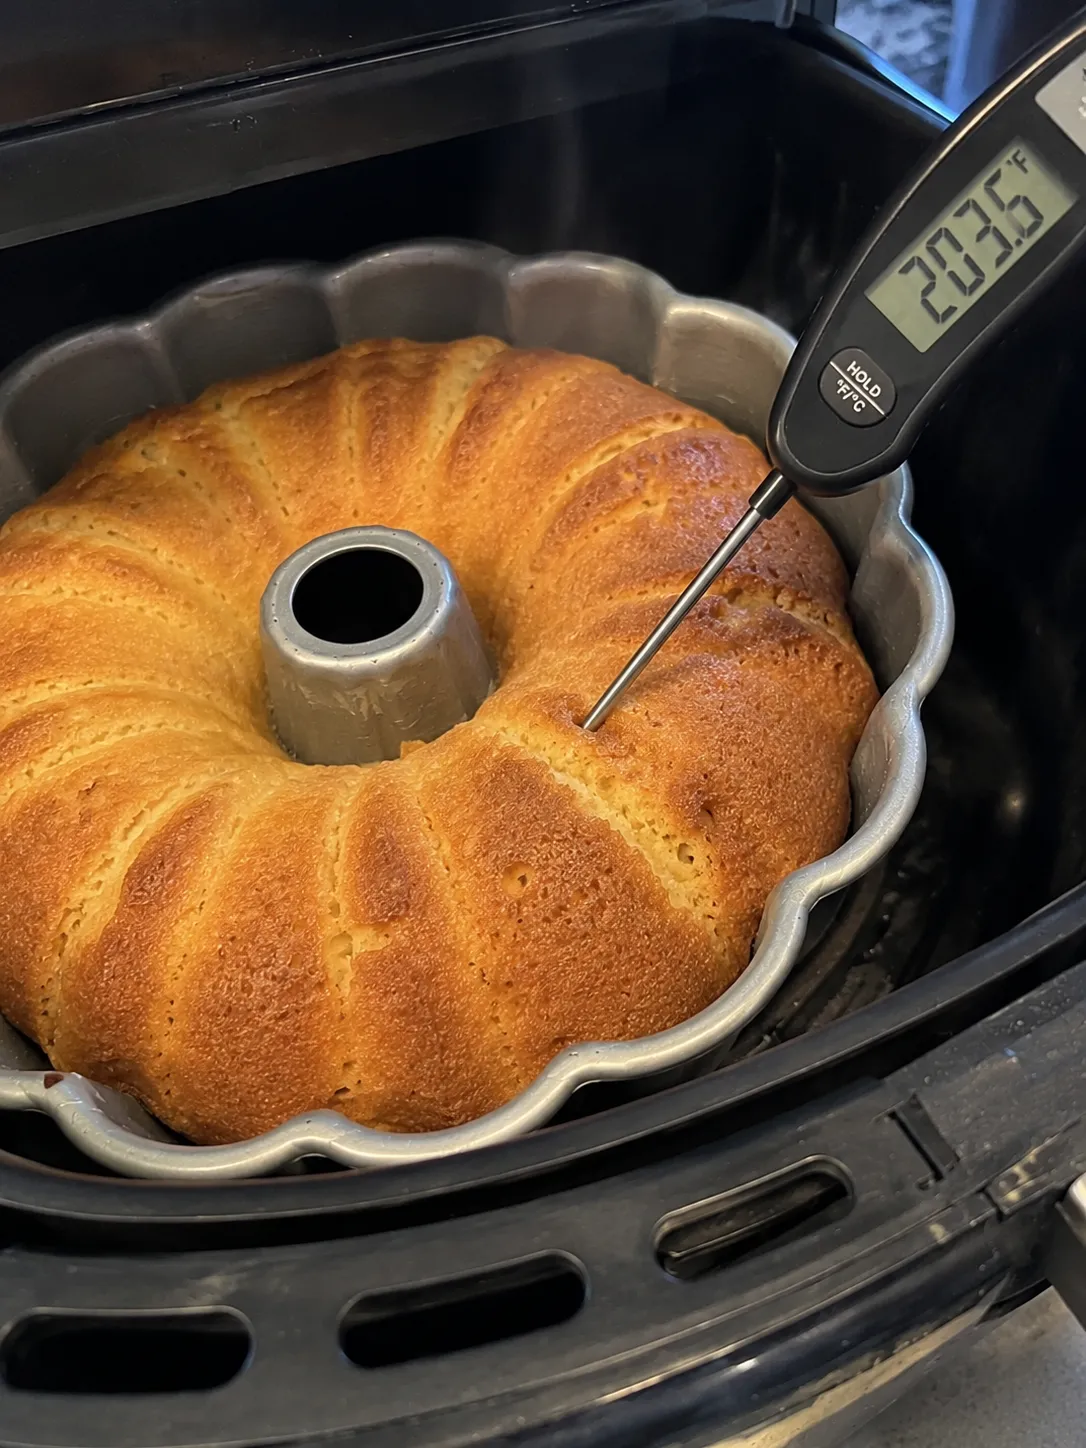
- Start checking at 28 minutes. Probe the thick part of the ring, not the middle, and look for 205°F. The next section is where to put the thermometer.
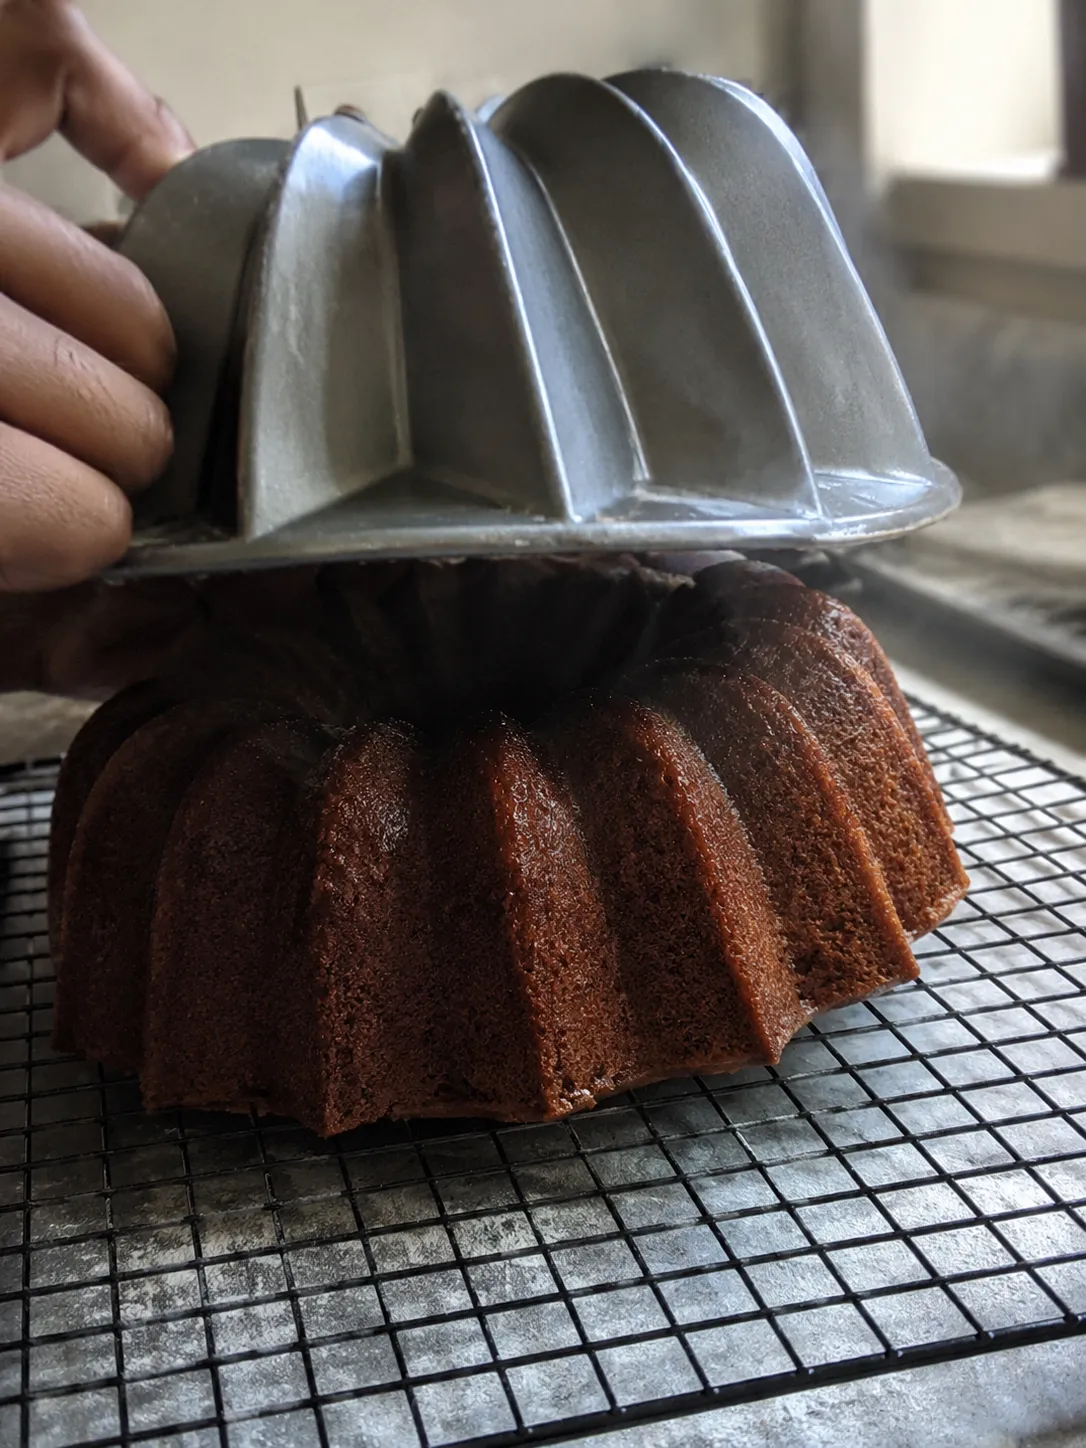
- Cool in the pan for 10 minutes, then invert onto a rack. Ten, not five and not twenty. The section after next explains why that is a window rather than a suggestion.
- Cool completely before glazing. Warm cake plus glaze is a puddle.
Why 320°F and not 350. The oven recipe you are converting from probably says 350°F, and in an oven that is right. In a basket the element is inches from the top of the pan, and every degree you add widens the gap between the surface temperature and the middle of the ring. A bundt already bakes fast because of its shape, so you do not need the heat to speed it up, and turning it up only buys you a darker top. If you are converting a recipe rather than starting from this one, run its numbers through the air fryer calculator first, then take another 10°F off what it gives you and go by internal temperature rather than by its time. The oven to air fryer conversion guide has the general rules if you do this more than once.
If your machine has a known hot spot, and most do, turn the pan 180 degrees when you tent it. It is one movement and it evens out the browning around the ring, exactly as rotating does for our air fryer cupcakes.
205°F, and where to probe when there is no center
Every recipe I read for this finishes on a toothpick in the center. There is no center. It is a hole.
That sounds like a joke and it is a real problem, because people compensate by pushing the toothpick in wherever looks convenient, which is usually close to the outer wall or right up against the tube. Both of those are the hottest, driest parts of the cake and both will read done well before the rest of it is.
Where the probe goes: halfway between the outer wall and the central tube, and about halfway down. That is the thickest part of the ring and the last part to finish. Go in at a slight angle from the top so the hole ends up somewhere a glaze will cover. Take one reading and pull the probe out.
| Reading | What you have |
|---|---|
| Under 195°F | Not set. Another 3 minutes, then check again. |
| 200°F | Nearly. Two more minutes. |
| 205°F | Done. Out. |
| 210°F and up | Dry, and in this pan it shows more than it would in a round one. |
205°F is the same number we use for a dense, buttery batter anywhere else on the site, because it is a property of the starch and the egg rather than of the pan. What the pan changes is how much a few degrees past it costs you, which is the whole of the section above. A cheap instant-read thermometer is the single most useful thing you can own for small bakes.
The toothpick test is not useless here, it is just second best. If you are going to use one, put it where the probe would go and accept that a clean toothpick means somewhere between 200 and 210, which is a five degree range you cannot see.
The ten minute window, and why it is a window
Ten minutes in the pan is the one instruction every bundt recipe agrees on, and not one of them says what happens on either side of it. It matters more here than in an oven, because a bundt has more places to stick than any other pan you own.
Under about 8 minutes
The crumb next to the pan wall is still soft and has not set enough to carry its own weight. Invert now and the ridges tear off and stay in the pan.
10 to 12 minutes
Set enough to hold together, still warm enough that the sugar at the surface is liquid. It slides out.
Past about 15 minutes
The sugar syrup against the pan cools and turns tacky, and it glues the cake into every flute. This is the one that ruins bundts.
So the ten minutes is not caution and it is not tradition. It is the gap between the crumb being strong enough and the sugar still being liquid, and it is only a few minutes wide.
If it does stick, put the pan back in the air fryer at 320°F for 60 to 90 seconds. That melts the sugar layer again and buys you a second attempt. It works surprisingly often. What does not work is running a knife around the edge, because a knife cannot get into the flutes, which is where the cake is actually stuck. If it is properly welded in, our bakeware cleaning guide covers getting the pan back without wrecking the non-stick.
Fixing what goes wrong
| What you got | Why | Fix |
|---|---|---|
| Half of it stayed in the pan | Left in the pan too long, or the flutes were not properly greased. | Turn out at 10 minutes. Baking spray with flour, into every flute. |
| Dark top, cake underneath fine | Pan too close to the element, or you tented too late. | Tent at 18 minutes, or 15 in a dark pan. Check your clearance. |
| Dry and crumbly | Past 205°F. This shape punishes that harder than a round tin. | Thermometer in the thick part of the ring. See avoiding dry bakes. |
| Pale seam around the outside | Less than half an inch of air between the pan and the basket wall. | A smaller pan, or an oven-style unit. Airflow is not optional. |
| Batter climbed the tube and domed over | Too much batter, or too much leavening. | Two thirds full, and do not add baking powder. |
| Sank in the middle of the ring | Pulled before the structure set. | 205°F. More in why air fryer cakes sink. |
| Holes in the ridges | Air trapped in the flutes when the batter went in. | Tap the pan firmly on the counter before it goes in the basket. |
| Took far longer than the recipe | A bigger pan than you thought, or silicone. | Measure the capacity in cups. Silicone needs 10°F down and 3 to 4 minutes more. |
| Tough and chewy | Overmixed after the flour went in. | Stop at the last streak. Gluten is structure and this cake does not want much. |
If problems repeat across different bakes rather than just this one, the air fryer baking troubleshooting guide works through the usual causes, and how to prevent burning covers the top-browning side specifically.
Flavors, and a box mix shortcut
- Lemon. Zest of two lemons rubbed into the sugar with your fingers before creaming, and a tablespoon of juice in with the milk. Rubbing rather than stirring is what gets the oil out of the zest.
- Brown butter. Brown the butter, cool it until it is soft rather than liquid, then cream it as normal. It is the single best thing you can do to this batter and it costs five minutes.
- Cinnamon swirl. Two tablespoons of sugar with a teaspoon of cinnamon, layered through the middle of the batter. Do not stir it, just drop the second half of the batter on top. Our air fryer coffee cake makes the same flavor the other way round, with the cinnamon on top as streusel.
- Chocolate. Swap 1/4 cup of the flour for cocoa and add two tablespoons of milk, since cocoa is thirsty. Bloom the cocoa in a little melted butter first, the way our chocolate mug cake does, and air fryer chocolate cake goes further into why cocoa needs heat rather than cold liquid.
- Apple or banana. Both work, both bring water. Our air fryer apple cake and air fryer banana bread deal with the extra moisture properly, and the same logic applies if you move those batters into a bundt.
- Box mix. Genuinely fine, and the fill rule is the same. One standard box makes roughly 4 cups of batter, which is a little more than a 6-cup pan wants at two thirds full, so hold some back and make a couple of cupcakes with it. Our boxed cake mix guide has the times and temperatures by format.
For a plain 6-inch round instead, air fryer vanilla cake is the same idea without the tube, and air fryer carrot cake is the one I make most in the fall. For something much denser in this same shape, air fryer pound cake is built around a tube pan for exactly the reason this page argues for one.
Storage and glazing
- Glaze only when it is completely cold. A simple glaze is powdered sugar with a teaspoon or two of milk, thick enough to fall off the spoon in a ribbon. On a warm cake it soaks in and disappears.
- Room temperature, unglazed: 3 days in an airtight container. The high fat in this batter keeps it well.
- Do not refrigerate. Cold sets the butter hard and speeds up starch retrogradation, which is the technical name for cake going stale. The fridge makes a cake stale faster than the counter does.
- Frozen, unglazed: 3 months, wrapped in plastic then foil. Thaw at room temperature, still wrapped.
- Reviving a day-old slice: 2 minutes at 320°F. It comes back better than a microwave brings it back, because the air fryer dries the surface instead of steaming it.
Half an hour of air fryer time for a cake this size is cheap next to heating a full oven, and the running cost calculator will give you the figure for your own electricity rate. All four air fryer baking tools are in one place, the guides index collects the technique pages behind all of this, how to bake in an air fryer covers the method end to end if this is new, and what you can and cannot bake in an air fryer is the honest list of what is worth attempting in a basket at all.
Frequently asked questions
QWhat size bundt pan fits in an air fryer?
A 6-cup pan, usually sold as a 7-inch bundt, fits most 5 quart baskets and up, and that is what this recipe is written for. A 3-cup mini fits almost anything. A 9-cup realistically needs an oven-style unit with a shelf, and a standard 10 to 12 cup bundt does not fit a basket at all. Measure three things rather than one: the widest point of the pan, which is the rim and not the base, the flat floor of the basket, and the height from the crisper plate to the element. You want the pan at least an inch narrower than the floor and at least an inch and a half below the element.
QWhat temperature and how long for a bundt cake in an air fryer?
320F for 28 to 34 minutes in a 6-cup pan, tented with foil at 18 minutes, pulled at 205F internal. A 3-cup mini is 18 to 22 minutes at the same temperature. Published recipes for this range from 15 minutes to 38, which sounds like machine variation and is not: it is pan capacity. A pan sold as 6 inches often holds 3 cups and one sold as 7 inches often holds 6, so those recipes are baking twice as much batter as each other. Measure your pan with water before you trust any time you read, including this one.
QHow do I know what size my bundt pan is?
Fill it with water from a measuring cup, one cup at a time, counting until the water reaches the rim. That number is the capacity and it is the only measurement that predicts bake time. Diameter does not, because bundt pans vary enormously in depth and in how much volume the flutes and the central tube take up, so two pans that look the same on a shelf can hold different amounts. It takes two minutes and you only do it once. Write the number on masking tape and stick it to the underside of the pan.
QWhy does my bundt cake stick to the pan?
Almost always one of two things. Either the flutes were not greased properly, because plain cooking spray runs down and pools at the base of each flute and leaves the ridges bare, or you left the cake in the pan too long. Use baking spray with flour in it, or soft butter brushed into every flute followed by a dusting of flour, and do it right before the batter goes in rather than in advance. Then turn the cake out at 10 minutes. Past about 15 the sugar at the surface of the cake cools and turns tacky and glues it into the ridges. If it does stick, 60 to 90 seconds back in the air fryer melts that layer and usually frees it.
QWhere do I put the thermometer if there is no center?
Halfway between the outer wall and the central tube, and about halfway down. That is the thickest part of the ring and the last part to finish. The mistake is probing near the wall or right against the tube, because both of those sit against hot metal and will read done several minutes before the rest of the cake is. Go in at a slight angle from the top so the hole ends up somewhere a glaze will hide, take one reading and pull the probe straight back out. You want 205F.
QCan I use a silicone bundt pan in an air fryer?
You can, and it releases beautifully, but it cancels most of the reason a bundt works well in a basket. The central tube is only useful because it conducts heat into the middle of the ring, and silicone insulates rather than conducting, so you are left with the shape and not the evenness. If you use one, drop the temperature 10F and add 3 to 4 minutes. Also stand it inside a metal pan or on a small tray before you fill it, because a silicone bundt full of batter has no rigid rim and folds when you pick it up.
QIs a bundt pan better than a round pan in an air fryer?
For evenness, yes, and it is not close. The failure mode of a cake in a basket is a dark top over an underdone middle, because the element is only a few inches above the batter and the middle of a round cake is the point furthest from any hot surface. A bundt pan removes that point entirely and replaces it with a hot metal tube, so the batter is a ring with metal on both faces and nothing in it is more than about an inch from heat. The trade is that all those flutes add a lot of surface area, so a bundt browns more and dries out faster, which is why bundt batters are traditionally rich ones.
QDo I need to cover a bundt cake with foil in the air fryer?
Yes, from about 18 minutes in a 6-cup pan, or 15 if your pan is dark. The top is done browning long before the ring is baked through, which is normal in a basket and not a sign anything is wrong. The important part is how the foil goes on: press it down firmly over the rim of the pan rather than draping it loosely, because the fan moves air fast enough to lift a loose sheet into the heating element, where it scorches and can catch. That is a real hazard, not a theoretical one.
QCan I use a box cake mix in a bundt pan in the air fryer?
Yes, and the times on this page still apply because they are set by the pan rather than by the batter. The one thing to watch is volume: a standard 15.25 oz box makes about 4 cups of batter and a 6-cup bundt only wants about 3 and a half at two thirds full, so hold the rest back and bake it as a couple of cupcakes rather than filling the pan higher. A bundt has nowhere to overflow except over the rim onto the element. Use 320F rather than the 350F on the box.
QWhy did my bundt cake dome over the top of the pan?
Too much batter, too much leavening, or both. Fill a bundt no more than two thirds, which looks like less than you expect, and resist adding baking powder to a recipe written for this pan. A bundt that rises hard climbs the central tube and spills over the rim, and once it has done that you cannot turn it out flat because the overflow has welded the cake to the top edge of the pan. Lift is genuinely not an advantage in this shape. The batter on this page uses half a teaspoon of baking powder for a cup and a half of flour for exactly that reason.
QHow long do I let a bundt cake cool before turning it out?
Ten minutes, and it is a narrow window rather than a rough guide. Before about eight minutes the crumb next to the pan wall has not set enough to hold its own weight, so the ridges tear off and stay behind. After about fifteen the sugar at the surface has cooled and gone tacky, and it glues the cake into every flute. Ten to twelve minutes is the gap where the cake is strong enough and the sugar is still liquid. Then invert it straight onto a rack, and let it cool completely before any glaze goes near it.
QCan I bake a full size bundt cake in an air fryer?
Not in a basket. A standard bundt is 10 inches across and holds 10 to 12 cups, and no basket air fryer takes a pan that size with the airflow it needs around it. A large oven-style unit with a full shelf can sometimes manage a 9-cup pan, and that is the realistic ceiling. If you have a 12-cup recipe and a basket, the honest answer is to halve it into a 6-cup pan rather than to try. The recipe scaler on this site will do the arithmetic, and a conventional oven is genuinely the better tool for anything bigger.
Never overbake again
Get our one-page times & temps cheat sheet, plus a new tested recipe each week.
No spam · unsubscribe anytime